3
Cable Drum Replacement for the TP250 Hoist
Continued
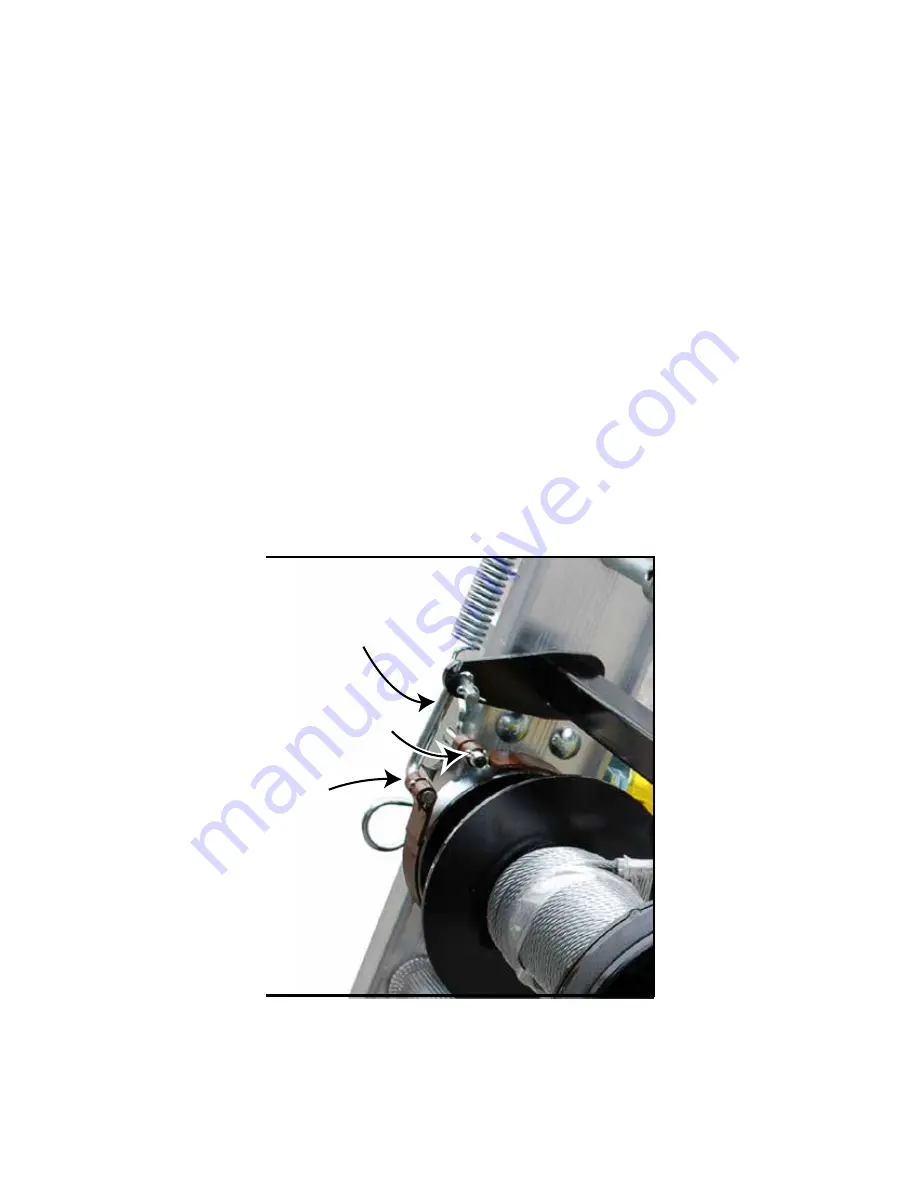
Lowest Brake
Strap/Cotter Pin
Lowest Brake
Strap/Cotter Pin
Lowest Brake
Strap/Cotter Pin
Lowest Brake
Strap/Cotter Pin
Brake
Linkage
Brake
Linkage
Brake
Linkage
Brake
Linkage
Upper Brake Strap
with Brake Post
Upper Brake Strap
with Brake Post
Upper Brake Strap
with Brake Post
Upper Brake Strap
with Brake Post
Brake Control
Shaft/Safety Pin
Brake Control
Shaft/Safety Pin
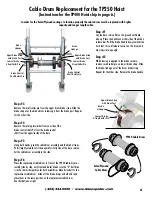
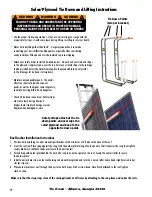
Step #9
Slide the upper brake strap over the brake post. Attach small cotter pin to the end of the brake post. Repeat for the other side.
Step #10
Pull the brake handle down towards the hoist feet, this will release tension on the drum and may require two people. While tension is applied
to the brake release, slide the brake linkage into the lower drum brake strap. Attach with a small cotter pin. Repeat for the other side. Release
the brake handle.
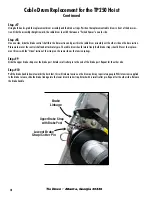
Step #7
Using both hands: grab the replacement drum assembly and the brake straps. Position the replacement cable drum in front of the base sec-
tion. Slide the assembly straight inward; the cable drum should fit between a “Forked Spacer” on each side.
Step #8
One one side, slide the brake control shaft thru the base section and pass thru the cable drum assembly out the other side on the base section.
Place washer over the control shaft and attach safety pin. The cable drum should rotate freely. Both brake straps should fit over the replace-
ment drums with the “Open” section of the straps on the same side as the tension springs.
Tie Down • Atlanta, Georgia 30336


