4
Carriage Replacement for the TP250 Hoist
(Instructions for the TP400 Hoist skip to page 6.)
In order for the Solar/Plywood carriage to function properly the TP250 Carriage must be replaced with the
Solar/Plywood Carriage.
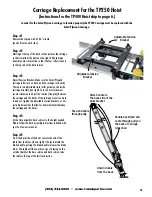
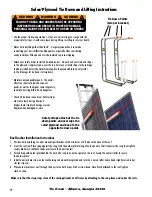
Adjustable Tension
Bracket
Adjustable Tension
Bracket
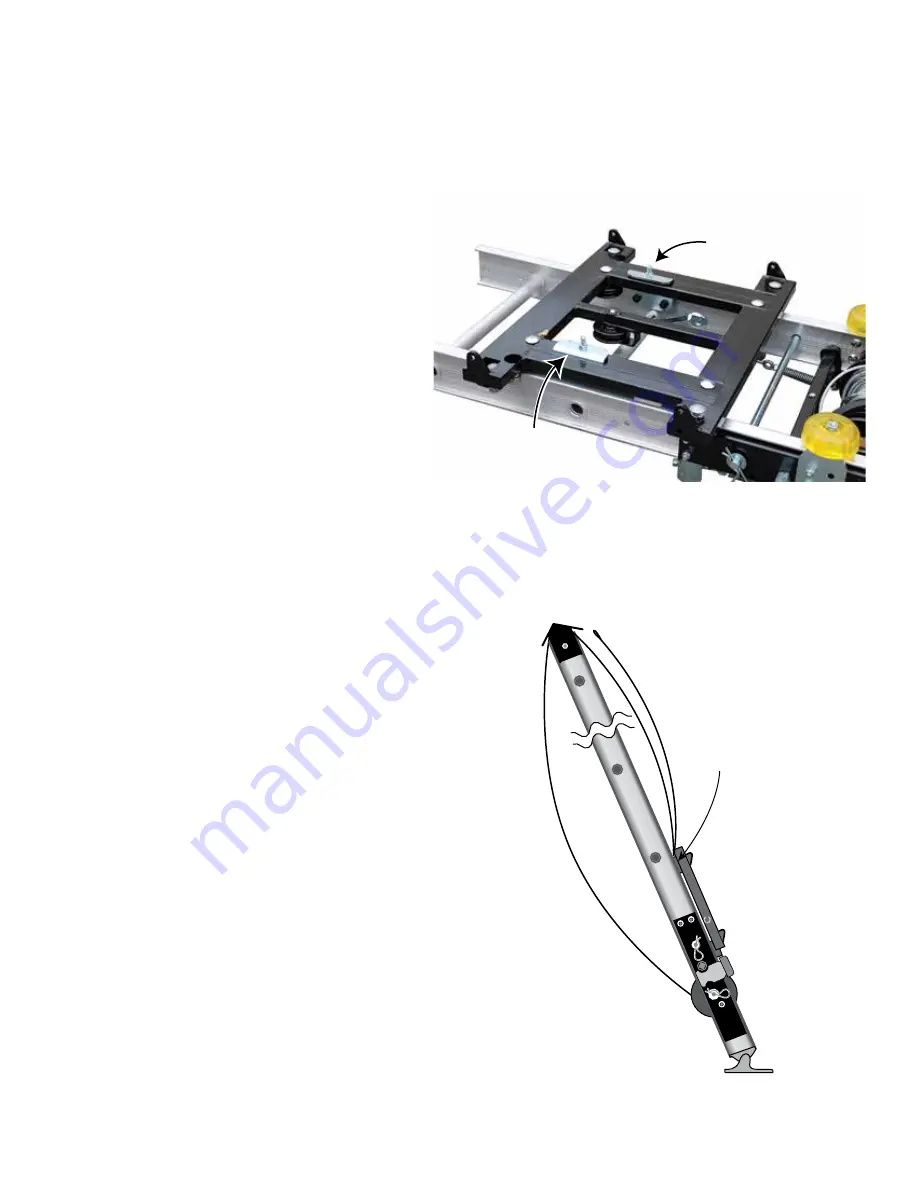
Double back/feed end
cable through pully on
the back of carriage
(cross bar)
Feed end cable
through pully
Unwind cable
from the back
Attach cable to
the back side of the
pully bracket
Step #1
Remove the top cap with a 7/16” wrench.
(one bolt/nut on each side)
Step #2
Starting at the top of the track section position the carriage
so that it matches the photo on the right. Slide carriage
assembly onto track section so that the four rollers connect
to the top rail of the track section.
Step #3
Adjust Tension Bracket - Make sure the Solar/Plywood
carriage rollers are on track, and the carriage rolls easily.
There are two adjustable track roller guides on the inside
carriage assembly (see right). Turn the nut clockwise or
counter clockwise to adjust the tension (free play) between
the carriage and the tracks. If the carriage moves too much
in and out, tighten the adjustable tension bracket nut. Cor-
rect adjustment should allow for minimal contact between
the carriage and the tracks.
Step #4
At this time assemble track sections to the height needed.
Please follow the track assembly instructions included with
your hoist owners manual.
Step #5
From the back side of the hoist, remove the end of the
cable from the drum (shown right). It helps to attach the
brake handle, pulling the brake handle releases the brake
drum. The cable will then easily un-spool. Staying on the
outside (back) of the base section and track section, take
the cable to the top of the last track section.
(404) 344-0000 • www.tranzsporter.com


