Installing the TE3000
13
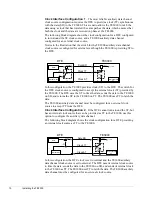
DTE Configuration
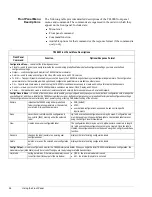
The pinouts for the RS-232 port configured as DTE are
listed in the following table.
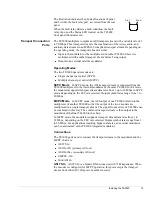
Connecting to the RS-232 Control Port
To connect a remote unit to the
TE3000 through the RS-232 control port, you need a cable that is the appropriate
length for the application. The cable must be made to the following specifications:
!
RS-232 electrical
!
DB-9 female connector on one end
!
An appropriate connector for the remote unit on the other end
A 6-foot long direct connect DB-9 male to DB-9 female cable is included in the
TE3000 shipping kit.
Using the direct connect cable provided with the TE3000, attach one end to a
remote unit and the other end to the RS-232 control port.
Ethernet Control Port
The Ethernet control port is an RJ-45 connector. Remote control using this port
requires the following:
!
Tiernan Network Management Software (NMS) program
!
Category 5 UTP patch cable (not supplied)
Connecting to a Network Using the Ethernet Port
You can connect the
TE3000 to a LAN using the Ethernet port, which enables you to monitor and
control the TE3000 through a remote unit not directly connected to the TE3000.
When connecting the TE3000 to a LAN using Ethernet, contact your Information
System department to coordinate installation and setup.
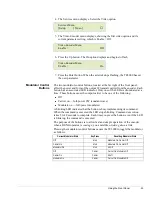
Perform the following steps to connect to the network using the Ethernet port:
1. Connect a Category 5 cable with RJ-45 connectors (standard ethernet cable)
between the TE3000 Ethernet port and a LAN hub.
2. Assign the device a unique IP address, if necessary.
The TE3000 default IP address is 0.0.0.0. Contact your Information Systems
department for a valid IP address.
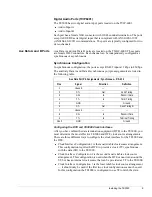
RS-232 Port Pin Assignments: DTE
Pin #
Signal
Direction
Signal Definitions
1
Unused
—
—
2
TXD
Out
Transmit Data
3
RXD
In
Receive Data
4
DSR
In
Data Set Ready
5
GND
—
Ground
6
DTR
Out
Data Terminal Ready
7
CTS
In
Clear to Send
8
RTS
Out
Request to Send
9
RI
In
Ring indicator
NOTE...
Summary of Contents for TE3000
Page 10: ...viii Preface ...
Page 14: ...4 TE3000 Overview ...
Page 52: ...42 Using the Front Panel ...
Page 94: ...84 Maintenance and Software Upgrades ...
Page 96: ...86 Technical Specifications ...
Page 102: ...92 TE3000 PID Assignments ...
Page 112: ...102 Glossary ...

