Using the Front Panel
41
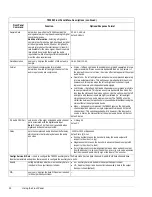
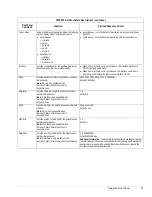
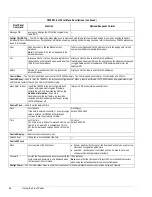
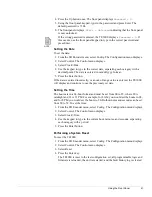
4. Press the Up button once. The front panel displays
Password = 0
.
5. Using the front panel keypad, type in the password and press Enter. The
default password is 7384.
6. The front panel displays
State = Unlocked
indicating that the front panel
is now unlocked.
If the wrong password is entered, the TE3000 displays
Password = 0
. If
this occurs, use the front panel keypad to type in the correct password and
press Enter.
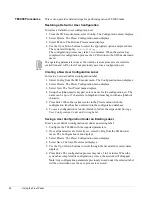
Setting the Date
To set the date:
1. From the SD Encoder menu, select Config. The Configuration menu displays.
2. Select Control. The Control menu displays.
3. Select Clock>Date.
4. Use the keypad to type in the correct date, separating each category with a
decimal point. The date is entered in mm/dd/yyyy format.
5. Press the Enter button.
If the date is entered incorrectly, or an out-of-range value is entered, the TE3000
will display and continue to use the previously set date.
Setting the Time
The hours are in a 24-hour format and must be set from 00 to 23, where 00 is
midnight and 23 is 11 PM. For example, for 8 AM you would set the hours to 08,
and for 8 PM you would set the hours to 20. Both minutes and seconds can be set
from 00 to 59. To set the time:
1. From the SD Encoder menu, select Config. The Configuration menu displays.
2. Select Control. The Control menu displays.
3. Select Clock>Time.
4. Use the keypad to type in the current hour, minutes, and seconds, separating
each category with a period.
5. Press the Enter button.
Performing a System Reset
To reset the TE3000:
1. From the SD Encoder menu, select Config. The Configuration menu displays.
2. Select Control. The Control menu displays.
3. Select Reset.
4. Press the Enter key.
The TE3000 is reset to the last configuration set; all programmable logic and
firmware is reloaded; the unit is restarted; and the fault history log is cleared
NOTE...
Summary of Contents for TE3000
Page 10: ...viii Preface ...
Page 14: ...4 TE3000 Overview ...
Page 52: ...42 Using the Front Panel ...
Page 94: ...84 Maintenance and Software Upgrades ...
Page 96: ...86 Technical Specifications ...
Page 102: ...92 TE3000 PID Assignments ...
Page 112: ...102 Glossary ...


