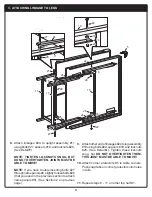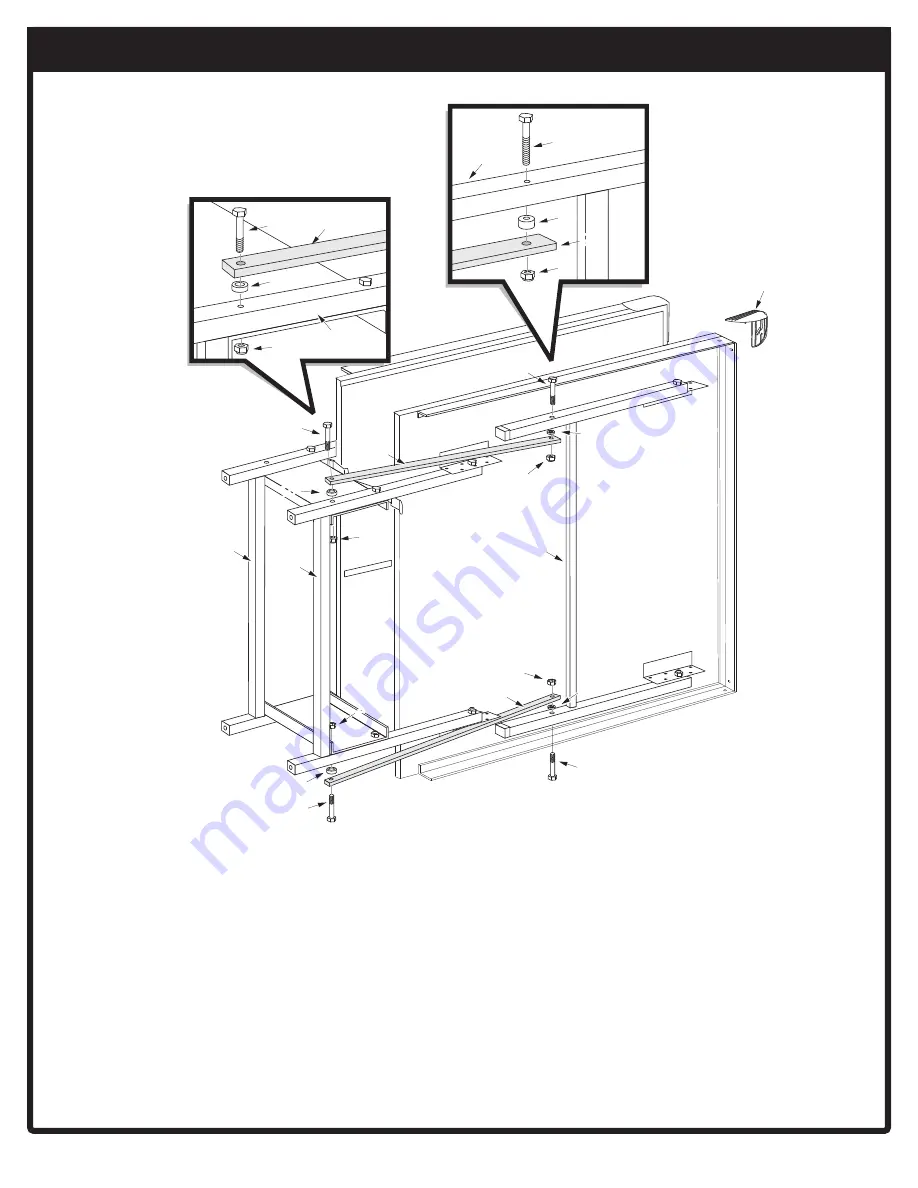
3. ATTACHING LINKAGE TO LEGS
28
28
28
5
28
18
18
24
28
27
27
27
24
11
11
24
18
18
18
28
22
24
11
10
Detail F
Detail G
22
18
22
10
9.
Attach other end of linkages #24 to leg assembly
#10 using bolts #22, spacers #18, and locknuts
#28. (See Detail
G
). Tighten these locknuts
snug, but
DO NOT OVERTIGHTEN THEM.
THIS JOINT MUST BE ABLE TO MOVE!
10.
Attach corner protectors #5 to table corners.
Push snap tabs on corner protectors into holes
in rails.
11.
Repeat steps 8 - 11 on other top half #1.
8.
Attach linkages #24 to upright assembly #11
using bolts #27, spacers #18, and locknuts #28.
(See Detail
F
).
NOTE: TIGHTEN LOCKNUTS SNUG, BUT
DO NOT OVERTIGHTEN. JOINTS MUST BE
ABLE TO MOVE!
NOTE:
If you have trouble inserting bolts #27
through name panels #8, slightly loosen bolts #26
(that you used in the previous section to attach
name panels #8). (See Section 2 on previous
page).
4


