background image

9

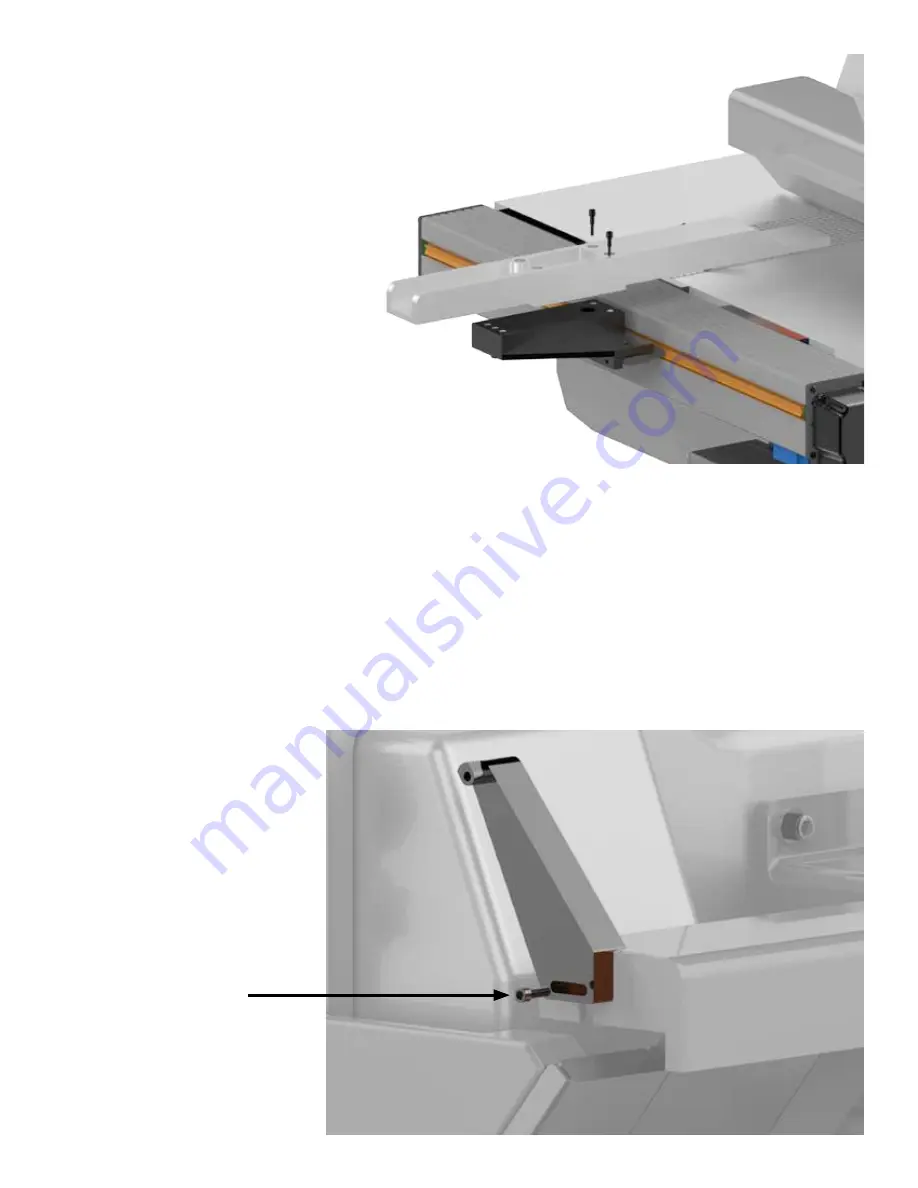
Mount Anti-Kickback Teeth Control

Drill & Tap

4.  Attach your existing ripping fence to 

the TigerFence SLR fence bracket.

Note: You may need to drill the existing rip fence.

Summary of Contents for TigerFence SLR

Page 1: ...1 TigerFence SLR Installation Guide Installation Guide 2017 TigerStop LLC February 2017 Mk1 ...

Page 2: ...eference Cards Nut Pack Power Cable Controller Cable Controller Stand Controller Serial Number Solenoid Cable Pneumatic Tubing Solenoid Valve Regulator Drilling Template Mounting Brackets Nut Pack Pneumatic Kit ...

Page 3: ...UCT WARNING TigerStop Products must be installed in accordance with all local state and federal regulations Only personnel properly trained in the safe design and installation of automation machinery and related power equipment should install TigerStop Products onto other equipment to ensure a safe and proper work station TigerStop Products should not be operated without proper training both in th...

Page 4: ... footwear safety glasses ear protection and a dust mask Use only 3 wire extension cords that have 3 prong grounding type plugs and 3 pole receptacles that accept the tools plug for 120VAC Use only 5 wire cords and plugs when using 3 phase DO NOT operate this or any machine under the influence of drugs or alcohol Do not open motor compartment or controller keypad DC Voltage with potentially FATAL am...

Page 5: ...n 7 Enable Code 14 First Power Up 15 Find the End Limits Auto Detect Calibrate Set Kerf Set Units Set Optimizer Settings Basic TigerFence Functions 20 Entering Decimals Entering Fractions Calculator Mode Jog Increment PreSet Quick Calibration Working with Part Lists 24 Maintenance Schedule 27 ...

Page 6: ...Uneven tightening of mounting hardware can introduce a slight twist or other deformation in the beam This will result in inaccurate measurement and premature failure of the drive belt or other components NEVER open TigerStop Motor Box The motor box compartment contains DC voltage with potentially FATAL amperage NEVER attempt unauthorized actions inside the motor box 110 VAC 15 Amps 208 VAC 20 Amps...

Page 7: ... Along This Line Maximum distance between holes on top line not more than 8 End of TigerFence beam is here DO NOT POSITION CLOSER TO SAW BLADE OR SEVERE DAMAGE TO YOUR MACHINE CAN OCCUR Mark this line with center punches or scribe 2 3 4 All holes 3 8 9 5mm Diameter 8 203mm TigerFence Drilling Template Shipped in cardboard tube 1 Remove the existing rip fence from the saw Note Set the fence and fen...

Page 8: ...ck Washer 3 Attach TigerFence SLR to the table using the spacers and supplied hardware Note Ensure the TigerFence SLR is flush with the saw table top Mount Fence to TigerFence Fence Square Adjustment Screws ...

Page 9: ...9 Mount Anti Kickback Teeth Control Drill Tap 4 Attach your existing ripping fence to the TigerFence SLR fence bracket Note You may need to drill the existing rip fence ...

Page 10: ...10 Connect to anti kick back lever Plumb Pneumatics Main Air Input Regulator Solenoid Valve Anti Kick Back Cylinder ...

Page 11: ...11 Install Controller Stand 1 2 3 4 5 6 7 8 9 ...

Page 12: ...12 End Sensors Set Range of Movement by Adjusting End Sensors Loosen Move Note Attach the controller stand anywhere that is convenient for the machine operator ...

Page 13: ...onnections Solenoid TigerStop Motor Box 6 Pin Solenoid Cable Power Outlet TigerStop Motor Box Power Cable Black TigerStop Power Cable Controller TigerStop Motor Box 15 Pin White End Motor Box Black End Controller Controller Cable ...

Page 14: ...ay also register your warranty by phone TigerStop Customer Service 360 254 0661 TigerStop Customer Service will contact you by phone to give you the enable code within the hour during regular business hours Monday through Friday 6 00 am 4 00 pm PST 2 When you have received your enable code power up TigerFence using the power switch on the motor box 3 TigerFence will ask you to enter your enable co...

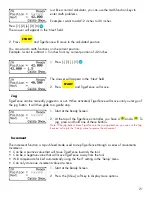
Page 15: ...he starting point for all TigerStop functions Let s take a look at the screen line by line Line 1 displays the heartbeat The heartbeat is a line that rotates and lets you know that TigerFence is functioning normally The letter next to the heartbeat is the drive indicator This tells you what the motor is doing Drive Indicator Meaning H Holding Still A Accelerating C Moving at Constant Speed D Decel...

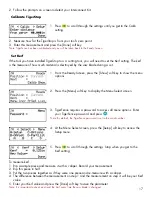
Page 16: ... Menu soft key to display the Menu Select screen 3 TigerFence requires a password to access all menu options Enter your TigerFence password and press Note By default the TigerFence password is set to the serial number 4 At the Menu Select screen press the Setup soft key to access the Setup Menu 5 Press to scroll through the settings Stop when you see FindLim 6 Press Start to run the Find End Limit...

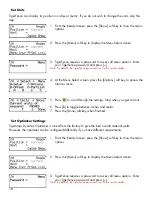
Page 17: ...to the serial number 4 At the Menu Select screen press the Setup soft key to access the Setup menu 5 Press to scroll through the settings Stop when you get to the Kerf setting To measure kerf 1 Rip a sample piece and measure it with a caliper Record your measurement 2 Rip this piece in half 3 Put the two pieces together as if they were one piece and re measure with a caliper 4 The difference betwe...

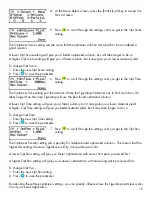
Page 18: ...ttings TigerStops Dynamic Optimizer is tuned from the factory to give the best overall material yield However the optimizer can be configured differently if you have different requirements 1 From the Ready Screen press the Show soft key to show the menu options 2 Press the Menu soft key to display the Menu Select screen 3 TigerFence requires a password to access all menu options Enter your TigerFe...

Page 19: ...p will use the best found optimized solution A lower Opt Time setting will give you a faster solution but it may give you a lower material yield A higher Opt Time setting will give you better material yield but it may take longer to do so To change Opt Time 1 Enter the new Opt Time setting 2 Press to save the parameter 7 Press to scroll through the settings until you get to the Opt Pen setting The...

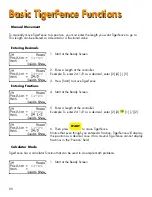
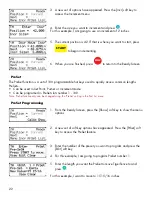
Page 20: ...4 1 2 as a decimal enter 2 4 5 3 Press Start to move TigerFence Entering Fractions 4 Start at the Ready Screen 5 Enter a length at the controller Example To enter 24 1 2 as a decimal enter 2 4 1 2 6 Then press START to move TigerFence Notice that even though you entered a fraction TigerFence will display the position as a decimal once it has moved TigerFence cannot display fractions in the Positio...

Page 21: ...ess and hold one of these buttons Note If the jog buttons move TigerFence in the wrong direction you can use the Jog Reverse setting in the Setup menu to reverse the movement TigerFence can be manually jogged in or out When activated TigerFence will move until you let go of the jog button It will then glide to a gentle stop Increment The increment function is a push feed mode used to step TigerFen...

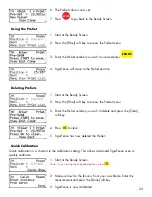
Page 22: ...mmon lengths PreSets Can be used in Set Point Pusher or Increment mode Can be programed in PreSet slots number 1 100 Note PreSet functionality can be changed using the PreSet setting in the Part List menu PreSet Programming 1 From the Ready Screen press the Show soft key to show the menu options 2 A new set of soft key options have appeared Press the PrSet soft key to access the PreSet feature 3 E...

Page 23: ... Press the PrSet soft key to access the PreSet menu 3 Enter the PreSet number you wish to delete and press the Clear soft key 4 Press to clear 5 TigerFence has now deleted the PreSet Quick Calibration Quick calibration is a shortcut to the calibration setting This allows advanced TigerFence users to quickly calibrate 1 Start at the Ready Screen Note if you viewing the expanded options press 2 Meas...

Page 24: ...t point lists can be optimized if you have the TigerStop Dynamic Optimizing upgrade Pattern A pattern list will tell TigerFence to process one stock lengths worth of parts in a push feed fashion It will run the same pattern of parts over and over until its told to stop Pattern lists cannot be optimized Pull A pull list works just like a pattern except it pulls away from the zero point instead of p...

Page 25: ...to the programming screen for line 1 Enter the length of the part you wish to process and press In this example I will tell TigerFence I want to cut a 24 inch part 8 The cursor will now drop to the quantity Enter how many parts you want followed by In this example I will tell TigerFence that I want 5 parts 9 You will now be taken to line 2 Repeat steps 7 and 8 until you have entered all the parts ...

Page 26: ...26 ...

Page 27: ...k calibration if necessary Quarterly Every 3 Months 1 Run a drive test to check machine drive The Drv MxP and MxN measurements must be below 12000 Note The drive test is inside the Debug menu Yearly 1 Inspect the condition of the drive belt and replace if necessary 2 Tighten belt Loosen 1 Remove the black plastic motor cover 2 Loosen the four motor mount bolts 3 Pull down on the motor to tighten t...

Page 28: ...28 Date Maintenance Performed Drive Test Results Maintenance Log Maintenance Log ...

Page 29: ...29 Date Maintenance Performed Drive Test Results Maintenance Log Maintenance Log ...

Page 30: ...30 ...

Page 31: ...31 ...

Page 32: ...32 12909 NE 95th Stree t Vancouver WA 98682 2426 1 360 254 0661 sales tigerstop com TigerStop B V Holland 31 546 575 171 info tigerstop nl www tigerstop com FIND US ONLINE AT ...

Reviews: