www.timberk.com • Electric drier for changing of air humidity
9
3. Clean the air filter
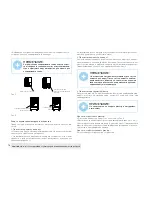
• Remove the filter every two weeks based on normal operating conditions.
• To remove the filter, pull filter outwards (See Fig.14).
• Wash the filter with clean water then dry.
• Re-install the filter,replace Bucket.
4. When not using the unit for long time periods
• After turning off the unit, wait one day before emptying the tank.
• Clean the main unit, bucket and air filter.
• Wrap the cord and bundle it with the band (see Fig.8).
• Cover the unit with a plastic bag.
• Store the unit upright in a dry, well-ventilated place.
NOTE:
Do not use a dishwasher to clean the bucket. After
clean, the bucket must be in place and securely seated
for the dehumidifier to operate.
Fig. 11
CAUTION!
DO NOT operate the dehumidifier without a filter
because dirt and lint will clog it and reduce performance.
8. TROUBLESHOOTING
Problem
What to check
Unit does not start
• Make sure the dehumidifier s plug is pushed completely into
the outlet.
• Check the house fuse/circuit breaker box.
• Dehumidifier has reached its preset level or bucket is full.
• Water bucket is not in the proper position.
Dehumidifier does
not dry the air as it
should
• Did not allow enough time to remove the moisture.
• Make sure there are no curtains, blinds or furniture blocking
the front or back of the dehumidifier.
• The humidity selector may not be set low enough.
• Check that all doors, windows and other openings are
securely closed.
• Room temperature is too low, below 5 C(41 F).
• There is a kerosene heater or something giving off water
vapor in the room.
The unit makes a
loud noise when
operating
• The air filter is clogged.
• The unit is tilted instead of upright as it should be.
• The floor surface is not level.
Frost appears on the
coils
This is normal. The dehumidifier has Auto defrost feature.
Water on floor
• Hose to connector or hose connection may be loose.
• Intend to use the bucket to collect water, but the back drain
plug is removed.
ES, AS,P2,EC ,Eb
and E3 appear in the
display
These are error codes and protection code. See the CONTROL
PADS ON THE DEHUMIDIFIER section.
The pump operation
on light blinks at 1Hz
Clean the filter of the pump.
Check the pump hose does not link or block.
Empty the water of the bucket.
Before calling for service, review the chart below first yourself.
Summary of Contents for DH TIM 30 E9
Page 11: ...1 1 11 2 12 3 12 4 13 5 14 6 15 7 15 8 19 9 20 1 TIMBERK www timberk om 11...
Page 13: ...4 1 2 3 4 5 1 2 3 4 3 5 6 7 20 40 1 2 1 1 4 3 www timberk om 13...
Page 14: ...2 20 20 20 20 20 40 5 41 F 35 95 F 220 240 50 5 41 F 5 41 F 5 1 1 1 www timberk om 14...
Page 15: ...3 6 1 2 250 3 4 5 6 35 85 5 0 0 24 7 8 35 85 0 24 5 30 90 AS NOTE www timberk om 15...
Page 16: ...ES P2 P2 EC EC E3 Eb 3 3 3 250 0 5 10 1 24 5 0 0 P2 www timberk om 16...
Page 17: ...7 1 P2 4 2 5 16 1 6 5 8 Eb 8 Eb www timberk om 17...
Page 18: ...1 6 5 2 3 30 4 7 www timberk om 18...
Page 19: ...4 7 8 5 41 F ES AS P2 EC Eb E3 www timberk om 19...
Page 20: ...www timberk om 20 www timberk com 24...
Page 22: ...www timberk om 22 TIMBERK TIMBERK ID 171 21 12 2004 18 5 TIMBERK ID...
Page 25: ...www timberk om 25...
Page 26: ...www timberk om 26...
Page 27: ...www timberk om 27...
Page 28: ...www timberk om 28...
Page 30: ...Timberk c 10 www timberk om 30...
Page 32: ...www timberk com...


