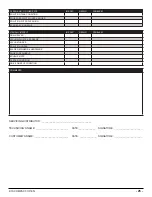
background image

K10-COMPACT-OP-EN


- 21 -

ON-BOARD CHARGER

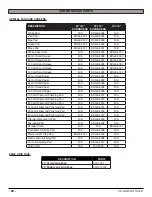
Charger Specifications

• 

Output voltage of 24 Volts

• 

Output current of 12 amps max

• 

Input voltage of 110 Volts/ 60 Hz  

(220V/50 Hz available)

• 

Automatic shut off circuit

• 

Made for Deep Cycle Batteries 
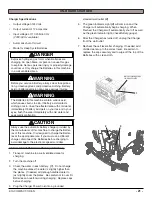
DANGER

Explosive hydrogen gas forms when Batteries are 
charging. An open flame or spark can cause this gas 
to explode. Serious personal injury or property damage 
could occur. Only charge the Batteries in this machine 
in a well ventilated area.
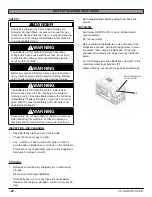
WARNING

Before you service a Battery, always wear face protec-
tion, protective gloves and protective clothing.  Battery 
acid or battery explosion can cause serious injuries.

WARNING

The Batteries in this machine contain sulfuric acid, 
which causes burns to skin. If battery acid contacts 
clothing or skin, rinse the effected area with cold water 
immediately. If battery acid gets on your face or in your 
eyes, flush the area immediately with cold water and 
seek medical attention.

CAUTION

Always use the automatic battery charger provided by 
the manufacturer of this machine to charge the Batter-
ies of this machine. It is designed to charge the Batter-
ies at the appropriate rate. If you must use a different 
charger, disconnect the Batteries before charging to 
avoid damage to the electronic speed controller.

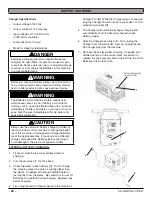
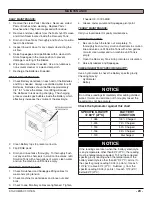
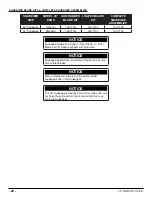
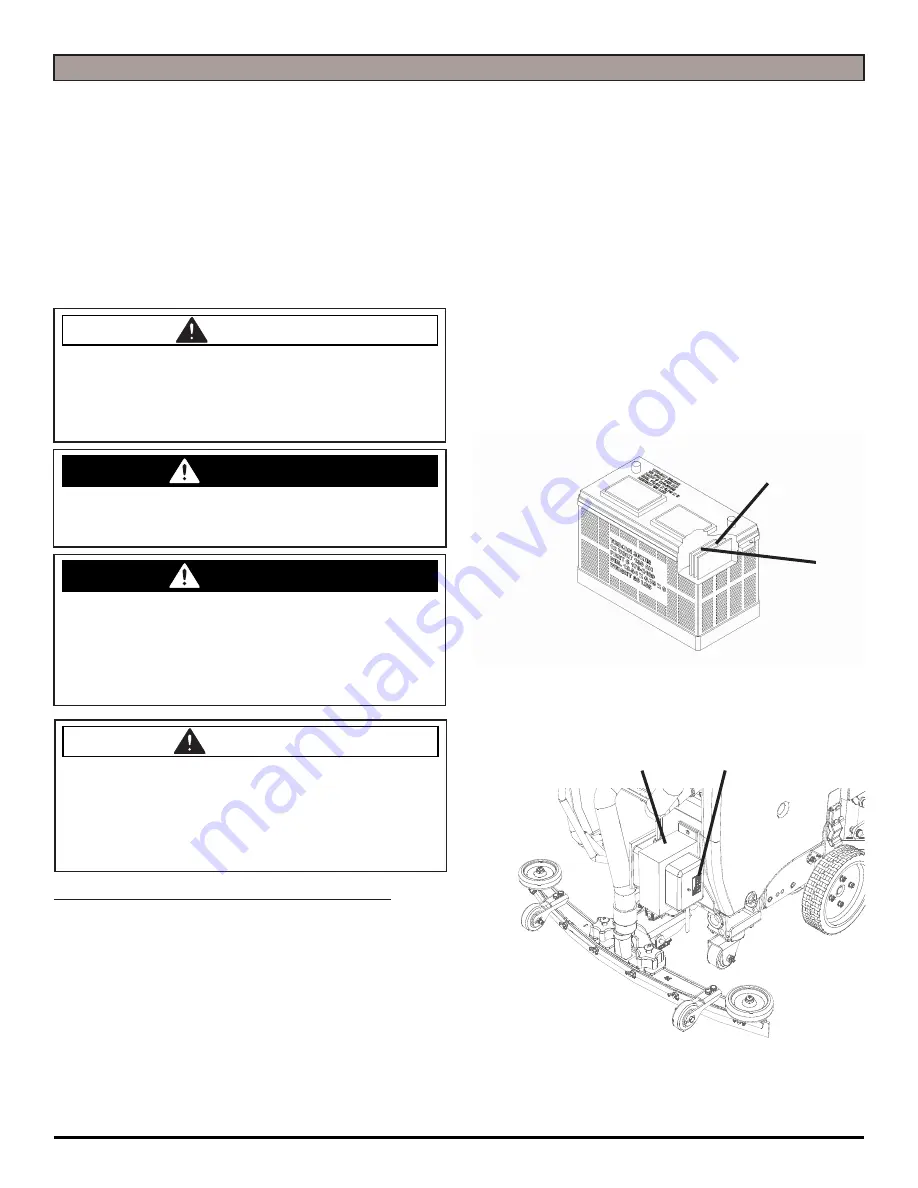
ON-BOARD BATTERY CHARGING (OPTIONAL):

1.  Transport machine to a well ventilated area for 

charging.

2.  Turn the machine off.

3.  Check the water in each battery.  

(1)

.  Do not charge 

the machine unless the water is slightly higher than 
the plates.  If needed, add enough distilled water to 
just slightly cover the plates.  Be careful not to over fill.  
Batteries can overflow during charging.  Replace caps 
before charging.

4.  Plug the Charger Power Cord into a grounded 

standard wall outlet 

(2)

.

5.  The green Indicator Light 

(3)

 will come on and the 

Charger will automatically begin charging.  When 
finished, the Charger will automatically shut off as well 
as the green indicator light 

(check Battery gauge)

.

6.  After the Charger has turned off, unplug the Charger 

from the wall outlet.

7.  Recheck the cell level after charging.  If needed, add 

distilled water up to the correct level.  Be certain to 
replace the caps securely and to wipe off the top of the 
Batteries with a clean cloth. 

WATER LEVEL SHOULD BE 

1/8'' ABOVE PLATES

1

2

3

Summary of Contents for XS Compact 17" Disk Pad Assist

Page 1: ...sk Pad Assist Read the Operators Manual before using the machine Read the Safety Messages before servicing machine XSCompact www timberlineclean com 1711 South Street Racine WI 53404 USA 262 833 4040...

Page 2: ...in death Machine Controls Shows you the different machine controls and features Machine Setup Tells you how to setup machine from un crating to installing Squeegee and Brushes Operations Section is to...

Page 3: ...Adjust Solution Flow 16 Draining Solution Tank 16 Draining Recovery Tank 16 Open Recovery Lid 16 Flush Recovery Tank 17 Clean Drain Saver 17 Clean Vacuum Screen 17 Tip Tank 18 Squeegee Up 18 Squeegee...

Page 4: ...nless you are trained and authorized to do so Unless you have read and understood this Operator s Manual On surfaces with greater than a 2 grade unless this machine is equipped with a functional parki...

Page 5: ...remove paint over or destroy warning decals If warning decals become damaged call 1 262 681 3583 for free replacements WARNING Dress safely Do not wear a neck tie scarf or any loose or dangling cloth...

Page 6: ...andard Floor Scrubber If you have questions about these labels ask your supervisor These images indicate where on the K10 Standard Safety Labels are located If ever the labels become illegible worn of...

Page 7: ...mergency 9 SCRUBDECK DOWN PRESSURE GAUGE OPTIONAL Shows the amount of down pressure applied to Scrubdeck 10 HANDLE BAR Adjustable Handlebar 11 ADJUSTABLE HANDLE BAR LOCK Pull out to adjust Handlebar a...

Page 8: ...ns off when motor stops 8 DECK ADJUSTMENT ARMS Determines the pitch level of the machine deck 9 SPRAY JET MOTOR OPTIONAL Motor for the Spray Jet Spray Nozzle 10 ISOLATOR HOUR METER Hour meter specific...

Page 9: ...HEIGHT WHEELS Height of wheels adjust to height of Squeegee 5 SQUEEGEE PITCH ADJUSTMENT Adjusts pitch of Squeegee Deflection should be even across entire Blade 6 SQUEEGEE BLADE Recovers dirty water fr...

Page 10: ...o the OFF position and remove Key if machine is equipped with optional key switch 2 Attach Battery Cables as shown below 3 Turn ON main power switch and check the battery condition meter to ensure cor...

Page 11: ...djusted just right with good deflec tion across the entire rear blade SEE BELOW REMOVING SQUEEGEE 1 With the Squeegee in the up position turn machine power off 2 Disconnect Vacuum Hose A from Squeegee...

Page 12: ...SEE BELOW 5 With Brushes locked into place tip machine back down to a level surface INSTALLING DRIVER PADS 1 Select the correct Pads that best meet your cleaning application needs Consult your local...

Page 13: ...P EN 13 ADJUSTING PAD ASSIST BIAS 1 Release 2 Tank latches A SEE BELOW 2 Tip Tank back SEE BELOW 3 Turn the Pad Assist Adjustment wing nut B to the right to increase bias and to the left to decrease S...

Page 14: ...To shut the solution OFF completely just release the Drive button or use dash mounted switch 2 Keep an eye on the clear Vacuum cover to make sure that there is not any foamy buildup in the Recovery T...

Page 15: ...ns G SCRUB ONLY 1 Turn on machine Power Switch A while making sure the Speed Control Knob B is at a lower setting 2 Lower Scrubdeck head to the floor by pressing the Scrubdeck Switch on the Control Pa...

Page 16: ...ROVED locations only 2 Rinse out Tank and solution flow system with clean water DRAINING RECOVERY TANK Always empty Recovery Tank when refilling the Solution Tank You can refill the Solution Tank whil...

Page 17: ...Lid open and Tank fully drained 1 Remove 2 Squeegee Intake Hose A from Drain Saver strainer B SEE BELOW 2 Remove stainless screen and dispose of debris 3 Rinse screen with fresh water from the outside...

Page 18: ...ap SEE BELOW CAUTION Casters need to be swiveled back B as shown other wise machine may tip SQUEEGEE UP 1 To raise the Squeegee off the floor rotate Squeegee Lift Lever A counter clockwise all the way...

Page 19: ...ampeners E that are available to quiet machine operation SOLUTION FILTER The solution system has an Inline Filter A to filter out cleaning solution prior to scrubbing SEE BELOW CLEANING SOLUTION FILTE...

Page 20: ...ne It is designed to charge the Batter ies at the appropriate rate If you must use a different charger disconnect the Batteries before charging to avoid damage to the electronic speed controller EXTER...

Page 21: ...machine to charge the Batter ies of this machine It is designed to charge the Batter ies at the appropriate rate If you must use a different charger disconnect the Batteries before charging to avoid d...

Page 22: ...wear rings or metal wrist watches when servicing this machine as they can cause an electrical short circuit which can cause serious burns INSPECTION AND CLEANING Keep Batteries clean and dry from res...

Page 23: ...ANCE 1 Check Scrubhead and Squeegee lifting cables for wear and spring tension 2 Check machine for water leaks and loose nuts and bolts 3 Check to see if Battery cables are tightened Tighten if needed...

Page 24: ...dy Particulate Dark BATTERY 2 WATER LEVEL Overfilled Full Low Dry CLEAN BATTERY TOPS CHECK BATTERY CABLE AND TERMINAL CONDITION NOTES PAD CONDITION SCRUB BRUSH FIBER LENGTH ROTATED BRUSHES DISK PAD DR...

Page 25: ...RAIN SAVER VACUUM FLOATS SCREENS VACUUM HOSES SOLUTION HOSES BLADE RETAINERS HARDWARE SQUEEGEE WHEELS BRUSH SKIRTS CASTER CONDITION DRIVE WHEELS CONDITION COMMENTS SERVICING DISTRIBUTOR ______________...

Page 26: ...N A 60 Grit Sand Paper N A EDGE 4033 N A 80 Grit Sand Paper N A EDGE 4034 N A 100 Grit Sand Paper N A EDGE 4035 N A 100 Grit Diamond Polishing Pad N A EDGE 4012 N A 400 Grit Diamond Polishing Pad N A...

Page 27: ...n 016 706 17N 706 20N Pad Driver 706 17D 706 20D Pad Driver Pad Retainer 40 433 Pad Driver Spring Clip 40 423 ROUND DISK PADS NOTICE The in Disk Column Denotes Desk Pad Size 17 20 DISK PADS DISK LEVEL...

Page 28: ...dard 180 770G 180 770L 180 7180 NOTICE Squeegee blade kits include 1 Rear Blade 1 Front Blade and 2 Backup Wheels with hardware NOTICE Squeegee Assemblies complete listed above all come with Linatex b...

Page 29: ...BLANK THIS PAGE WAS INTENTIONALLY LEFT BLANK...

Page 30: ...RPS Corporation 2020 1711 South Street Racine WI 53404 www rpscorporation com Tel US 800 634 4060 Tel Int 001 262 681 3583...

Reviews: