


Page 5
Installing Impression Rail
™
Express
Aluminum Posts
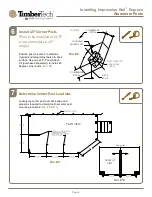
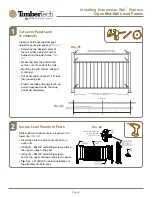
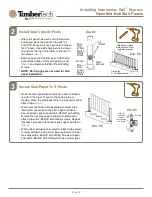
Install Stair End Posts
(if applicable)
• Temporarily install end stair post
so rail centerline aligns with top
stair posts installed in Step 1 (if
applicable). Recommended post
installation locations are shown.
(Dia. #5)
Confirm with local code
officials before installing stair
rail sections or stair rail posts
to ensure compliance with local
code requirements.
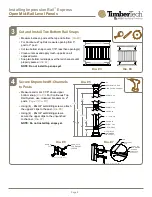
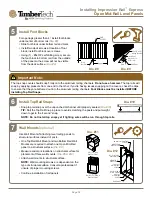
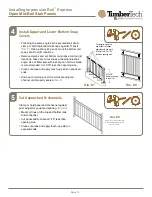
Install End Posts
(if applicable)
Install posts at all end locations with
maximum gap between post and wall
to be less than a 4" opening.
(Dia. #6)
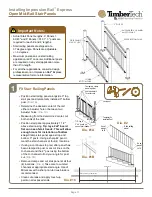
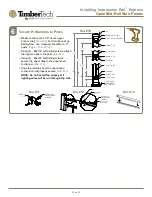
Install 90-degree Corner
Posts
Position post on same 3" centerline
(typical) and temporarily fasten using
a single fastener through base plate
mounting hole.
(Dia. #7)
3
4
5
Dia. #6
Dia. #7
Important Note:
3" posts are required at all transitions.
2" posts may not be used to start/end
a run or to form a corner.
Dia. #5
3"
3"
3" TYPICAL
3B
DECK
SURFACE
STAIR DOWN
3" TOP
STAIR POST
TEMPORARILY INSTALL
3" BOTTOM STAIR
END POST ALIGNED
WITH TOP STAIR END
POST (REFER TO STAIR
INSTRUCTIONS)
OPENING
LESS THAN 4"
3" CENTERLINE
TYPICAL
DECK
EDGE
BUILDING WALL
LOCATE END
POST
TOP VIEW
3" CENTERLINE
TYPICAL
LOCATE
90° CORNER
POST
3" CENTERLINE
TYPICAL
DECK
EDGE


