background image

36 
 

tooth brush, or other stiff bristle brush to remove any remaining ash. A canister type vacuum cleaner may 

be a useful tool in removing this ash. The first step should remove most carbon and your wick should feel 

softer to the touch. If any part still feels hard , you can use small pliers to pinch these hard spots and break 

up the carbon into pieces. After doing this, replace the cabinet, add a small amount of fuel, wait at least 

one hour and then repeat Step 1. 

The first step should remove most carbon and your wick should feel softer to the touch. If any part still 

feels hard , you can use small pliers to pinch these hard spots and break up the carbon into pieces. After 

doing this, replace the cabinet, add a small amount of fuel, wait at least one hour and then repeat Step 1. 


Note: Burn your heater dry, as noted above, weekly during the heating season. Check your wick often to 

see if CARBON REMOVAL/DRY BURNING is necessary. Carbon removal will NOT be effective if your fuel has 
been contaminated by water or any other liquid. In this case you must clean the fuel tank, replace the wick 

and soak it for 60 minutes in fresh, 1-K Kerosene. 


TO EXCHANGE WICKS 

1

.

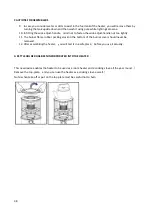
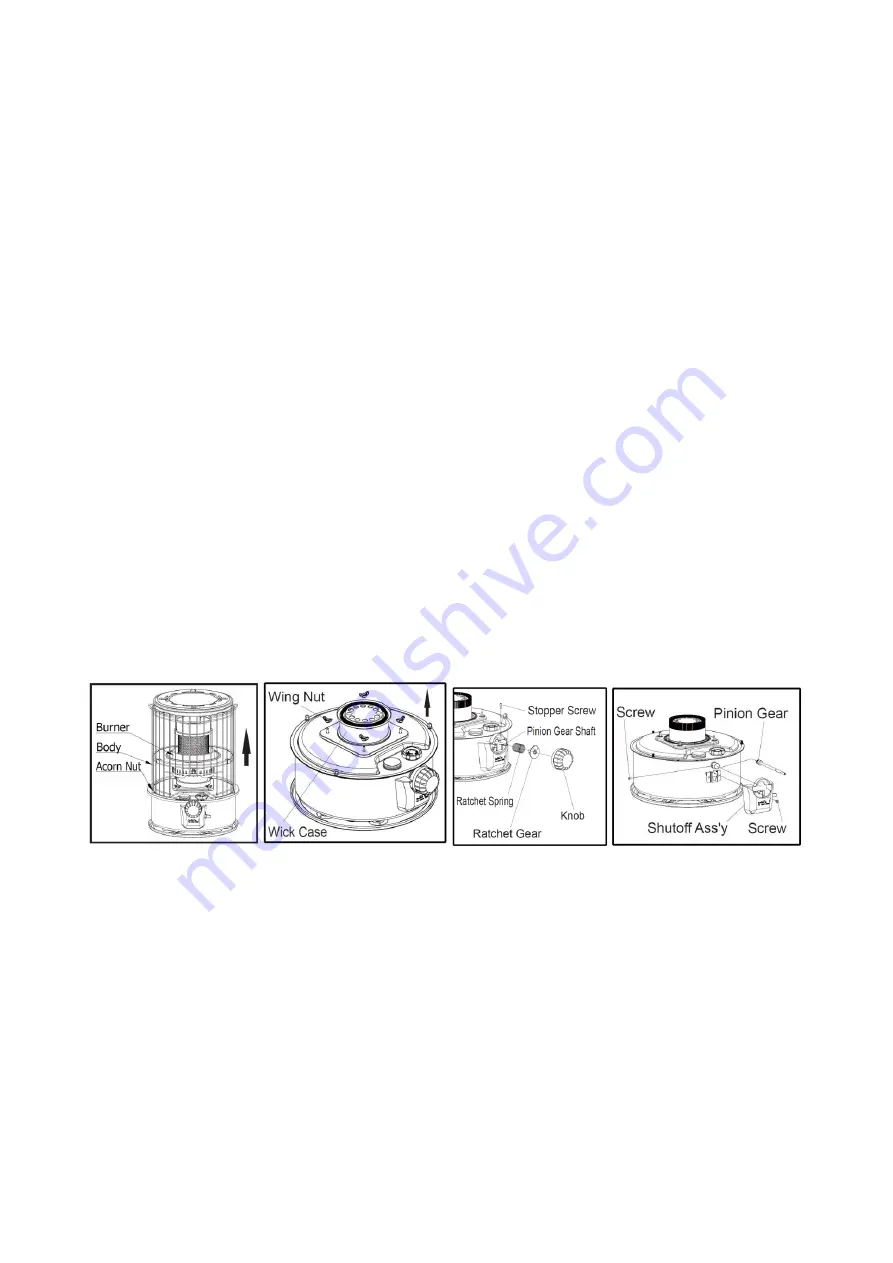
Remove 3 acorn nut that fix body to fuel tank. 

2

Remove body and Burner. 

3

.

Pull off the Wick Case by screwing off the four Wing Nuts. 

6

.

Remove Shutoff Ass’y from Fuel tank by unscrewing Screw that fix Shutoff Ass’y. 

7

.

Remove Pinion Gear from Fuel tank by unscrewing Screw that fix Pinion Gear. 


8

.

Lift the wick holder assembly straight up and remove from the tank. 

9

Remove the wick from the holder by folding it toward the center loosening it from the sharp metal 

teeth on the inner surface of the inner surface of the holder

and slide it out. 

10

The black line on the outside of the wick should match the top edge of the holder. Then press it 

against the teeth inside the holder to obtain a firm grip. 

11

Replace the wick holder assembly in the Fuel Tank. Rotate 90 degrees left and right as well as up and 

down until the wick slides freely. Check to see that gasket is still in place on the Fuel Tank. 

12

Insert the pinion Gear at the other end of the wick control shaft into the rack of the wick holder and fix 

by Screw. 

13

Replace Shutoff Ass’y to Fuel Tank 

Summary of Contents for 102827423

Page 1: ...1 K ytt ohje Timco PL 79 2 9kW petroolil mmitin Alkuper isen k ytt ohjeen k nn s Nimi Timco PL 79 2 9kW petroolil mmitin Tuotenumero 102827423 Takuu 1 vuosi...

Page 2: ...2m vapaata tilaa Kiinnit erityist huomiota lapsiin l mmittimen k yt n aikana Laite on tarkoitettu lis l mmitykseen ei ensisijaisesti tai pysyv ksi l mm nl hteeksi Jos polttoaines ili ss on kondensiove...

Page 3: ...ett v syd nlanka Tyyppi Kartio heijastin Polttoaineenkulutus 0 22 0 28 l h L mm ntuotto keskim rin 2 750 W Palamisaika 12 18 tuntia Sytytysmenetelm K sin Mitat Korkeus 46 5 cm leveys 32 5 cm pituus 32...

Page 4: ...odota noin kymmenen minuuttia kunnes petrooli on imeytynyt syd nlankaan 2 Sytyt l mmitin tulitikulla tai pitk k rkisell kaasusytyttimell a Nosta syd nlankaa k nt m ll s t nuppia my t p iv n b Kallista...

Page 5: ...at tummia se johtuu siit ett syd nlanka on liian alhaalla tai polttoaine on lopussa 1 Liekki voidaan s t s t nupin avulla Tarkkaile liekin ja hehkun tilaa ja s d liekki s t nupissa olevan s t alueen a...

Page 6: ...amatta ennen kuin siirr t l mmittimen toiseen paikkaan tai poistut l mmitett v st huoneesta Automaattinen sammutus L mmitin on varustettu automaattisella sammutuksella Sen tarkoituksena on sammuttaa l...

Page 7: ...llisesti kohdan Noen poisto kuivapoltto menettelyn joka on kuvattu kohdissa Syd nlangan huolto ja Noen poisto kuivapoltto T RKE ILMOITUS TARKISTA AUTOMAATTINEN SAMMUTUS KERRAN VIIKOSSA L MMITYSKAUDEN...

Page 8: ...mua Nosta sitten syd nlanka ylimp n asentoon ja odota kunnes liekki sammuu Odota 30 minuuttia sytyt syd nlanka uudelleen tarvittaessa tulitikulla ja anna sen palaa uudelleen loppuun Kun l mmitin on j...

Page 9: ...nuppi takaisin ja ty nn r ikk jousi kasaan ota nuppi pois ja pid k dell jousta paikallaan Kuva 3 10 Ota ruuvi irti kuva 4 ja vapauta jousi ja hammasratas varovasti ja hitaasti 11 Irroita kuvan ruuvi k...

Page 10: ...10 Kuva 1 Kuva 2...

Page 11: ...11 Kuva 3 Kuva 4...

Page 12: ...12 kuva 5 Kuva 6 Kuva 7...

Page 13: ...kumitiivistett joka on kiinni polttimen kannen pohjassa ei saa koskaan poistaa 4 Kun olet koonnut l mmittimen testaa sen toiminta turvallisessa paikassa ennen varsinaista k ytt L MMITTIMESS ON VESIPAN...

Page 14: ...osta syd nlankaa Syd nlanka on ep tasainen X X X X Leikkaa syd nlanka Palosylinterin asennus on ep vakaa X X X X X Vakauta tai vaihda palosylinteri Syd nlangan mekanismi on tiukka X X L ys hieman mutt...

Page 15: ...syttyvien aineiden l heisyydess 4 L mmitin ei saa altistua vedolle 5 L mmitin on tarkoitettu k ytett v ksi tasaisella pinnalla 6 Valopetroolin l ikkymist on varottava Jos sit l ikkyy pyyhi valumat poi...

Page 16: ...16 Bruksanvisning Timco PL 79 2 9kW fotogenv rmare vers ttning av den ursprungliga bruksanvisningen Namn Timco PL 79 2 9kW fotogenv rmare Produktnummer 102827423 Garanti 1 r...

Page 17: ...ler andra v tskor i br nsletanken Om br nsletanken inneh ller vatten eller andra v tskor ska du t mma br nsletanken och fylla den med lysfotogen Anv nd inte apparaten i utrymmen med otillr cklig venti...

Page 18: ...ion Modell Timco PL 79 Sort R rlig veke Typ Kon reflektor Br nslef rbrukning 0 22 0 28 l h V rmeeffekt 2 750 W F rbr nningstid 12 18 timmar T ndningsmetod t ndsticka M tt H jd 46 5 cm bredd 32 5 cm l...

Page 19: ...du tills tta lysfotogen och v nta cirka tio minuter tills fotogenet har sugits upp av veken 2 T nd v rmaren med en t ndsticka a H j veken genom att vrida reglaget medurs b V nd eldcylindern genom att...

Page 20: ...r att br nslet h ller p att ta slut 1 Flammorna kan justeras med hj lp av ett vred Observera flamman och gl den och justera flamman med hj lp av kontrollomr det p reglaget 2 En flamma av felaktig stor...

Page 21: ...ldrig flamman vara osl ckt innan du flyttar v rmaren till en annan plats eller l mnar det utrymme som ska v rmas upp Automatisk sl ckning V rmaren r utrustad med automatisk avst ngning Den r utformad...

Page 22: ...tigt att du regelbundet utf r proceduren f r avl gsnande av sot torkbr nning som beskrivs i avsnitten Underh ll av veken och avl gsnande av sot torrf rbr nning VIKTIGT MEDDELANDE KONTROLLERA DEN AUTOM...

Page 23: ...att tills tta br nsle tills flamman b rjar slockna Lyft sedan veken till det versta l get och v nta tills flamman slocknar V nta 30 minuter t nd veken p nytt eventuellt med en t ndsticka och l t den...

Page 24: ...v 7 Avl gsna kugghjulet fr n br nsletanken genom att ta bort dess f stskruv 8 Lyft upp vekeh llaren rakt upp t och ta bort den fr n tanken 9 Ta bort veken fr n h llaren genom att vika den mot mittdele...

Page 25: ...trollera vekens h jd den b r vara 9 5 mm ovanf r kragen 18 Kontrollera att avst ndet mellan vekeh llaren och dragr ret r korrekt Det b r vara detsamma runt om 19 S tt tillbaka br nnaren och ramen i br...

Page 26: ...er fast p botten av br nnarlocket f r aldrig avl gsnas 8 N r du har monterat v rmaren ska du testa den p en s ker plats innan du tar den i bruk V RMAREN HAR EN H LLARE F R VATTENKITTELN Denna nya appa...

Page 27: ...oj mn X X X X Klipp veken Eldcylinderns montering r instabil X X X X X Stabilisera eller byt ut eldcylindern Vekens mekanism r sn v X X Lossa muttern n got eller byt ut f rseglingen Kopplingen mellan...

Page 28: ...a mnen 4 V rmaren f r inte uts ttas f r drag 5 V rmaren r avsedd att anv ndas p en plan yta 6 Var f rsiktig s att inte lysfotogen l cker ut Om det l cker ut torka bort det 7 Sl ck flamman innan du fyl...

Page 29: ...29 Manual Timco PL 79 2 9kW kerosene heater Original manual Nimi Timco PL 79 2 9kW petroolil mmitin Tuotenumero 102827423 Takuu 1 vuosi...

Page 30: ...ated sprit into fuel container In case water or other fuels are inside fuel container make fuel container empty and then fill up with clean Kerosene Do not use the appliance in inadequately ventilatio...

Page 31: ...l Timco PL 79 Kind Wick up down glide Type Cone reflection Fuel consumption 0 22 0 28L hr Heat output 2750 W Combustion hour 12 18hours Ignition Method 7 Match Size Height 46 5 cm Width 32 5 cm Length...

Page 32: ...are going to use the heater for the first time you will feed oil and wait about ten minutes until the wick is soaked with fuel 2 Lit with a match a Lift the wick by turning the wick adjust handle knob...

Page 33: ...rol Knob dial By watching condition of flame and red glow adjust it within the adjustment range shown on control Knob dial 2 Smoke and odor will result if the heater is operated with the flame too hig...

Page 34: ...he heater and it functions to prevent the flame from spreading if the heater is knocked over The automatic safety shut off device is built into the mechanism that raises and lowers the wick It has bee...

Page 35: ...ng the knob If the wick fails to drop completely when you push the shut off knob If the top of the wick is stiff hard like a bristle brush It is time to DRY BURN your heater A wick that is in good con...

Page 36: ...or any other liquid In this case you must clean the fuel tank replace the wick and soak it for 60 minutes in fresh 1 K Kerosene TO EXCHANGE WICKS 1 Remove 3 acorn nut that fix body to fuel tank 2 Rem...

Page 37: ...Wick Control Knob to Shaft by Hand 16 Replace Wick Case to the Fuel Tank 17 Check height of wick it should be 3 8 above collar 18 Check for correct clearance between wick holder and draft tube It shou...

Page 38: ...ightly 11 The burner flame rubber packing stuck on the bottom of the burner cover should never be removed 12 After assembling the heater you will test it in a safe place before you use it actually A K...

Page 39: ...ied Wick level is too low X X X Raise wick as specified Wick level is uneven X X X X Trim wick Chimney assembly Unstable X X X X X Stabilize or replace conbustion cylinder Wick winding Mechanism tight...

Page 40: ...t be subjected to drafts 5 This heater is to be used on a horizontal level 6 Care should be taken not to spill oil If it should be spilt wipe it out 7 Before you fill oil or before it is moved to anot...

Reviews: