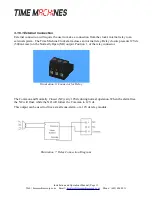
the cables can run through the bracket and down into the backside of each clock.
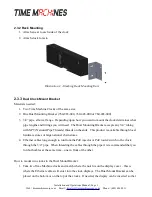
2. At the ends of the clocks, leave the screws out about 1/4” so that they can be inserted into the
key holes on the Dual Mount Bracket.
3. BEFORE you mount the clocks into the bracket, run two Ethernet cables through all pipe and
fittings that will be used to hang the clocks. Connect the cables to the clocks and then mount
the clocks into the bracket.
4. Secure the bracket to the clocks by tightening the screws on the ends of the bracket into the
clock.
5. Begin to tighten the pipe into the bracket. Work from the pipe/Dual Clock Bracket connection
out to the connections for the wall or ceiling.
6. Secure the entire fixture to the wall or ceiling.
7. Connect the Ethernet cables to the PoE Source.
8. Power up the PoE injector.
Installation and Operations Manual | Page 4
Web / timemachinescorp.com Email /
tmsales@timemachinescorp.com
Phone / (402) 486.0511
Illustration 2: 2.5" Dual Mount Bracket


