

About Intelli-Time
®
Your new digital clock is equipped with Intelli-Time
®
technology which is pre-programmed
with the correct time and date. Intelli-Time
®
instructs the clock to set itself once batteries are
installed. The Intelli-Time
®
feature requires an internal memory battery to operate correctly.
This battery is located in the Intelli-Time
®
memory battery compartment on the back of the
clock and is pre-installed at the factory. We suggest replacement of the backup battery every
5 years. We recommend the replacement of backup battery in 1-2 years if the unit is not
powered on for a long period of time. Do not replace the memory battery unless the clock is
powered and the display is operating with the correct time.
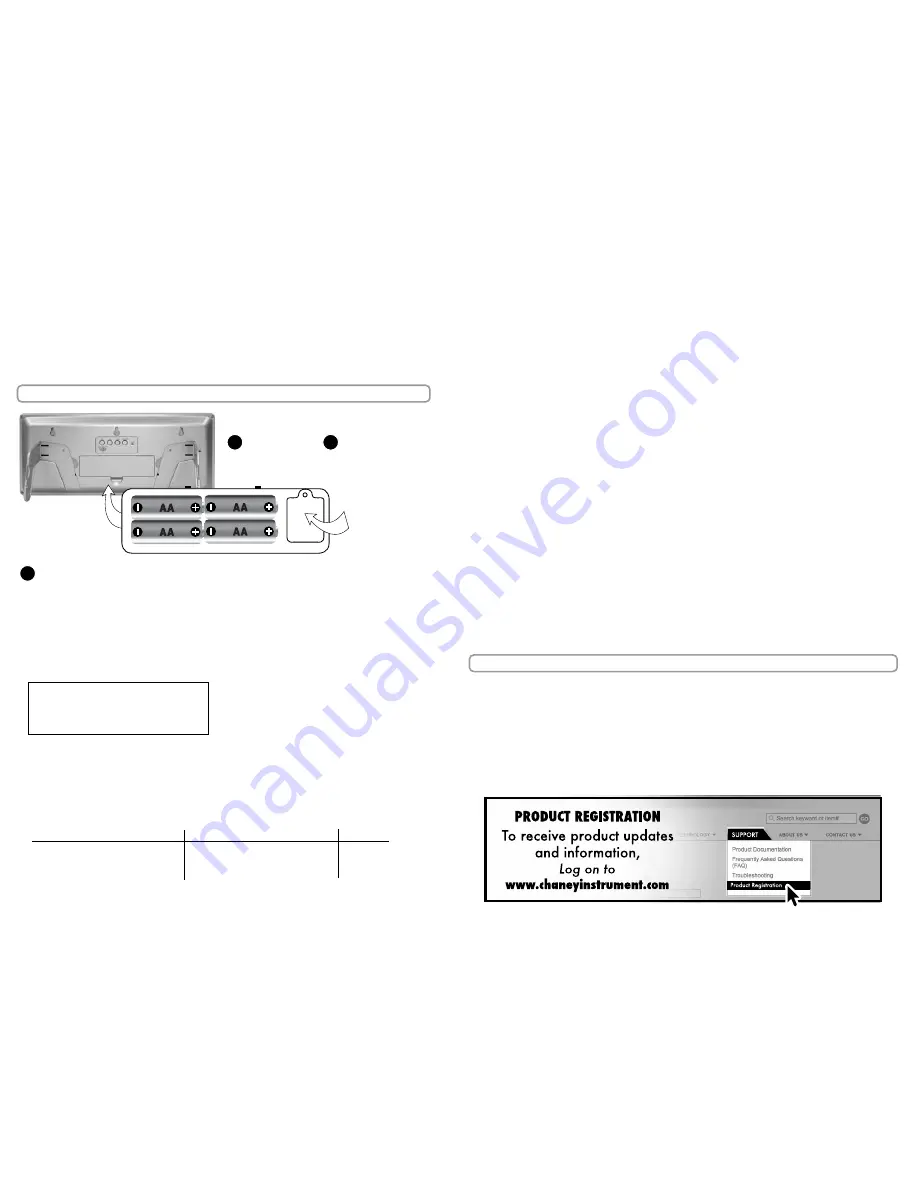
BATTERY INSTALLATION:
Setting the time zone and daylight saving time:
1. Press, then release the “TIME ZONE” button on the back of the digital clock until it
reaches the desired time zone position. You will see the time zone on the front of the clock
in the upper right hand corner.
TIME ZONES
AST: Atlantic
EST: Eastern
CST: Central
2. You must also determine which Daylight Saving time setting to use on the back of the
unit; new or old. Due to possible future changes in DST, this unit is equipped with a
selection switch to choose between the traditional DST setting (OLD) or the new DST time
change dates. You may slide the button to the left for (OLD), middle for (NEW) or right
for (OFF). “DAYLIGHT ST” will appear on the screen when Daylight Saving Time is observed.
-2-
-3-
2 • SETUP
Optional Custom Time Setting:
If you wish to set the clock slightly ahead or slightly behind, or if the Intelli-Time
®
internal
memory battery is allowed to go dead, you may set the time and date by simply following
the custom setup procedure below:
1. Press and hold the “SET” button for 5 seconds then release to enter the manual time set mode.
2. The
hour
will be flashing, adjust up or down using the “UP” or “DOWN” buttons.
Note the AM or PM indicator on the display.
3. Press and release the “SET” button once to move on to the minute setting mode.
4. The
minute
will be flashing, adjust up or down using the “UP” or “DOWN” buttons.
5. Press and release the “SET” button once to move on to the month setting mode.
6. The
month
will be flashing, adjust up or down using the “UP” or “DOWN” buttons.
7. Press and release the “SET” button once to move on to the day setting mode.
8. The
day
will be flashing, adjust up or down using the ”UP” or “DOWN” buttons.
9. Press and release the “SET” button once to move on to the year setting mode.
10. The
year
will be flashing, adjust up or down using the “UP” or “DOWN” buttons.
11. Press and release the “SET” button again to exit the manual set mode.
To view the MONTH/DAY/YEAR at any time press and release the “SET” button.
The following chart illustrates the differences between the auto DST settings and when
each setting automatically changes the time during the year.
AUTO DST NOTE:
portions of the country do not observe daylight savings time. If you live in
an area that does not observe daylight saving time, please turn off DST function.
NEW DST
OLD DST
OFF
2007 and beyond
2006
NO DST
2:00 am 2nd Sunday in March
2:00 am 1st Sunday in April
changes
2:00 am 1st Sunday n November
2:00am last Sunday in October
Changing the Backup Battery
Do not change the backup batteries unless the main 4 “AA” batteries are working. This
will prevent the clock from being without power, and the internal calendar memory will
function properly.
When changing the backup batteries, remove the battery compartment cover on the back of
the unit. The backup battery compartment is inside. Open the backup battery cover. Replace
the 1 “3V” CR2032 lithium battery with a fresh one and replace the cover.
3
REMOVE
BATTERY
COMPARTMENT
COVER
1
INSTALL 4 “AA”
ALKALINE
BATTERIES
2
BACKUP
BATTERY
COMPARTMENT
INITIAL SETup:
Once the batteries are installed, the clock will power up. The
clock will set itself to the correct time and date, defaulting to EST (eastern
standard time).
3 • TROUBLESHOOTING
During shipping a static charge may build up. It will NOT damage the product but may
prevent the display from showing. To restore the display you need to reset the unit. To
do this, simply look at the back of the clock. You will see a small hole that is the RESET
button. Use the end of a paper clip to press the button. This will restore the display.
MST: Mountain
PST: Pacific
AKST: Alaska
HAST: Hawaii-Aleutian


