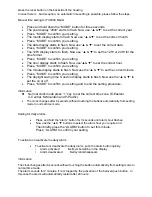
background image


13

• 

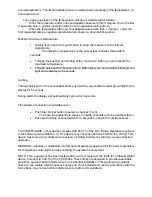
A flashing radio mast symbol indicates that the WWVB


signal reception 

has started. 

• 

A continuously displayed radio mast symbol indicates that the WWVB was 
received successfully. 

• 

We recommend a minimum distance of 2.5 meters (8.2 Feet)


to all 

sources of interference such as televisions or computer monitors. 

• 

Radio reception is weaker in rooms with concrete walls (e.g. in cellars) 
and in offices. In extreme cases, place the system at a window.  

• 

As there is less atmospheric interference at night, radio reception is 
normally possible at this time. A single synchronization each day is 
sufficient to keep the time display accurate to one second.  

DAYLIGHT SAVINGS TIME - Your radio controlled clock will automatically 
reset itself in the spring and then again in the fall. The signal from Fort Collins, 
Colorado automatically takes care of these changes. However in those few 
spots in the USA that are not on the daylight saving time program, the 
daylight savings Time (DST) should be turned to the off position." 

 
NOTES: 
If the clock cannot receive the WWVB


signal (because the distance is too great 

to receive a signal from the transmitter in Colorado), you have the option of 
setting the time manually as mentioned above. As soon as the reception of the 
WWVB signal is possible, then the clock is readjusted automatically.    
 
  
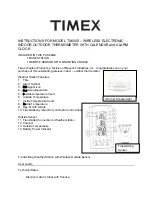
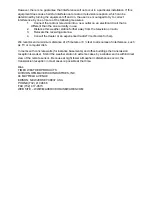
WARRANTY CARD FOR TX6180 SERIES


ONE YEAR LIMITED WARRANTY    
Timex Weather Products, a business unit of Maverick Industries, Inc. warrants 
this product to be free from original defects in material and workmanship for a 
period of one year from the date of purchase. This warranty does not cover 
damage in shipment or failure caused by tampering, carelessness or abuse. 
Repair or replacement will be made at our option without additional charge if the 
instrument is returned postage paid to:  
Timex Weather Products   
Maverick Industries   
94 Mayfield Avenue 
Edison, New Jersey 08837 USA 

www.maverickhousewares.com


Phone (732) 417-9666 
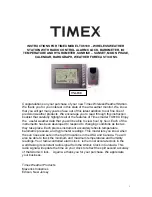
Congratulations on your purchase of this Timex weather station. We wish you 
many happy hours of keeping on top of the weather in your area. 


FCC COMPLIANCE – This device complies with Part 15 of the FCC Rules. 
Operation is subject to the following two conditions: (1) This device may not 
cause harmful interference, and (2) This device must accept any interference 
received, including interference that may cause undesired operation. WARNING: 
Changes or modification to this unit not expressly approved by the party 

Summary of Contents for TX6180

Page 1: ...ta that you will be able to view hour by hour Each of the instruments has been developed to respond to changing conditions as fast as they take place Each precise instrument accurately reflects temper...

Page 2: ...d below in order to have it repaired at your expense Cost for all repairs and return postage after the guarantee has expired will be the responsibility of you the consumer The proper address to return...

Page 3: ..._______________________________ PAGE 09 Daylight Saving Time______________ PAGE 09 C F temperature display______________________ PAGE 09 Temperature trend display__________________________ PAGE 09 Max...

Page 4: ...ays barometric pressure in two scales The mb hPa millibars hecto Pascals and the Hg Mercury scale Weather forecast using five icons sunny light cloud cover cloudy rain and stormy Thermometer Indoor me...

Page 5: ...the batteries inoperable Important information Please insert the batteries in the remote temperature transmitter first Obstacles can severely impair the range of the transmitter Protect the transmitte...

Page 6: ...transmission Do not permanently install the remote sensor until transmission has been confirmed Open the battery compartment on the rear side of the base weather station and insert the batteries agai...

Page 7: ...set the correct minute Press Set to confirm your setting The daylight saving time S and on display starts to flash Now use the to set the on or off Press Set to confirm your setting and to end the set...

Page 8: ...al clock mode The alarm will sound for two minutes if you do not deactivate it by pressing any button In this case the alarm will be repeated automatically after 24 hours Crescendo alarm length 2 minu...

Page 9: ...able to complete the setting process The minimum must always be at least 1 C below the maximum When the temperature alarm sounds the appropriate channel and the upper or lower limit symbol is shown 12...

Page 10: ...ed first then a positive course is displayed arrow pointing downwards If the relative humidity does not change within an hour then the upward or downward pointing arrow becomes a horizontal arrow The...

Page 11: ...n to activate the LED display backlight for five seconds RADIO FREQUENCY CONNECTION TO OUTDOOR SENSOR Press the CHANNEL button to select a channel 1 to 3 This gives you the option of polling three out...

Page 12: ...a YYZ Los Angeles CA LAX Portland OR PDX Vancouver Canada YVR RECEPTION OF THE RADIO SIGNAL The clock automatically starts the WWVB signal search on any restart or if the batteries are changed The rad...

Page 13: ...ansmitter in Colorado you have the option of setting the time manually as mentioned above As soon as the reception of the WWVB signal is possible then the clock is readjusted automatically WARRANTY CA...

Page 14: ...cause harmful interference to radio communications However there is no guarantee that interference will not occur in a particular installation If this equipment does cause harmful interference to rad...

Page 15: ...r Weather Station Features 1 Time 2 Alarm Symbol 3 RCC signal icon 4 Outside temperature 5 Outside temperature trend 6 Outside Temperature 7 Inside Temperature trend 8 Inside Temperature 9 Day Month D...

Page 16: ...month date day in English alarm inside and outside temperature To start up To activate Open the battery compartment on the back of the outside sensors and install the batteries matching the marked pol...

Page 17: ...S and on display starts to flash Now use the to set the on or off Press MODE to confirm your setting and to end the setting procedure Information Normal clock mode press key to set the correct time zo...

Page 18: ...ctual temperature differs by more than 1 degree C from the preset settings Parallel In conjunction with the signal sound will the symbol for the temperature alarm will start blinking Setting limits ch...

Page 19: ...seconds During alarm the display will automatically light up for 5 seconds Transmission connection to outside sensor Push the channel button to select a channel 1 to 3 You have the possibility to choo...

Page 20: ...Relocate the receiving antenna 4 Consult the dealer or an experienced radio TV technician for help We recommend a minimum distance of 2 5 meters or 8 feet to all sources of interference such as TV or...

Reviews: