

www.timex.com
W-282
032-095002
AS
www.timex.com
W-282
032-095002
AS
Thank you for purchasing your Timex
®
waTch.
Please read instructions carefully to understand how to operate
your Timex
®
watch.
feaTures anD Basic operaTion
• Time with 12- or 24-hour format
• Date with MM-DD or DD.MM format
• 3 time zones
• Alerts with audible tone and/or silent vibration
• Optional hourly chime
• 100-hour chronograph with display of lap and split times
• 24-hour countdown timer (count down and stop or repeat)
• Occasion reminders
• Hydration timer
• 3 daily/weekday/weekend alarms with 5-minute backup
• Customizable mode set (hide unwanted modes)
• INDIGLO
®
night-light with NIGHT-MODE
®
feature
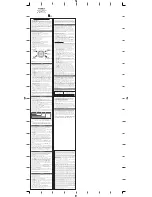
Press MODE
repeatedly to step through modes: Chrono, Timer,
Occasion, Hydration, Alarm 1, Alarm 2, and Alarm 3. Press
MODE
to exit current mode and return to Time mode.
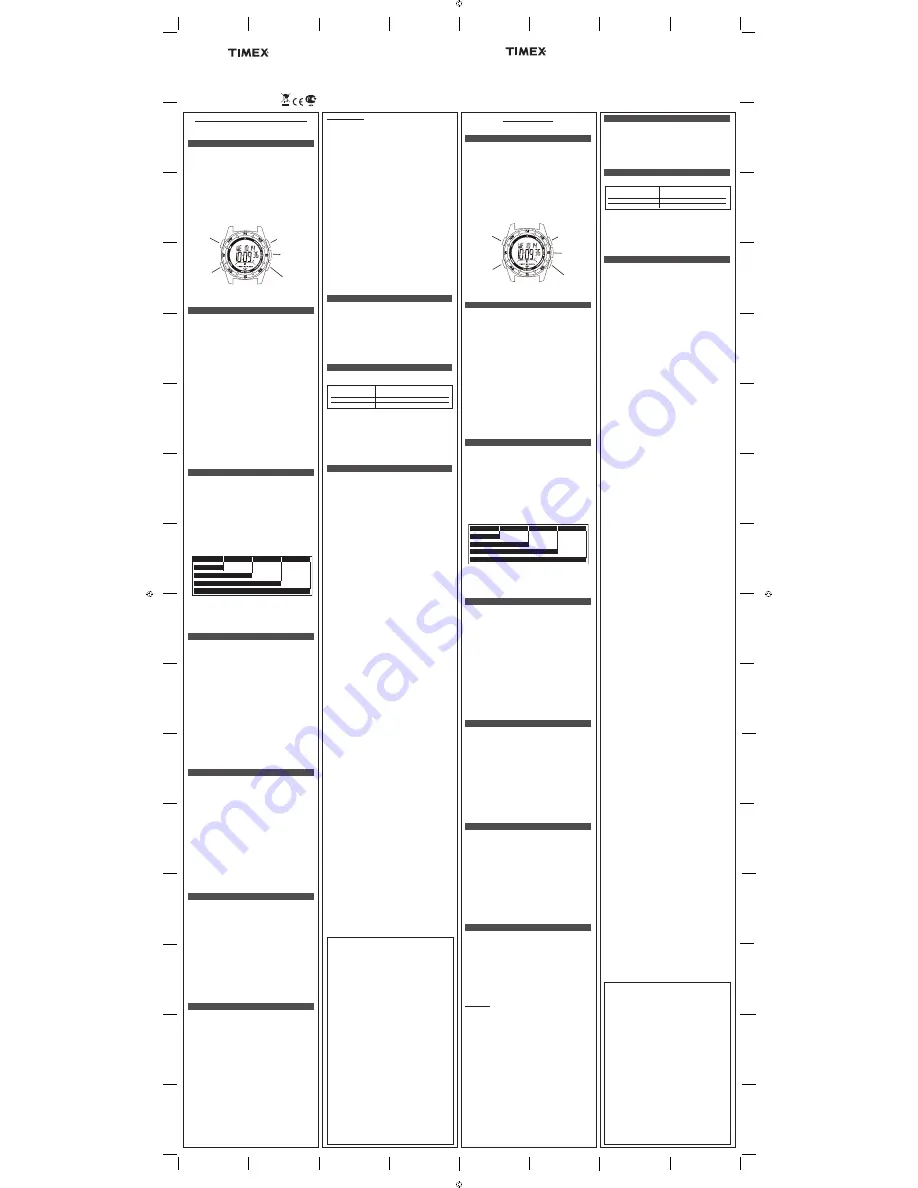
Button functions shown with secondary functions in parentheses
Time
To set time, date, and options:
1) With time and date showing, press and hold
SET.
2) Current time zone (1, 2, or 3) flashes. Press
+ or – to select time
zone to set, if desired.
3) Press
NEXT
. Hour flashes. Press
+ or –
to change hour (including
AM/PM); hold button to scan values
4) Press
NEXT
. Minutes flash. Press
+ or –
to change minutes
5) Press
NEXT
. Seconds flash. Press
+ or –
to set seconds to zero.
6) Press
NEXT
. Month flashes. Press
+ or –
to change month.
7) Press
NEXT
. Day flashes. Press
+ or –
to change day.
8) Press
NEXT
. Year flashes. Press
+ or –
to change year.
9) Press
NEXT to set options. Press + or –
to change value and
then press NEXT
to go to
next option. Press DONE at any step to
exit and save settings. Available options are 12- or 24-hour time
format, MM-DD or DD.MM date format, tone or vibration alert,
hourly chime
N
, beep for button presses, customizable mode
set (Select “HIDE” for unwanted modes – they are removed from
mode sequence).
If you hide a mode, you can turn it back on later using procedure
above.
Press START·SPLIT
once and hold to see 2nd time zone. Press
START·SPLIT
twice and hold to see third time zone. Continue to
hold button for 4 seconds to switch to displayed time zone.
Press and hold STOP·RESET to see next
upcoming occasion (see
description of Occasion mode). Release and immediately press and
hold again to see subsequent occasions.
Dual mode offers choice of alert type for alarms and countdown
time: audible tone, silent vibration or combination of vibration fol-
lowed by tone. To set, refer to point 9.
chronograph
This mode provides a chronograph (stopwatch) function. Press
MODE
to go to Chrono mode.
To start, press
START·SPLIT
. Chrono counts up by hundredths
of a second up to one hour, then by seconds up to 100 hours.
Stopwatch icon
w
flashes to indicate chrono is running.
To stop, press
STOP·RESET. Stopwatch icon
w
freezes to indicate
chrono is stopped.
To resume, press
START·SPLIT
, or to reset (clear) chrono, press
and hold STOP·RESET.
When chrono is already running, chrono continues to run if you exit
mode. Stopwatch icon
w
appears in TIME mode.
While chrono is running, press
START·SPLIT
to take a split. Lap and
split times will be displayed with lap number.
LAP 1 = 7.11
LAP 2 = 7.50
SPLIT 2 = 15.01
LAP 3 = 7.08
SPLIT 3 = 22.09
LAP 4 = 7.30
SPLIT 4 = 29.39
SPLIT 1 = 7.11
To set display format, press
SET
. Then, press
+ or – to select
desired format. Press DONE to exit.
NOTE:
• When a split is taken, times are frozen on the display for 10
seconds. Press MODE
to release display and show running
chrono immediately.
Timer
Timer mode provides a countdown timer with alert. Press
MODE
repeatedly until TIMER appears.
To set countdown time:
1) Press
SET
. Hours flash. Press
+ or –
to change hours; hold button
to scan values.
2) Press
NEXT
. Minutes flash. Press
+ or –
to change minutes.
3) Press
NEXT
. Seconds flash. Press
+ or –
to change seconds.
4) Press NEXT. Action at end of countdown flashes. Press + or –
to select STOP or REPEAT, indicated by hourglass icon with
arrow
I
.
5) Press
DONE
at any step when done setting.
To start timer, press
START·SPLIT
. Timer counts down every sec-
ond from countdown time. Hourglass icon
H
flashes to indicate
timer is running.
To pause countdown, press
STOP·RESET
. Hourglass icon
H
freezes
to indicate timer is stopped.
To resume countdown, press
START·SPLIT
, or to reset countdown,
press STOP·RESET.
Watch beeps and night-light flashes when countdown ends (timer
reaches zero). Press any button to silence. If REPEAT AT END
selected, timer repeats countdown indefinitely.
Timer continues to run if you exit mode. Hourglass icon
H
appears
in Time mode.
hyDraTion
Hydration mode provides a countdown timer with alert to remind
you to drink during a workout. Press
MODE
repeatedly until HYDRA
appears.
To set hydration time:
1) Press
SET
. Minutes flash. Press + or - to change minutes; hold
button to scan values.
2) Press
NEXT
. Seconds flash. Press + or - to change seconds; hold
button to scan values.
3) Press
DONE
at any step, when done setting.
To start hydration timer, press
START·SPLIT. Timer counts down
every second from countdown time. Drop icon
D
flashes to indicate
timer is running.
To pause countdown, press
STOP·RESET
. Drop icon
D
freezes to
indicate timer is stopped.
To resume countdown, press
START·SPLIT
, or to reset countdown,
press STOP·RESET.
Watch beeps and night-light flashes when countdown ends (timer
reaches zero). Press any button to stop alert.
Hydration timer continues to run, if you exit mode. Drop icon
D
appears in Time mode.
aLarm
The watch has three alarms. Press MODE
repeatedly until ALM 1,
ALM 2, or ALM 3 appears.
To set alarm:
1) Press
SET
. Hour flashes. Press
+ or –
to change hour; hold
button to scan values.
2) Press
NEXT
. Minutes flash. Press
+ or –
to change minutes.
3) Press
NEXT
. AM/PM flashes if in 12-hour time format. Press
+ or –
to change.
4) Press
NEXT
. Alarm day setting flashes. Press
+ or – to select
DAILY, WKDAYS, or WKENDS.
5) Press
DONE
at any step when done setting.
To turn alarm on/off, press
START·SPLIT.
Alarm clock icon
a
appears when alarm is on in this mode and in
Time mode.
When alarm sounds, night-light flashes. Press any button to silence.
If no button is pressed, alarm will sound for 20 seconds and repeat
once five minutes later.
Each of the three alarms has a different alert melody.
occasion
Occasion mode allows you to set reminders for occasions, like
birthdays, anniversaries, holidays, and appointments. Press
MODE
repeatedly until OCCASN appears.
Today’s date is shown with today’s occasion in top line. Press
+ or –
to step through dates; hold button to scan dates. Occasion
for displayed date is always shown. Non-recurring occasions may
be set for dates up to one year in advance.
To set occasion:
1) Press
SET
. Date flashes. Press + or - to select date; hold button
to scan dates. Occasion for displayed date is always shown.
2) Press
NEXT
. Occasion flashes. Press + or - to change occasion.
ANNIV, BDAY, BILL-YR, and HOLI-YR repeat yearly and BILL-MO
repeats monthly.
3) To set occasions for other dates, press
NEXT and select date
and occasion as in previous steps.
4) Press
DONE
at any step when done setting.
Occasion Reminders
Watch alerts you of occasions at 8:00 AM on day of occasion. You
may choose to receive no alert or an alert at a different time or
day. You may choose different alerting for each occasion type.
E.g., all birthdays may alert one day prior while all holidays may
have no alert.
To set occasion reminder alerts:
1) Go to today’s date by pressing
+ or –
(hold button to scan
dates). You may also go to today’s date by simply entering
Occasion mode.
2) From today’s date, press
–
to go to ALERT SETUP.
3) Press
SET
. Occasion type flashes. Press
+ or – to select
occasion type. Your settings will affect all occasions of the
selected type.
4) Press
NEXT
. Alert status (ON/OFF) flashes. Press
+ or – to turn
alert on or off for selected occasion type. If OFF selected, next
|4 steps are skipped.
5) Press
NEXT
. Alert time hour flashes. Press
+ or –
to change
hour; hold button to scan values.
6) Press
NEXT
. Alert time minutes flash. Press
+ or –
to change
minutes.
7) Press
NEXT
. AM/PM flashes if in 12-hour time format.
Press + or –
to change.
8) Press
NEXT
. Alert day flashes. Press
+ or –
to set alert for 0 - 9
days prior to occasion.
9) To set alerts for other occasion types, press
NEXT
. Occasion
type flashes. Select occasion type as in step 3 and continue with
setting procedure.
10) Press
DONE
at any step when done setting.
Hand icon
F
appears when displayed occasion type has a remind
-
er alert. When alert sounds in Time mode, hand icon
F
flashes.
Press any button to silence. See Time mode for instructions on
viewing upcoming occasions.
TIP: For reminder at end of every month, set BILL-MO for first of
month and alert one day prior.
inDigLo
®
nighT-LighT wiTh nighT-moDe
®
feaTure
Press INDIGLO
®
button to illuminate watch display for 2 - 3
seconds (5 - 6 seconds while setting). Electroluminescent technolo-
gy used in the INDIGLO
®
button night-light illuminates entire watch
face at night and in low light conditions. Any button pressed while
INDIGLO
®
button night-light is on keeps it on.
Press and hold INDIGLO
®
for 4 seconds to activate NIGHT-MODE
®
feature. Moon icon
P
will appear in Time mode. Feature causes
any button press to activate INDIGLO
®
night-light for 3 seconds.
NIGHT-MODE feature may be deactivated by pressing and holding
INDIGLO
®
again for 4 seconds, or it automatically deactivates after
8 hours.
waTer resisTance
If your watch is water-resistant, meter marking or (
O
) is
indicated.
WARNING: TO MAINTAIN WATER-RESISTANCE, DO NOT PRESS
ANY BUTTONS UNDER WATER.
1. Watch is water-resistant only as long as lens, push buttons and
case remain intact.
2. Watch is not a diver watch and should not be used for diving.
3. Rinse watch with fresh water after exposure to salt water.
4. Shock-resistance will be indicated on watch face or caseback.
Watches are designed to pass ISO test for shock-resistance.
However, care should be taken to avoid damaging crystal/lens.
BaTTery
Timex strongly recommends that a retailer or jeweler replace
battery.
Battery type is on watch back. If present, push/short
internal reset switch after replacing battery. Battery life estimates
are based on certain assumptions regarding usage; battery life may
vary depending on actual usage.
DO NOT DISPOSE OF BATTERY IN FIRE. DO NOT RECHARGE.
KEEP LOOSE BATTERIES AWAY FROM CHILDREN.
Water-Resistance Depth
p.s.i.a. * Water Pressure Below Surface
30m/98ft
60
50m/164ft
86
100m/328ft
160
*pounds per square inch absolute
TIMEX INTERNATIONAL WARRANTY
Your TIMEX
®
watch is warranted against manufacturing defects by Timex
Group USA, Inc. for a period of ONE YEAR from the original purchase date.
Timex and its worldwide affiliates will honor this International Warranty.
Please note that Timex may, at its option, repair your watch by installing
new or thoroughly reconditioned and inspected components or replace it
with an identical or similar model. IMPORTANT — PLEASE NOTE THAT THIS
WARRANTY DOES NOT COVER DEFECTS OR DAMAGES TO YOUR WATCH:
1) after the warranty period expires;
2) if the watch was not originally purchased from an authorized Timex
retailer;
3) from repair services not performed by Timex;
4) from accidents, tampering or abuse; and
5) lens or crystal, strap or band, watch case, attachments or battery. Timex
may charge you for replacing any of these parts.
THIS WARRANTY AND THE REMEDIES CONTAINED HEREIN ARE EXCLUSIVE
AND IN LIEU OF ALL OTHER WARRANTIES, EXPRESS OR IMPLIED, INCLUDING
ANY IMPLIED WARRANTY OF MERCHANTABILITY OR FITNESS FOR PARTICULAR
PURPOSE. TIMEX IS NOT LIABLE FOR ANY SPECIAL, INCIDENTAL OR
CONSEQUENTIAL DAMAGES. Some countries and states do not allow limita-
tions on implied warranties and do not allow exclusions or limitations on
damages, so these limitations may not apply to you. This warranty gives
you specific legal rights and you may also have other rights which vary from
country to country and state to state.
To obtain warranty service, please return your watch to Timex, one of its
affiliates or the Timex retailer where the watch was purchased, together with
a completed original Watch Repair Coupon or, in the U.S. and Canada only,
the completed original Watch Repair Coupon or a written statement identify-
ing your name, address, telephone number and date and place of purchase.
Please include the following with your watch to cover postage and handling
(this is not a repair charge): a US$ 8.00 check or money order in the U.S.; a
CAN$7.00 cheque or money order in Canada; and a UK£2.50 cheque or money
order in the U.K. In other countries, Timex will charge you for postage and
handling. NEVER INCLUDE A SPECIAL WATCHBAND OR ANY OTHER ARTICLE
OF PERSONAL VALUE IN YOUR SHIPMENT.
For the U.S., please call 1-800-448-4639 for additional warranty information.
For Canada, call 1-800-263-0981. For Brazil, call +55 (11) 5572 9733. For
Mexico, call 01-800-01-060-00. For Central America, the Caribbean, Bermuda
and the Bahamas, call (501) 370-5775 (U.S.). For Asia, call 852-2815-0091.
For the U.K., call 44 020 8687 9620. For Portugal, call 351 212 946 017. For
France, call 33 3 81 63 42 00. For Germany/Austria, call +43 662 88921 30.
For the Middle East and Africa, call 971-4-310850. For other areas, please
contact your local Timex retailer or Timex distributor for warranty information.
In Canada, the U.S. and in certain other locations, participating Timex retailers
can provide you with a postage-paid, pre-addressed Watch Repair Mailer for
your convenience in obtaining factory service.
©2012 Timex Group USA, Inc. TIMEX and INDIGLO are trademarks of Timex
Group B.V. and its subsidiaries.
感谢您选购
TIMEX
®
手表。
请仔细阅读本说明,以了解
Timex
®
手表的使用方法。
功能与基本操作方法
• 12
或
24
小时制时间显示模式
•
按
MM-DD (
月月-日日
)
或
DD.MM (
日日-月月
)
格式显示日期
• 3
个时区的时间显示
•
有声响铃及/或静音震动警报
•
每小时报时功能选择
•
可显示中途时间和间隔时间、长达
100
小时的秒表计时功能
• 24
小时倒计时功能
(
含倒计时、秒表计时或重复计时功能
)
•
事件提示功能
•
水分补充计时功能
• 3
个含
5
分钟记忆备份并可按日/星期/周末设置的闹铃
•
可定制的模式设置 (隐藏不需要的模式)
•
带
NIGHT-MODE
®
功能的
INDIGLO
®
夜间照明灯
不断按
MODE
键进入各种模式
Chrono (
秒钟计时
)
、
Timer (
计时
)
、
Hydration (
水分补充计时
)
、
Alarm 1
(闹铃
1)
、
Alarm 2 (
闹铃
2)
和
Alarm 3 (
闹铃
3
)。按
MODE
退出当前模式并回到时间模式。
不同按键功能并在括号内说明相关设置作用
时间
(TIME)
设置时间、日期和其它功能:
1
) 在显示时间和日期的模式下,按住
SET
键。
2
) 当前时区
(1
、
2
或
3)
开始闪烁。可按
+
或
–
选择设定所需要时区。
3
) 按
NEXT
。小时开始闪烁。按
+
或
–
调整小时
(
包括
AM/PM)
;按
住键钮查找小时数值。
4
) 按
NEXT
。分钟开始闪烁。按
+
或
–
调整分钟。
5
) 按
NEXT
。秒钟开始闪烁。按
+
或
–
将秒钟归零。
6
) 按
NEXT
。月份开始闪烁。按
+
或
–
调整月份。
7
) 按
NEXT
。星期开始闪烁。按
+
或
–
调整星期。
8
) 按
NEXT
。年份开始闪烁。按
+
或
–
调整年份。
9
) 按
NEXT
设置其它功能。按
+
或
–
调整数值并按
NEXT
进入
NEXT
下一个设置。完成任何步骤后,都可以按
DONE
退出并保存
设置。各种可设定功能包括
12
或
24
小时制格式、
MM-DD (
月月-
日日
)
或
DD-MM (
月月-日日
)
日期格式、每小时报时鸣音
N
、按键
鸣音、可定制的模式设置
(
选“
HIDE
”隐藏不需要的模式—这些模式
即会从模式排列中清除
)
。
如果将某种模式加以隐藏,以后也可以采用上述步骤将该模式还原。
按一下
START·SPLIT
并将该键按住查看第二个时区的时间。按两下
START·SPLIT
并将该键按住查看第三个时区的时间。继续按住键钮
4
秒钟,则会切换到所显示时区的时间。
按住
STOP·RESET
查看
NEXT
下一个将要发生的事件
(
见事件模式说
明
)
。放开并马上再按住键钮查看接下来的事件。
双模式提供闹钟和计时警报类型选择:听得见的铃声,静音震动,或者震动
加响铃组合。设置请参考第
9
点。
秒表计时器
这一模式提供秒表 (
stopwatch
) 计时功能。按
MODE
进入秒表计时
模式。
开始按
START·SPLIT
。秒表计时能以百分之一秒计时最高达一小时,
然后以秒计时达
100
小时。秒表计时标志
w
开始闪烁,表示已开始
计时。
停止按
STOP·RESET
。秒表标志
w
停止闪烁,表示已停止计时。
继续按
START·SPLIT
恢复计时,或按住
STOP·RESET
重新计时
(
清
除
)
。
秒表计时运行时,即使退出模式计时仍会继续工作。秒表标志
w
会在
时间模式下显示。
在秒表计时状态下,按
START·SPLIT
截取分时时间。分段和分时时间将
以分段时间号码显示。
设定显示格式,按
SET
。然后按
+
或
–
选择所需要的格式。按
DONE
(
完成
)
退出。
注:
•
截取时间时,时间显示会冻结
10
秒钟。这时可按
MODE
立即解冻
并显示运行中的秒钟计时。
TIMER
(
计时器
)
计时模式提供带提示音的倒计时功能。不断按
MODE
,直到出现
TIMER
。
倒计时设置:
1
) 按
SET
。小时开始闪烁。按
+
或
–
调整小时;按住键钮查找小时数
值。
2
) 按
NEXT
。分钟开始闪烁。按
+
或
–
调整分钟。
3
) 按
NEXT
。秒钟开始闪烁。按
+
或
–
调整秒钟。
4
) 按
NEXT
。倒计时结束时所应采取的行动开始闪烁。按+或-选择带
箭头计时标志
I
下的
STOP
或
REPEAT
。
5
) 按
DONE
结束每一步骤的设置。
按
START·SPLIT
开始计时。计时器按每秒钟开始倒计。计时标志
H
开始闪烁,表示计时器已开始计时。
按
STOP·RESET
暂停倒计时。计时标志
H
停止闪烁,表示计时器已
停止计时。
按
START·SPLIT
恢复倒计时,或按
STOP·RESET
重新计时。
倒计时结束
(
计时器回到零
)
时,手表发出短促音鸣,夜间照明灯开始
闪示。按任何键钮均可停止闹铃声。如选择了
REPEAT AT END
,倒计
时则会永远重复下去。
即便退出模式,计时器仍会继续工作。计时标志
H
会在时间模式下
出现。
水分补充
水分补充模式具有倒计时提示功能,提醒您在锻炼中补充水分。不断按
MODE
,直到出现
HYDRA
。
水分补充计时设置:
1
) 按
SET
。分钟开始闪烁。按+或-调整分钟;按住键钮查找分钟数值。
2
) 按
NEXT
。秒钟开始闪烁。按+或-调整秒钟;按住键钮查找秒钟数
值。
3
) 按
DONE
完成每一步骤的设置。
开始水分补充计时按
START·SPLIT
。计时器按每秒钟开始倒计。水滴
标志
D
开始闪烁,表示计时器已开始计时。
按
STOP·RESET
暂停倒计时。水滴标志
D
停止闪烁,表示计时器已
停止计时。
按
START·SPLIT
恢复倒计时,或按
STOP·RESET
重新计时。
倒计时结束
(
计时器回到零
)
时,手表发出短促音鸣,夜间照明灯开始
闪示。按任意键停止警音。
即便退出模式,水分补充计时器仍会继续工作。计时标志
D
会在时间
模式下出现。
ALARM
(
闹铃
)
手表可有三个闹铃设置。不断按
MODE
直到出现
ALM 1
、
ALM 2
或
ALM 3
。
闹铃设置:
1
) 按
SET
。小时开始闪烁。按
+
或
–
调整小时;按住键钮查找小时
数值。
2
) 按
NEXT
。分钟开始闪烁。按
+
或
–
调整分钟。
3
) 按
NEXT
。如选择
12
小时制,则
AM/PM
开始闪烁。按
+
或
–
调
整。
4
) 按
NEXT
。闹铃日设置开始闪烁。按
+
或
–
选择
DAILY (
每日
)
、
WKDAYS (
每星期中
)
、或
WKENDS (
每周末
)
。
5
) 按
DONE
结束每一步骤的设置。
按
START·SPLIT
打开/关闭闹铃。
闹钟标志
a
将出现在此模式和时间模式下。
闹铃响起时,夜间照明灯会开始闪示。按任何键钮均可停止闹铃声。
如不按任何键钮,闹铃会持续响
20
秒,然后每隔五分钟重复一次。
每个闹铃设置都有不同的闹音旋律。
事件
事件模式使您可以为生日、周年日、节假日及约会等各种事件设置提
示。不断按
MODE
,直到出现
OCCASN
。
今天日期和今天的事件在最上面一行显示。按
+
或
–
逐天进行查看;
按住键扫描不同日期。所显示日期内都会出现当天的事件。可以根据日
期预设长达一年的非重复性事件。
事件设置:
1
) 按
SET
。日期开始闪烁。按+或-调整日期;按住键钮扫描不同日
期。所显示日期内都会出现当天的事件。
2
) 按
NEXT
。事件开始闪烁。按+ 或
–
更改事件。
ANNIV (
周年
)
、
BDAY (
生日
)
、
BILL-YR (
付款-年
)
及
HOLI-YR (
节日-年
)
均按年重
复,而
BILL-MO (
付款-月
)
则按月重复。
3
) 按
NEXT
设置其它日期的事件,并按照以上步骤选择日期和事件。
4
) 按
DONE
结束每一步骤的设置。
事件提示功能
手表会在事件发生当天的上午
8
:
00
时发出事件提示警告。您可以选择
在不同天或不同时间里接受或不接受提示警告。您还可以为各种类型的
事件选择不同的警告。例如,所有生日都在前一天发出警告,而所有节
假日都不发出警告。
事件提示设置:
1
) 按
+
或
–
进入今天日期
(
按住键钮扫描日期
)
。或您亦可进入重要
事项模式,即可看到今天的日期。
2
) 按
–
从今天日期进入
ALERT SETUP
。
3
) 按
SET
。事件类型开始闪烁。按
+
或
–
选择事件类型。您的设置
将影响所有所选类型的事件。
4
) 按
NEXT
。警告状态
(
开/闭
)
开始闪烁。按
+
或
–
启动或关闭所选
事件类型的警告。如果选择关闭,则不用采取下面的
4
个步骤。
5
) 按
NEXT
。警告时间的小时开始闪烁。按
+
或
–
调整小时;按住键
钮查找小时数值。
6
) 按
NEXT
。警告时间的分钟开始闪烁。按
+
或
–
调整分钟。
7
) 按
NEXT
。如选择
12
小时制,则
AM/PM
开始闪烁。按
+
或
–
调
整。
8
) 按
NEXT
。警告日期开始闪烁。按
+
或
–
设置事件发生前
0
-
9
天
发出警告
9
) 按
NEXT
为其它类型事件设置警告。事件类型开始闪烁。按照步骤
3
选择事件类型并继续进行设置。
10
) 按
DONE
结束每一步骤的设置。
当显示的事件类型含有提示警告时
F
就会出现。当警告在时间模式
下响起时,手掌标志
F
就会闪示。按任何键钮均可停止闹铃声。有关
查看即将到来的时间的指南,见时间模式的说明。
提示:为月底设置提示时,可通过
BILL-MO
设定每月第一天及提前一
天发出警告。
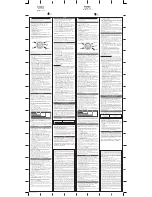
SET
(设置完毕)
INDIGLO
®
键
MODE
(
模式
)
(NEXT)
(
下一个
)
START/SPLIT
(
开始/分项计时
)
(+)
STOP/RESET
(
停止/重置
)
(–)
LAP 1 = 7.11
LAP 2 = 7.50
SPLIT 2 = 15.01
LAP 3 = 7.08
SPLIT 3 = 22.09
LAP 4 = 7.30
SPLIT 4 = 29.39
SPLIT 1 = 7.11
TIMEX
国际保修规定
自原购买日起一年内,
Timex Group USA Inc.
保证您的
TIMEX
®
手表不会出现 制
造缺陷。
Timex
及其遍布全球的加盟机构都会承诺这项国际保修义务。
请注意,
Timex
在为您修理手表时,可酌情安装新配件或经过全面 修复和检验的
配件,也可用相同或类似的型号加以更换。
重要说明—请注意,本保修服务不包
括在以下情况中出现的手表故障或损坏:
1)
保修期已过;
2)
如果手表是从未经授权的
Timex
零售店购买;
3)
手表由
Timex
之外的机构进行维修;
4)
意外事故、自行拨弄或使用不当;以及
5)
镜面或水晶镜面、表带或表链、表壳、附件或电池受损。
Timex
会为更换
这些配件向您收取一定费用。
本保修规定及其所含补偿条款具有专有性质,并取代所有其他明示或暗示的保修
承诺,包括任何对适销性和针对任何特定目的的适用性的暗示保证。
TIMEX
对任
何特别、附带性或后果性的损害赔偿概不负责。部分国家和州不允许限制暗示性
保证,也不允许排除或限制有关损失,因此上述限制可能对您无效。本保修规定
赋予您具体的合法权利,同时因所在国或所在州而异,您可能还享有其他权利。
如需保修服务,请将您的手表退还给
Timex
、其加盟机构或购买该表的
Timex
零售店,同时附上填好的
Watch Repair Coupon
(手表维修单)原件。如果您在
美国或加拿大,则可附上填好的
Watch Repair Coupon
(手表维修单)原件或一
份 书面声明,其中注明您的姓名、住址、电话号码以及购买日期和地点。请随表
按以下费率寄交邮费和手续费(不属于修理费):美国用户请寄一张
8.00
美元的支
票或汇票;加拿大用户请寄一张
7.00
加元的支票或汇票;英国用户则请寄一张
2.50
英镑的支票或汇票。其他国家和地区的用户,
Timex
会相应收取邮费和手续
费。切勿在寄送的包裹内夹带特殊款式的表带或其他个人贵重物品。
有关保修的其他信息,在美国请致电
1-800-448-4639
。加拿大请致电
1-800-
263-0981
。巴西请致电
+55 (11) 5572 9733
。墨西哥请致电
01-800-01-060-00
。
中美洲、加勒比海、百慕达及巴哈马地区请致电
(501) 370-5775
(美国)。亚洲
请致电
852-2815-0091
。英国请致电
44 020 8687 9620
。葡萄牙请致电
351 212
946 017
。法国请致电
33 3 81 63 42 00
。德国/奥地利请致电
+43 662 88921 30
。
中东和非洲请致电
971-4-310850
。其他地区请与当地
Timex
零售商或
Timex
经销商联系以了解保修信息。在加拿大、美国和部分其他地区,参与有关计划的
Timex
零售商可为您提供一个邮资已付并印好收件地址的“手表修理信封”,以
便您获得厂家服务。
©2012
年
Timex Group USA, Inc.
版权所有
TIMEX
、
INDIGLO
和
NIGHT-MODE
是
Timex Group B.V
及其分公司的商标。
INDIGLO
®
NIGHT-MODE
®
夜间照明夜间照明功能
按
INDIGLO
®
键可持续照亮表盘显示区
2
-
3
秒
(
在设置时会显示
5
-
6
秒
)
。
用于
INDIGLO
®
键夜间照明的电致发光技术可在夜间和低光度环境下
照亮整个表盘。
INDIGLO
®
键夜间照明启动时,按任何键就会让照明
灯亮着。
按住
INDIGLO
®
并持续
4
秒钟即可启动
NIGHT-MODE
®
功能。月亮
形标志
P
会在时间模式下出现。使用此功能后,可以按任意键启动
INDIGLO
®
夜间照明灯并持续照明
3
秒钟。再次按住
INDIGLO
®
4
秒钟
后,即可解除
NIGHT-MODE
功能,或者在
8
小时后该功能会自动解除。
防水功能
您的手表如果具有防水性能,则会显示米数刻度或 (
O
)。
警告:为保持防水性能,请勿在水中按任何键钮。
1
. 只有在镜面、键钮和表壳完好无损的情况下,本表才能保持防水性
能。
2
. 本表非跳水用手表,不宜在跳水时使用。
3
. 接触盐水后,请用清水冲洗。
4
. 表盘或表壳背面会注明防震性能。本表的防震设计通过了
ISO
国际标
准测试。但应注意避免损坏水晶/晶片。
电池
Timex
强烈建议由零售商店或钟表店来更换电池。
电池类型在手表背面
注明。如配有内部重置开关,请在换好电池后按下/接通该重置开关。
电池寿命是根据对使用方式的某些假设而估计确定的;电池寿命长短取
决于实际使用方式。
切勿将电池扔到火中。请勿为电池充电。请将拆下的电池放在远离儿
童的地方。
防水深度
p.s.i.a. *
水面以下水压
30
米/
98
英尺
60
50
米/
164
英尺
86
100
米/
328
英尺
160
*按磅计算的每平方英寸压力绝对值
SET
(DONE)
INDIGLO
®
BUTTON
MODE
(NEXT)
START/SPLIT
(+)
STOP/RESET
(–)
Printed in the Philippines


