TPM 053
Version 1.0, May 30, 2017
Page | 28
SOFTWARE
Gateway Installation and Operation Manual
C
ONFIGURATION AND
C
OMMUNICATION
T
EST
P
ROCEDURE
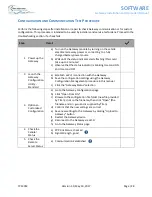
Perform the following steps after installation or repair to check Gateway communication or for custom
configuration. This procedure is intended to be used by installers and service technicians. Proceed to the
troubleshooting section if a check fails.
Step
Detail
1.
Power up the
Gateway
a)
Turn on the Gateway module by turning on the vehicle
electrical accessory power or connecting to a fully
charged battery power source
b)
Wait until the status indicator starts flashing (this could
take up to 2 minutes)
c)
Observe that the status indicator is blinking ½ second ON
and ½ second OFF
2.
Launch the
Gateway
Configuration
Utility -
Standard
a)
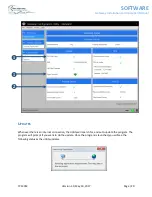
Establish a Wi-Fi connection with the Gateway
b)
Save the configuration settings using the Gateway
Configuration Management procedure in this manual
c)
Click the “
Gateway
Status” selection
3.
Optional
–
Customized
Configuration
a)
Go to the Gateway Configurations page
b)
Click “Open From File”
c)
Browse to the configuration file folder (new file provided
by Titan)
, click on the filename, then click “Open”
(the
filename ends in .gwu and is supplied by Titan)
d)
Confirm that the new settings are correct
e)
Save new settings to the Gateway
by clicking “Upload to
Gateway
” button
f)
Restart the Gateway device
g)
Reconnect to the Gateway via Wi-Fi
h)
Go to the Gateway Status page
4.
Check the
Cellular
Status
a)
PPP Link Status, checked
b)
Signal Strength, good
5.
Check the
Remote
Server Status
a)
Communication Established
❖


