background image

16

© Titan Tool Inc.  Todos los derechos reservados.

Precauciones de Seguridad

Este manual contiene información que tiene que leerse y
entenderse antes de utilizar el equipo. Cuando se encuentre
en una área que tenga uno de los siguientes símbolos, esté
muy atento y asegúrese que tiene en cuenta la seguridad.

Estos símbolos indican un peligro potencial que puede causar
graves daños o pérdidas humanas. A continuación se explica
información importante para la seguridad.

Estos símbolos indican un peligro potencial para usted o para
su equipo. A continuación se explica información que puede
prevenir daños en el equipo o cómo evitar las causas que
provocan daños menores.

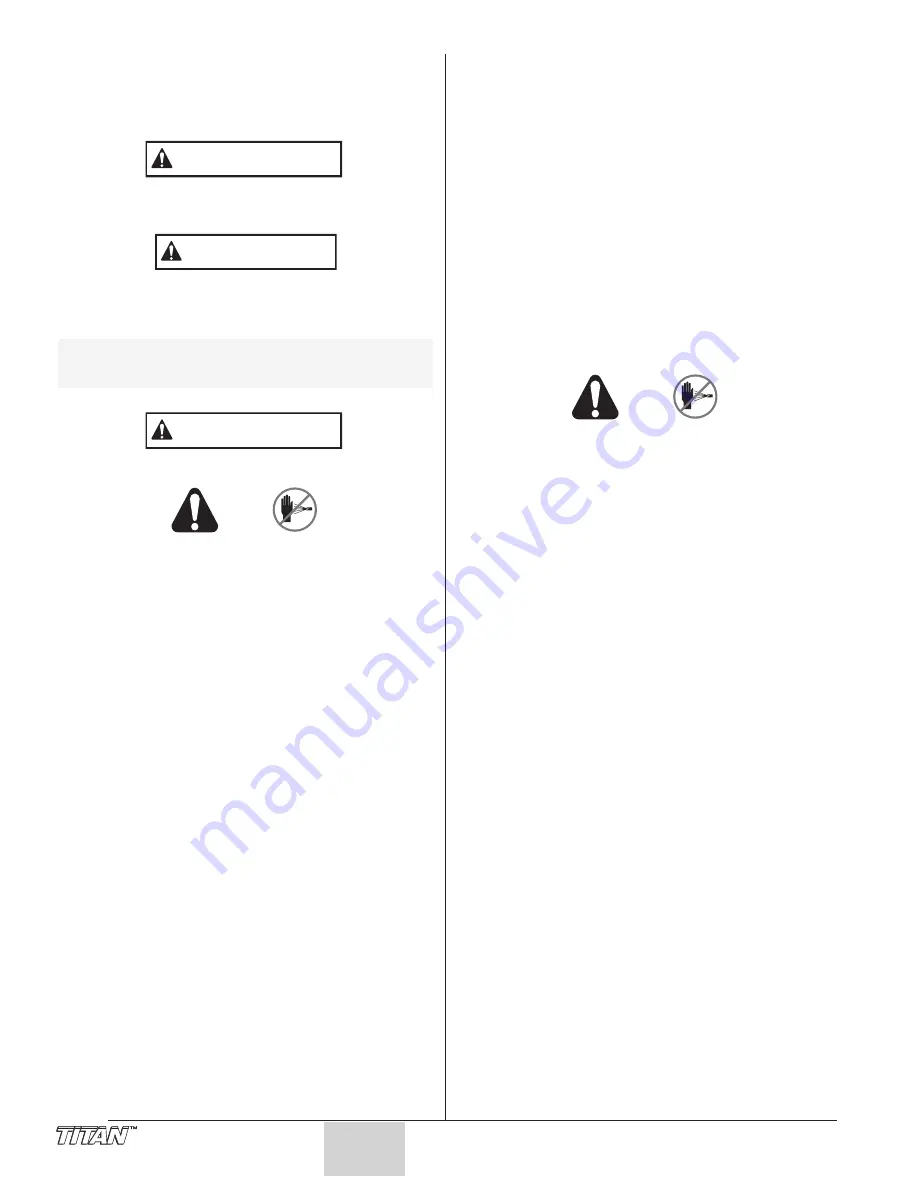
Las unidades sin aire desarrollan presiones de
pulverización extremadamente altas.

• Nunca poner los dedos, las manos ni ningún otro

miembro del cuerpo en la boquilla del pulverizador.

• Nunca apuntar la pistola pulverizadora a uno mismo ni a

ninguna otra persona.

• Nunca utilizar la pistola pulverizadora sin la protección de

seguridad.

¡Atención! ¡Peligro de lesiones por inyección!

En caso de lesiones en la piel causadas por materiales de
revestimiento o solventes, consultar a un médico
inmediatamente. Informar al médico del tipo de material de
revestimiento o agente de limpieza con el que se causó la lesión.

Las instrucciones de empleo señalan que deben
observarse siempre los siguientes puntos antes de
empezar:

1. No deben utilizarse las unidades averiadas.
2. Asegurar la pistola pulverizadora utilizando el pasador de

seguridad en el disparador.

3. Asegurarse de que la unidad está puesta a tierra

correctamente.

4. Comprobar las presiones operativas permisibles.
5. Comprobar todas las conexiones para ver si existen fugas.

Deben observarse estrictamente las instrucciones
referentes a la limpieza y mantenimiento regular de la
unidad.
Antes de realizar ningún trabajo en la unidad o cuando se
tome un descanso en el trabajo, deben observarse las
siguientes normas:

1. Aliviar la presión de la pistola pulverizadora y de la

manguera.

2. Asegurar la pistola pulverizadora utilizando el pasador de

seguridad en el disparador.

3. Apagar el motor.

¡Ser precavido!

ADVERTENCIA

NOTA: Las notas dan información importante que

tendría que ser considerada con especial
atención.

PRECAUCION

ADVERTENCIA

Español

Deben observarse todas las ordenanzas locales en vigor.
Para asegurar un funcionamiento seguro de los sistemas
sin aire deben seguirse las normas de seguridad que se
listan a continuación:

1. Para evitar peligros, leer detalladamente las instrucciones

de empleo y seguir las instrucciones que se indican en las
mismas.

2. No utilice los materiales de revestimiento con un punto de

inflamación debajo de 21ºC (70ºF).

3. Se prohíbe el uso de esta unidad en talleres que estén

bajo ordenanzas de prevención de explosiones.

4. Nunca operar cerca de fuentes de combustión, v.gr.:

llamas abiertas, cigarrillos, cigarros y pipas, chispas,
alambres al rojo vivo, superficies calientes, etc.

5. ¡Atención! ¡Riesgo de lesiones por inyección!

Nunca apuntar la pistola pulverizadora a uno mismo ni a
otras personas.
Nunca poner los dedos o las manos en la boquilla del
pulverizador. Las presiones de pulverización que son muy
altas pueden ocasionar lesiones muy graves. Nunca
utilizar la pistola pulverizadora sin la protección de
seguridad.

Al instalar y extraer la puntera y durante los descansos en el
trabajo, la pistola pulverizadora debe estar siempre
bloqueada, de forma que no pueda activarse.

6. Usar equipo respiratorio al pulverizar. El operario debe

estar provisto con una mascarilla protectora.
Para evitar enfermedades profesionales, deben
observarse las regulaciones del fabricante con respecto a
los materiales, solventes y agentes de limpieza utilizados
al preparar, trabajar con y limpiar la unidad. Para proteger
la piel es necesario usar ropa protectora, guantes y, en
algunos casos, crema protectora de la piel.

7. La pistola pulverizadora y la manguera de alta presión

entre la unidad y las pistola pulverizadora debe ser de un
estándar suficiente para la presión producida en la
unidad.
En la manguera debe indicarse con una marca de
identificación permanente la presión operativa permisible para
la manguera de alta presión, el fabricante y la fecha de
fabricación de la misma. Además, debe estar construida de
tal forma que la resistencia eléctrica entre las conexiones a la
unidad y la pistola pulverizadora sea igual a o inferior a un
megaohmio.

8. En ciertas condiciones la velocidad del caudal puede

causar una carga electroestática en la unidad. Esto puede
causar chispas o llamas en la descarga. Por lo tanto, es
importante que la unidad esté siempre puesta a tierra
sobre la instalación eléctrica. El contacto debe realizarse
usando un receptáculo a prueba de sacudidas puesto a
tierra conforme a las regulaciones.

9. ¡Atención! Observar las siguientes indicaciones al trabajar

en el interior y al aire libre:
No deben llevarse gases de solventes a la unidad. No
deben formarse gases de solventes cerca de la unidad.
Instalar la unidad en el lado opuesto al objeto que se vaya a
pulverizar. Cuando se pulverice al aire libre, tener en cuenta
la dirección del viento. Al trabajar en el interior, asegurarse
de que haya suficiente ventilación para la extracción de los
gases de solvente. Debe observarse una distancia mínima
de 3 m entre la unidad y el objeto que se esté pulverizando.

10. El usuario debe tener instalado un equipo de extracción

conforme a los reglamentos locales.

11. Los objetos que se estén pulverizando deben estar

puestos a tierra.

12. Al limpiar la unidad, no pulverizar nunca solventes en un

envase que tenga una abertura pequeña (piquera). Puede
formarse una mezcla explosiva de gas/aire. El envase
debe estar puesto a tierra.

Summary of Contents for 340

Page 1: ...Airless Sprayer Owner s Manual For professional use only NOTE This manual contains important warnings and instructions Please read and retain for reference International Model NOTE This manual contains important warnings and instructions Please read and retain for reference Model Number Skid Complete 230V 704 2115 Skid Complete 110V 704 2125 ...

Page 2: ...t be strictly observed Before any work is done on the unit or for every break in work the following rules must be observed 1 Release the pressure from the spray gun and hose 2 Secure the spray gun using the safety catch on the trigger 3 Turn off the motor Be safety conscious All local regulations in force must be observed In order to ensure safe operation of the airless systems the safety regulati...

Page 3: ... AN INJECTION INJURY AS A SIMPLE CUT Injection can lead to amputation See a physician immediately HAZARD EXPLOSION OR FIRE Solvent and paint fumes can explode or ignite causing property damage and or severe injury PREVENTION Fire extinguishing equipment must be present and in good working order Use only conductive or earthed high pressure fluid hoses for airless applications Be sure that the gun i...

Page 4: ... wear to the packings 7 Make sure the electrical service is correct for the unit 8 Plug the power cord into a properly grounded outlet at least 7 6m 25 from the spray area Always use a minimum 12 gauge three wire extension cord with a grounded plug Never remove the third prong or use an adapter Preparing a New Sprayer If this unit is new it is shipped with test fluid in the fluid section to preven...

Page 5: ...e unlocked position Ground the gun by holding it against the edge of the metal container while flushing Failure to do so may lead to a static electric discharge which may cause a fire WARNING WARNING Trigger lock in locked position WARNING NOTE Make sure that the spray gun does not have a tip or tip guard installed 12 Trigger the gun into the metal waste container until all air and solvent is flus...

Page 6: ...e so as to lap the previous pattern by 50 Too Thick Offspray Arcing Gun at angle start stroke release trigger pull trigger end stroke WARNING 6 Titan Tool Inc All rights reserved For corners and edges split the center of the spray pattern on the corner or edge and spray vertically so that both adjoining sections receive approximately even amounts of paint When spraying with a shield hold it firmly...

Page 7: ...n hose into the metal waste container 9 Turn off the unit by moving the ON OFF switch to the OFF position 10 Move the PRIME SPRAY valve up to its SPRAY position 11 Turn on the unit Ground the gun by holding it against the edge of the metal container while flushing Failure to do so may lead to a static electric discharge which may cause a fire 12 Trigger the gun into the metal waste container until...

Page 8: ...will not dislodge from the pump housing Remove the front cover plate Using a rubber mallet carefully tap on the front of the motor crankshaft that extends through the connecting rod CAUTION WARNING 8 Titan Tool Inc All rights reserved 9 Secure the motor with the four motor mounting screws 10 Using the double sided tape and the tie wrap that came with the new motor attach the capacitors to the moto...

Page 9: ...ly into the pump housing 12 Thread the set screw into the pump housing and tighten securely 13 Reassemble the pump by reversing steps 1 6 Make sure the transducer is aligned properly with the hole in the pump block during reassembly Improper alignment may cause damage to the transducer o ring CAUTION WARNING Front Cover Pump Housing Front Cover Screw 2nd Stage Gear Thrust Washer Motor Gear and Cra...

Page 10: ...tlet Valve Ball Upper Cage Upper Seal Piston Rod O Ring Foot Valve Housing Foot Valve Seat Foot Valve Ball Bushing O Ring Lower Cage Lower Seal WARNING 10 Titan Tool Inc All rights reserved Repacking the Fluid Section 1 Remove the foot valve and outlet valve assemblies using the steps in the Servicing the Valves procedure above 2 Using 3 8 a hex wrench loosen and remove the two pump block mounting...

Page 11: ...ed on inspection clean or replace the seal 4 Turning counterclockwise thread the new or cleaned filter into the pump block 5 Slide the filter housing over the filter and thread it into the pump block until secure Pump Block Seal Filter Filter Housing NOTE Left handed threads require turning the filter clockwise to remove If the filter breaks off in the pump block use a small wood screw to remove N...

Page 12: ...s following the Servicing the Fluid Section procedure in the Maintenance section of this manual 10 Take unit to a Titan authorized service center 1 Repack the pump following the Servicing the Fluid Section procedure in the Maintenance section of this manual 2 Replace the piston rod following the Servicing the Fluid Section procedure in the Maintenance section of this manual Cause 1 The unit is not...

Page 13: ...a minimum of 15m 50 x 10mm 1 4 grounded textile braid airless paint spray hose 2 Replace the spray tip following the instructions that came with the spray gun 3 Rotate the pressure control knob counterclockwise to decrease spray pressure 1 Replace the spray tip with a new or smaller spray tip following the instructions that came with the spray gun 2 Rotate the pressure control knob to adjust the p...

Page 14: ...surfaces chaudes etc 5 Attention Risque de blessure par injection Ne jamais pointer le pistolet vers vous mêmes ou une personne quelconque Ne jamais mettre les doigts ou la main dans le jet de pulvérisation Les très hautes pressions de pulvérisation peuvent provoquer des blessures très graves N utiliser jamais le pistolet sans sa protection Pour le montage ou démontage de la tête de pulvérisation ...

Page 15: ...t un médecin DANGER EXPLOSION OU INCENDIE Les vapeurs de solvant ou de peinture sont explosives et inflammables et peuvent causer des dommages matériels et ou corporels sérieux MESURES PREVENTIVES Toujours avoir un extincteur en état de fonctionner à portée de la main Utiliser uniquement des flexibles haute pression conducteurs ou reliés à la terre pour les utilisations sans air comprimé S assurer...

Page 16: ...nzas de prevención de explosiones 4 Nunca operar cerca de fuentes de combustión v gr llamas abiertas cigarrillos cigarros y pipas chispas alambres al rojo vivo superficies calientes etc 5 Atención Riesgo de lesiones por inyección Nunca apuntar la pistola pulverizadora a uno mismo ni a otras personas Nunca poner los dedos o las manos en la boquilla del pulverizador Las presiones de pulverización qu...

Page 17: ...YECCION COMO UN SIMPLE CORTE La inyección puede conducir a la amputación Consultar a un médico inmediatamente Español PELIGRO EXPLOSION O INCENDIO Los gases de solventes y pintura pueden explotar o prender fuego causando daños a la propiedad y o lesiones graves PREVENCION Se debe tener a mano un equipo de extintor de incendios en buen estado de funcionamiento Usar solamente mangueras de fluidos de...

Page 18: ... 1 704 181 Screw 4 2 704 232 Motor cover 1 3 Motor assembly 1 4 704 179 Left leg assembly 1 5 761 178 Screw 4 6 704 185 Fluid section assembly 1 Item Part Description Quantity 7 704 117 Screw 2 8 Gear box assembly 1 9 704 178 Right leg assembly 1 10 700 258 PRIME SPRAY valve assembly 1 11 704 300 Suction set assembly 1 ...

Page 19: ...otor 230V complete includes items 1 5 6 10 and 11 1 704 277 Motor 110V complete includes items 1 5 6 10 and 11 1 8 704 258 Y adapter positive red 1 9 704 331 Gasket 1 10 704 250 Motor fan 1 11 854 915 Screw 1 12 770 099 Tie wrap not shown 1 13 314 991 Tape not shown 1 NOTE All electrical work should be performed by a Titan authorized service center Electrical Schematic 230V Electrical Schematic 11...

Page 20: ...20 Titan Tool Inc All rights reserved Gear Box Assembly 2 1 10 11 8 9 13 12 14 15 17 18 16 19 20 21 22 3 25 1 27 29 28 1 30 26 23 24 4 5 6 7 ...

Page 21: ...3 704 169 MIcroswitch mounting plate 1 24 704 125 Washer 2 25 700 785 Lock washer 2 26 704 380 ON OFF switch 1 27 800 377 Circuit breaker 230V 1 704 211 Circuit breaker 110V 28 710 127 Set screw 1 29 704 373 Capacitor rectifier kit 230V includes item 22 1 704 363 Capacitor rectifier kit 110V includes item 22 1 30 704 441 Electrical box cover 1 Suction Set Assembly P N 704 300 Item Part Description...

Page 22: ...7 24 23 27 28 29 30 31 32 33 34 35 36 Install lower packings with raised lip and O ring facing up Install upper packing with raised lip and O ring facing down O Ring O Ring Raised Lip Raised Lip NOTE Packing kit P N 703 401 includes those items marked with an Also included are packing grease P N 700 203 and piston guide tool P N 700 793 ...

Page 23: ...rmined by the fan width required for a specific job and by the orifice size that will supply the desired amount of fluid and accomplish proper atomization For light viscosity fluids smaller orifice tips generally are desired For heavier viscosity materials larger orifice tips are preferred Please refer to the chart below The following chart indicates the most common sizes and the appropriate mater...

Page 24: ...ACCESSORIES EQUIPMENT MATERIALS OR COMPONENTS SOLD BUT NOT MANUFACTURED BY TITAN THOSE ITEMS SOLD BUT NOT MANUFACTURED BY TITAN SUCH AS GAS ENGINES SWITCHES HOSES ETC ARE SUBJECT TO THE WARRANTY IF ANY OF THEIR MANUFACTURER TITAN WILL PROVIDE THE PURCHASER WITH REASONABLE ASSISTANCE IN MAKING ANY CLAIM FOR BREACH OF THESE WARRANTIES Warranty United States Sales Service 1 800 526 5362 Fax 1 800 528...

Reviews: