background image

3515 Flex-Wing Rotary Cutter 

44 

Titan  Implement,  LLC                

February 2020 


(423) 334-0012 

9.  Service and Maintenance

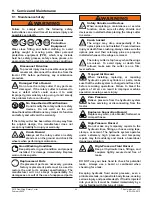
9.1  Maintenance Safety

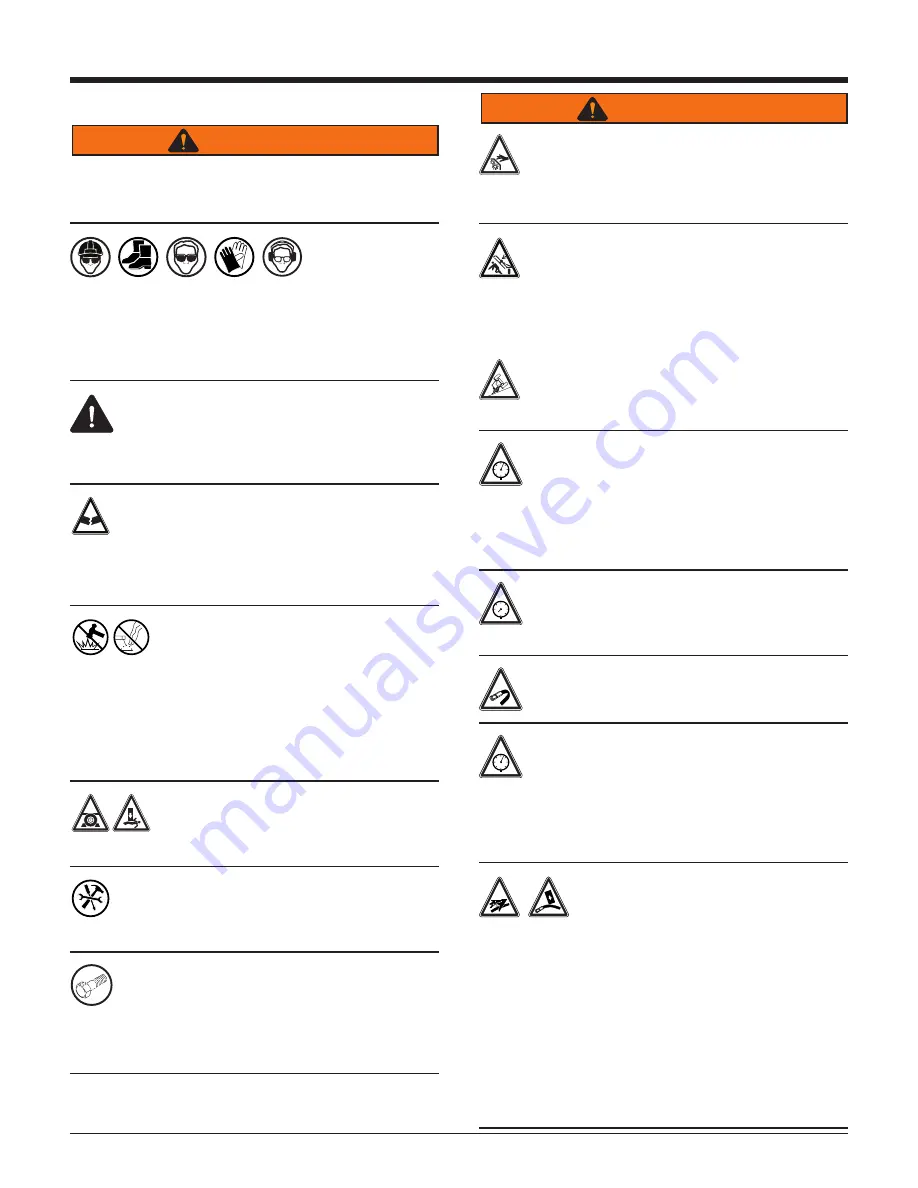
WARNING

Failure to comply with the following safety 

instructions can and will result in serious injury and 

possibly even death.


Personal  

Protection  

Equipment  

Wear  close  fitting  and  belted  clothing  to  avoid 

getting caught in moving parts. Wear personal 

protection equipment (PPE), which may include 

hard hat, safety glasses, safety shoes, gloves, etc. 

appropriate for the work site and working conditions.

Disconnect Driveline


To prevent injury due to possible unexpected 

movement, disconnect the driveline from the 

tractor PTO before performing any maintenance 

procedure.  

Damaged Parts Hazard 


Do not use the rotary cutter if any parts are  

damaged.  If the rotary cutter is believed to 

have a defect which could cause it to work 

improperly, immediately stop using it and remedy 

the problem before continuing.

No Unauthorized Modifications


Do not modify the rotary cutter or safety 

devices. Do not weld on the unit. 


Unauthorized modifications may impair its function 

and safety and will void the warranty.  


If the rotary cutter has been altered in any way from 

the original design, the manufacturer does not 

accept any liability for injury or warranty.

Crush Hazard   

Always set the rotary cutter on safety 

stands or on the ground and chock the 

wheels when performing maintenance. 

Good Working Condition


Keep all parts in good condition and properly 

installed. Fix damage immediately. Replace 

worn or broken parts. 

OEM

Replacement Parts


If replacement parts are necessary, genuine 

factory replacement parts must be used to 

restore  the  unit  to  its  original  specifications.  The 

manufacturer will not accept responsibility for 

damages as a result of the use of unapproved parts.

WARNING

Safety Shields and Devices


When completing a maintenance or service 

function, make sure all safety shields and 

devices are installed before placing the rotary cutter 

in service.

Crush hazard


The wings may drop unexpectedly if the 

uplock pins are not installed. To avoid serious 

injury or death from crushing, always make sure the 

uplock pins and their retaining pins are properly 

installed whenever the wings are raised.

The rotary cutter is top heavy when the wings 

are raised.  To avoid injury or death from 

rollover,  make  sure  the  cutter  is  on  a  firm, 

level surface.


Trapped Air Hazard 


When installing, replacing, or repairing 

hydraulic system cylinders or parts, make 

sure that the entire system is charged and free of air 

before resuming operations. Failure to bleed the 

system of all air can result in improper machine 

operation, causing severe injury.

0


Zero Pressure 


Relieve pressure from the hydraulic system 

before servicing or disconnecting from the 

tractor.


Explosive Separation Hazard 


Replace any worn, cut, abraded, flattened, or 

crimped hoses. 


High-Pressure Hazard 


Do not make any temporary repairs to the 

hydraulic lines, fittings, or hoses using tape, 

clamps, or cement. The hydraulic system operates 

under extremely high pressure and temporary 

repairs may fail suddenly and create a hazardous/

dangerous situation.

High-Pressure Fluid Hazard 


Keep  all  hydraulic  lines,  fittings,  and 

couplers tightly secured and free of 

leaks.   


DO NOT use your bare hand to check for potential 

leaks.  Always use a board or cardboard when 

checking for a leak.   


Escaping  hydraulic  fluid  under  pressure,  even  a 

pinhole size leak, can penetrate body tissue, causing 

serious injury and possible death.  If fluid is injected 

into your skin, it must be treated immediately by a 

doctor familiar with this type of injury.

Summary of Contents for 3515

Page 1: ......

Page 2: ......

Page 3: ... Make Sure the Gearbox Bolts are Properly Tightened Make Sure that Blade Carrier Bolts are Properly Tightened and Cotter Pins are in Place Make Sure that Blades are Installed in Correct Rotational Direction Make Sure that All Hardware is Properly Tightened Review Procedure to Adjust Cutting Height and Level ATTACHMENTS INSTALLATION Make Sure the Chain Shielding is Attached Make Sure All Bolts Pins...

Page 4: ......

Page 5: ...r Address ______________________________________________________________________ City ________________________________________ State _______________________ Zip Code ____________________________ Cutter Model _______________________________ Serial Number _______________________________ Date Purchased ____________________________ Dealer Salesperson ___________________________ Dealership Name _______...

Page 6: ......

Page 7: ...fety Training 31 6 2 Tractor Requirements 32 6 2 1 Equipment and Capabilities 32 6 2 2 Tractor Safety Devices 32 6 2 3 ROPS and Seat Belt 32 6 2 4 Power Take Off PTO 33 6 2 5 Drawbar 33 6 3 Attaching to Tractor 33 6 4 Setting the Rotary Cutter 35 6 4 1 Leveling Front to Back 35 6 4 2 Setting the Cutting Height 35 6 5 Initial Setup Checklist 36 6 6 Machine Break In 37 6 7 Pre Operation Checklist 37...

Page 8: ...al injury or even death be sure you read and understand all of the instructions in this manual and other related OEM equipment manuals The rotary cutter if not used and maintained properly can be dangerous to users unfamiliar with its operation Do not allow operating maintaining adjusting or cleaning of this rotary cutter until the user has read this manual and has developed a thorough understandi...

Page 9: ...ine Warranty 1 Year Limited Cutting Capacity 3 5 Cutter Suspension 2 Heavy Duty springs positioned on the center tail wheel axle Safety Tow Chain Standard Chain Guards Standard Skid Shoes Replaceable Wheel Options 20 Laminated Tire 26 Laminated Tire 26 Foam Filled Aircraft Tires 29 Pneumatic Aircraft Tires Specifications subject to change without notice 1 5 Intended Usage Do not use this rotary cu...

Page 10: ...been designed for the specific purpose of cutting grass weeds and brush When this unit is no longer capable of doing its designed purpose it should be dismantled and scrapped Do not use any materials or components from this unit for any other purpose 1 10 Unanswered Questions If you have any questions not answered in this manual require additional copies or the manual is damaged please contact you...

Page 11: ...ential hazard The warnings in this manual and on the unit are therefore not all inclusive If a method of assembly operation or maintenance not specifically recommended by us is used you must satisfy yourself that it is safe for you and for others You should also ensure that the unit will not be damaged or be made unsafe by the methods that you choose The information specifications and illustration...

Page 12: ...in park Use proper support Use proper tools Visibility Rollover protection Wear seat belt Weight rating Clear vision 2 3 2 Prohibited Actions Do not alter or modify Do not leave out tools Do not weld No alcohol No drugs No smoking No young children No riders 2 3 3 Hazard Avoidance Crush hazard Crush hazard chock wheels Crush hazard foot Defective or broken part Entanglement hazard Explosive separa...

Page 13: ...r Refer to 2 5 OSHA Training Requirements on page 14 Stay Clear Clear the area of people especially small children before using the rotary cutter Under no circumstances should young children be allowed to work with or around the rotary cutter Impaired User Hazard Do not attempt to assemble operate or maintain this rotary cutter under the influence of drugs or alcohol Consult your doctor before usi...

Page 14: ...nt damage N I N G AR Safety Signs Replace any missing or hard to read safety signs or instructional labels Use care when washing or cleaning the rotary cutter Replacement safety sign locations and part numbers are provided in this manual and are available from an authorized dealer parts department or the factory First Aid Kit Have a first aid kit available for use should the need arise and know ho...

Page 15: ...the employee is or will be involved These will include but are not limited to instructions to Keep all guards in place when the machine is in operation Permit no riders on equipment Stop engine disconnect the power source and wait for all machine movement to stop before servicing adjusting cleaning or unclogging the equipment except where the machine must be running to be properly serviced or main...

Page 16: ...in this manual Do not use or allow anyone else to use this rotary cutter until all information has been reviewed Annually review this manual before the season start up Make periodic reviews of SAFETY and OPERATION of the rotary cutter a standard practice An untrained operator is not qualified to use this rotary cutter Sign Off Form Date User s Signature Owner s Signature This sign off sheet is pro...

Page 17: ...r safety recommendations related to transporting the rotary cutter All applicable safety recommendations in other sections should also be followed 2 10 Storage Safety Refer to 8 1 Storage Safety on page 43 for safety recommendations related to storing the rotary cutter All applicable safety recommendations in other sections should also be followed 2 11 Maintenance Safety Refer to 9 1 Maintenance S...

Page 18: ...bels clean and legible at all times Use a clean damp cloth to clean safety decals 2 Replace any missing or hard to read safety signs or instructional labels 3 Use care when washing or cleaning the equipment not to remove or damage the labels When using a pressure washer to clean the rotary cutter avoid spraying too close to decals high pressure water can enter through very small scratches or under...

Page 19: ...riveline Keep Away Outer Shield Tube 1 5 DANGER Shield Missing Do Not Operate 1 6 WARNING Use Paper or Cardboard to Check for Leaks 1 7 WARNING PTO Speed 540 RPM 1 8 WARNING PTO Speed 1000 RPM 1 9 WARNING Keep Mower Deck Clear of Debris 1 10 WARNING No Riders 4 11 SERIAL Serial Number 1 12 INSTRUCTIONAL Made In the USA 1 13 INSTRUCTIONAL Blade Rotation CW 1 14 DANGER Keep Away Thrown Objects 2 15 ...

Page 20: ...3515 Flex Wing Rotary Cutter 20 Titan Implement LLC February 2020 423 334 0012 3 3 1 Cutter Deck Safety Signs 1 TI 00336 2 TI 00337 3 TI 00338 4 TI 00339 5 TI 00340 ...

Page 21: ...15 Flex Wing Rotary Cutter 423 334 0012 February 2020 6 TI 00342 7 TI 00344 8 TI 00345 9 TI 00343 10 TI 00074 WARNING NO RIDERS 11 TI 00134b 0010001 Serial Number 12 TI 00008 WITH U S IMPORTED PARTS MADE IN THE USA 13 TI 00341 ...

Page 22: ...3515 Flex Wing Rotary Cutter 22 Titan Implement LLC February 2020 423 334 0012 14 TI 00346 15 TI 00347 16 TI 00348 17 TI 00351 ...

Page 23: ...ee spindles with two free swinging blades each which reduce the shock of impact when a stationary object is contacted Slip clutches protect the gearboxes and driveline from damage Standard equipment includes driveline shields gearbox shields and front and rear chain discharge shields 4 1 1 Owner Operator Manual Storage Always store the Owner Operator manual and other operating materials in the doc...

Page 24: ...erify that the wing uplock pins are in place 3 Remove the pins and washers 4 Rotate the hitch forward using a suitable lifting device The lifting device may be attached to the safety chain 5 Install the pins and washers previously removed in Step 3 in the front of the leveling rods through the slot in the hitch 6 Loosen the bolt and nut on the hose rack Stand the rack up and tighten the bolt and n...

Page 25: ... hitch using a suitable lifting device The lifting device may be attached to the safety chain 9 Remove the retaining bolt from the front driveline 10 Raise the front gearbox cover 11 Install the driveline onto the gearbox input shaft Insert the retaining bolt and tighten the locknut securely ...

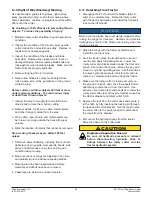
Page 26: ...ox causing serious injury or death Do not omit the retaining bolt Tighten the locknut securely 12 Attach the safety chain on the driveline guard to the gearbox cover 13 Separate the two halves of the driveline 14 Apply a bead of grease around the end of the inner drive shaft 15 Slide the front driveline half over the rear half Align the square rib on the mating halves to engage ...

Page 27: ...ollow the procedure in 6 3 Attaching to Tractor on page 33 Note Quick disconnect hydraulic couplers are not supplied with the unit If desired these may be procured from a local equipment dealer 5 3 1 Leveling the Center Deck 1 With the cutter attached to the tractor disengage the PTO and park on a level hard surface Place the tractor gear selector in park or set the parking brake 2 Cycle the wheel...

Page 28: ...truck by a tailwheel WARNING Stay Clear The tailwheels will swing freely when the banding is cut To avoid injury from being struck by a tailwheel stay clear of the tailwheels 7 Rotate the tailwheel arms to align the holes with the clevis eye Insert the bolt and reinstall the nut 5 3 2 Leveling the Wing Decks Each wing section will need adjusting if the wing top is not level with the center deck to...

Page 29: ... outer wing edge until wing is level Tighten jam nut 1 to the correct torque when level c When properly adjusted the turnbuckle length should be approximately 11 5 5 4 Checking the Driveline Length Before operating the rotary cutter make sure the driveline will not bottom out or become disengaged Bottoming out occurs when the inner shaft penetrates the outer housing until the assembly can shorten ...

Page 30: ...istance Securely block the rotary cutter in position 7 Hold the driveline sections parallel to each other and check for minimum 6 overlap If the driveline has been marked for cutting the overlap will be the distance between the two marks If the driveline has less than the minimum overlap do not use Contact your Titan Implement dealer Note If the driveline is the correct length omit the following S...

Page 31: ... Cutter Blade Contact Hazard foot To avoid serious injury or death keep away from rotating blades Do not put feet under rotary cutter deck WARNING Crush Hazard Hydraulic or mechanical failure can allow a wing to drop suddenly without warning Do not allow anyone to walk under or stand near a raised wing when the uplock pins are removed Entanglement Hazard Operating the rotary cutter without the dri...

Page 32: ...t operate the cutter on a tractor with an underframe exhaust 6 2 2 Tractor Safety Devices If transporting or operating the tractor and implement near a public roadway the tractor must be equipped with proper warning lighting and a Slow Moving Vehicle SMV emblem which are clearly visible from the rear of the unit Lights and a SMV emblem must be attached directly to the implement if the visibility o...

Page 33: ...he distance between the drawbar hitch pin hole and the end of tractor PTO shaft must be set according to the PTO operating speed The distance from the top of the drawbar to the PTO shaft must be 8 PTO damage may occur if these dimensions vary more than 1 TI 00177 A 8 Tractor PTO Drawbar Ground Level DRAWBAR LENGTH CHART PTO Dimension A 540 RPM 14 1000 RPM 21 spline 1 3 8 shaft 16 1000 RPM 20 splin...

Page 34: ... safe operation A properly set rotary cutter will make a more uniform cut distribute clippings more evenly require minimal tractor work and follow the contour of uneven terrain The two adjustments to make before cutting are Leveling front to back Cutting height Note Avoid very low cutting heights Striking the ground with the blades causes damaging shock loads and will cause damage to the rotary cu...

Page 35: ...riking the ground increasing blade life and reducing stress on the rotary cutter and tractor 1 Park the tractor and rotary cutter on level ground 2 Using the tractor hydraulic cylinder control lever position the front of the rotary cutter with the side skids 1 lower than the desired cut height For example for a 3 cut position the skids 2 from the ground Set the control lever stop at this position ...

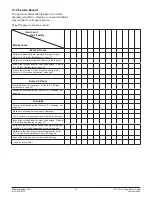
Page 36: ...3 Make sure the driveline is attached to the tractor PTO and safety chains are installed Refer to 6 3 Attaching to Tractor on page 33 Make sure all hardware is properly installed and tightened Refer to 9 11 Bolt Torque Requirements on page 50 Check that the blades are sharp Refer to 9 6 Blade Servicing on page 47 Make sure the blade carrier nuts are tight and the cotter pins installed Refer to 9 7...

Page 37: ...arize themselves with the detailed safety and operating procedures 1 Operate the rotary cutter only in conditions where you have clear visibility in daylight or with adequate artificial lighting Never operate the rotary cutter in darkness or foggy conditions where you cannot clearly see at least 300 feet in front and to the sides of the tractor and rotary cutter Make sure that you can clearly see ...

Page 38: ...eck to make sure there are no persons behind the rotary cutter and use extreme care when maneuvering in reverse 15 Always cross steep ditches and banks at a diagonal Never cross straight across and never back into a steep ditch or bank Cutting over ditches and backing up hills can Bottom Out the driveline Bottoming out is when the driveline shaft has shortened to the point it is pressing against t...

Page 39: ...ions or wings are adjusted to be close and parallel to ground without exposing blades 3 Mowing area has been inspected and foreign materials and debris have been removed 4 Passersby are inside an enclosed vehicle 6 11 Detaching From Tractor 1 Disengage the PTO and wait for blade rotation to come to a complete stop Raise the rotary cutter with the tractor hydraulics and install the transport lock o...

Page 40: ...isconnect the driveline safety chain and hitch safety chain 8 Pull back on the collar on the tractor end of the driveline TI 00224 9 Slide the driveline off the tractor PTO shaft and secure it up off the ground 10 Remove the hitch pin and drive the tractor away from the rotary cutter ...

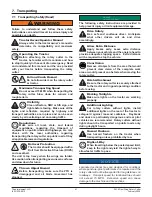
Page 41: ... slow down for turns Thrown Object Hazard Before transporting make sure the PTO is disengaged and all blade movement has stopped SAFETY INSTRUCTIONS The following safety instructions are provided to help prevent injury or limit equipment damage Drive Safely Be a safe and courteous driver Anticipate what other drivers will do and drive accordingly Allow Extra Distance Apply brakes early Leave extra...

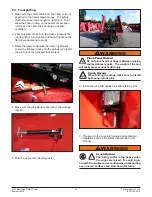
Page 42: ... onto the cylinder and insert the pin to lock the transport lock in place 4 Make sure the jack stand is secured in the storage location 5 Fold the wings onto the wing rests WARNING Pinch Point Hazard Do not place hands or fingers between moving and or stationary parts The weight of the unit will easily cause serious bodily injury Crush Hazard When folding the wings make sure to install both wing u...

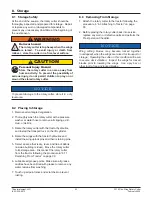
Page 43: ...the tractor hydraulics and install the transport lock on the lift cylinder 4 Raise the wings with the tractor hydraulics and install the wing uplock pins and their retaining pins 5 Select an area that is dry level and free of debris inside a building is ideal Move the rotary cutter to its storage area Disconnect the rotary cutter from the tractor following the procedure in 6 11 Detaching From Trac...

Page 44: ...nufacturer will not accept responsibility for damages as a result of the use of unapproved parts WARNING Safety Shields and Devices When completing a maintenance or service function make sure all safety shields and devices are installed before placing the rotary cutter in service Crush hazard The wings may drop unexpectedly if the uplock pins are not installed To avoid serious injury or death from...

Page 45: ...each Do not position the jack stands under wheels axles or wheel supports as they may rotate and cause the rotary cutter to fall Make sure the jack stands are stable and the rotary cutter deck is approximately level Test the stability of the rotary cutter before working underneath If the rotary cutter is attached to the tractor set the brakes remove the key chock the tractor wheels and block the r...

Page 46: ... grease with extreme pressure EP performance Also acceptable is an SAE multipurpose lithium base grease 1 Always use a handheld grease gun for all greasing 2 Wipe grease zerks with a clean cloth before greasing to avoid injecting dirt and grit 3 Apply grease until new grease can be seen coming out of the joint 4 Do not let excess grease collect on or around parts particularly when operating in san...

Page 47: ...U joint 5 Apply grease to all accessible grease zerks 6 Rotate the driveline shield 180 until the holes on the opposite side align with the remaining grease zerks and apply grease 7 Repeat for the U joint at the rear of the center driveline and at both ends of the wing drivelines 8 Grease the zerks on the splitter cross shaft 9 Re connect the drivelines close the front gearbox shield and install t...

Page 48: ...e carrier near the hub several times with a heavy hammer to seat the hub Use care not to strike the nut or the end of the shaft 4 Retighten the nut to 700 ft lbs 5 Install the cotter pin and spread the tangs 9 9 Slip Clutch Operational Check The rotary cutter is equipped with three slip clutches with one located in front of each spindle gearbox The slip clutches serve as overall protection for the...

Page 49: ...ring lengths are the same Initial spring length is shown in the chart TI 00102 SEE CHART CLUTCH SPRING LENGTH CHART EG COMER BONDIOLI PAVESI 1 27 32 2mm 1 15 29 3mm 1 28 32 4mm 1 12 28 5mm 2 If necessary adjust the nut on any spring that is unequal Adjust all eight spring retaining nuts 1 3 of a turn two flats on a nut and check clutch slippage 3 If further adjustment is necessary adjust in 1 3 tu...

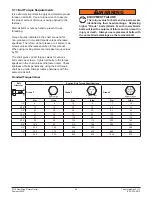
Page 50: ...the chart unless otherwise noted Check tightness of bolts periodically using the bolt torque chart as a guide Always replace hardware with the same Grade bolt Standard Torque Values Bolt Diameter English Bolt Torque Specifications Grade 2 No Marking Grade 2 Grade 5 Grade 5 3 Radial Lines Grade 8 Grade 8 6 Radial Lines N m ft lbs N m ft lbs N m ft lbs 1 4 8 6 12 9 17 12 5 16 13 10 25 19 36 27 3 8 2...

Page 51: ...V joint U joints and slip joints Refer to 9 5 Driveline Lubrication on page 47 Every 50 Hours Check blade carrier nut torque Refer to 9 6 2 Blade Installation on page 47 Grease all lubrication points Refer to 9 3 Greasing on page 46 Annually Grease all lubrication points Refer to 9 3 Greasing on page 46 Make sure all fasteners are properly tightened Check cutter deck gearboxes and driveline for da...

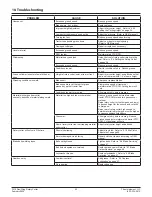
Page 52: ...ed by path of tractor tires Slow ground speed of tractor but maintain rated PTO RPM Cutting lower will help Conditions too wet for mowing Allow grass to dry before mowing Material discharges from cutter unevenly bunches of material along swath Material too high and too much material Reduce ground speed but maintain rated tractor PTO RPM or make two passes over material Raise rotary cutter for the ...

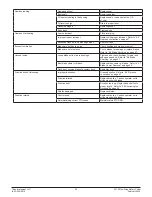
Page 53: ...r replace blades Refer to 9 6 Blade Servicing on page 47 Unusual noise Loose blade bolts or worn bushings Tighten bolts check bushings for wear and change as needed Refer to 9 6 Blade Servicing on page 47 Bent blade carrier or blades Replace blade carrier or blades Refer to 9 7 Blade Carrier Removal on page 48 Deck bent causing blades to contact deck Straighten deck Driveline will not telescope Im...

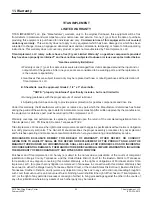
Page 54: ... in material or workmanship After written approval by the manufacturer the equipment or defective part must be returned to Titan Implement LLC Warranty coverage and performance is expressly conditioned upon the return of the completed registration form to Titan Implement LLC PO Box 649 Decatur Tennessee 37322 Titan Implement LLC reserves the right to make improvements and changes in specifications...

Page 55: ...Titan Implement LLC 55 3515 Flex Wing Rotary Cutter 423 334 0012 February 2020 ...

Page 56: ...USED WITH ABOVE UNIT ________________________________ PURCHASER S NAME ________________________________________________________________ ADDRESS __________________________________________________________________________ CITY _________________________________ STATE __________________ ZIP _______________ SELLING DEALER S NAME ____________________________________________________________ CITY _________...

Page 57: ...Titan Implement LLC 57 3515 Flex Wing Rotary Cutter 423 334 0012 February 2020 Cut Here to Remove Page or Make Copies of This Page ...

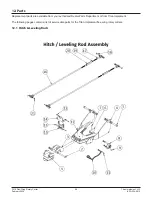
Page 58: ...3 334 0012 12 Parts Replacement parts are available from your authorized Dealer Parts Department or from Titan Implement The following pages contain a list of serviceable parts for the Titan Implement flex wing rotary cutters 12 1 Hitch Assembly 12 1 Hitch Leveling Rods ...

Page 59: ...Titan Implement LLC 59 3515 Flex Wing Rotary Cutter 423 334 0012 February 2020 ...

Page 60: ...3515 Flex Wing Rotary Cutter 60 Titan Implement LLC February 2020 423 334 0012 12 2 Deck Assembly 12 2 Center Deck ...

Page 61: ...Titan Implement LLC 61 3515 Flex Wing Rotary Cutter 423 334 0012 February 2020 ...

Page 62: ...3515 Flex Wing Rotary Cutter 62 Titan Implement LLC February 2020 423 334 0012 12 3 Tailwheel Assembly 12 3 Wing Deck ...

Page 63: ...Titan Implement LLC 63 3515 Flex Wing Rotary Cutter 423 334 0012 February 2020 ...

Page 64: ...3515 Flex Wing Rotary Cutter 64 Titan Implement LLC February 2020 423 334 0012 12 4 Wheel Lift ...

Page 65: ...Titan Implement LLC 65 3515 Flex Wing Rotary Cutter 423 334 0012 February 2020 ...

Page 66: ...3515 Flex Wing Rotary Cutter 66 Titan Implement LLC February 2020 423 334 0012 12 4 Hydraulics Assembly 12 5 Hydraulics ...

Page 67: ...Titan Implement LLC 67 3515 Flex Wing Rotary Cutter 423 334 0012 February 2020 12 6 Driveline Shield ...

Page 68: ...3515 Flex Wing Rotary Cutter 68 Titan Implement LLC February 2020 423 334 0012 12 5 Driveline Assembly 12 7 Splitter Shield ...

Page 69: ...Titan Implement LLC 69 3515 Flex Wing Rotary Cutter 423 334 0012 February 2020 12 8 540 1000 RPM Splitter Gearbox ...

Page 70: ...3515 Flex Wing Rotary Cutter 70 Titan Implement LLC February 2020 423 334 0012 12 9 Outboard Gearbox ...

Page 71: ...Titan Implement LLC 71 3515 Flex Wing Rotary Cutter 423 334 0012 February 2020 12 10 1 540 RPM Driveline ...

Page 72: ...3515 Flex Wing Rotary Cutter 72 Titan Implement LLC February 2020 423 334 0012 12 10 2 1000 RPM Driveline ...

Page 73: ...Titan Implement LLC 73 3515 Flex Wing Rotary Cutter 423 334 0012 February 2020 12 10 3 Center Deck Driveline ...

Page 74: ...3515 Flex Wing Rotary Cutter 74 Titan Implement LLC February 2020 423 334 0012 12 10 4 Wing Deck Driveline ...

Page 75: ...Titan Implement LLC 75 3515 Flex Wing Rotary Cutter 423 334 0012 February 2020 12 11 Wing Deck Driveline ...

Page 76: ...3515 Flex Wing Rotary Cutter 76 Titan Implement LLC February 2020 423 334 0012 ...

Page 77: ...Titan Implement LLC 77 3515 Flex Wing Rotary Cutter 423 334 0012 February 2020 ...

Page 78: ...Form No 3515M Printed in USA 09 2016 ...

Reviews: