Performance Series 560e
15
GB
Repairs at the unit
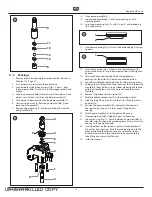
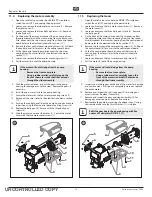
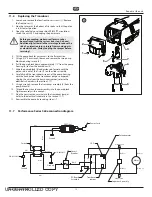
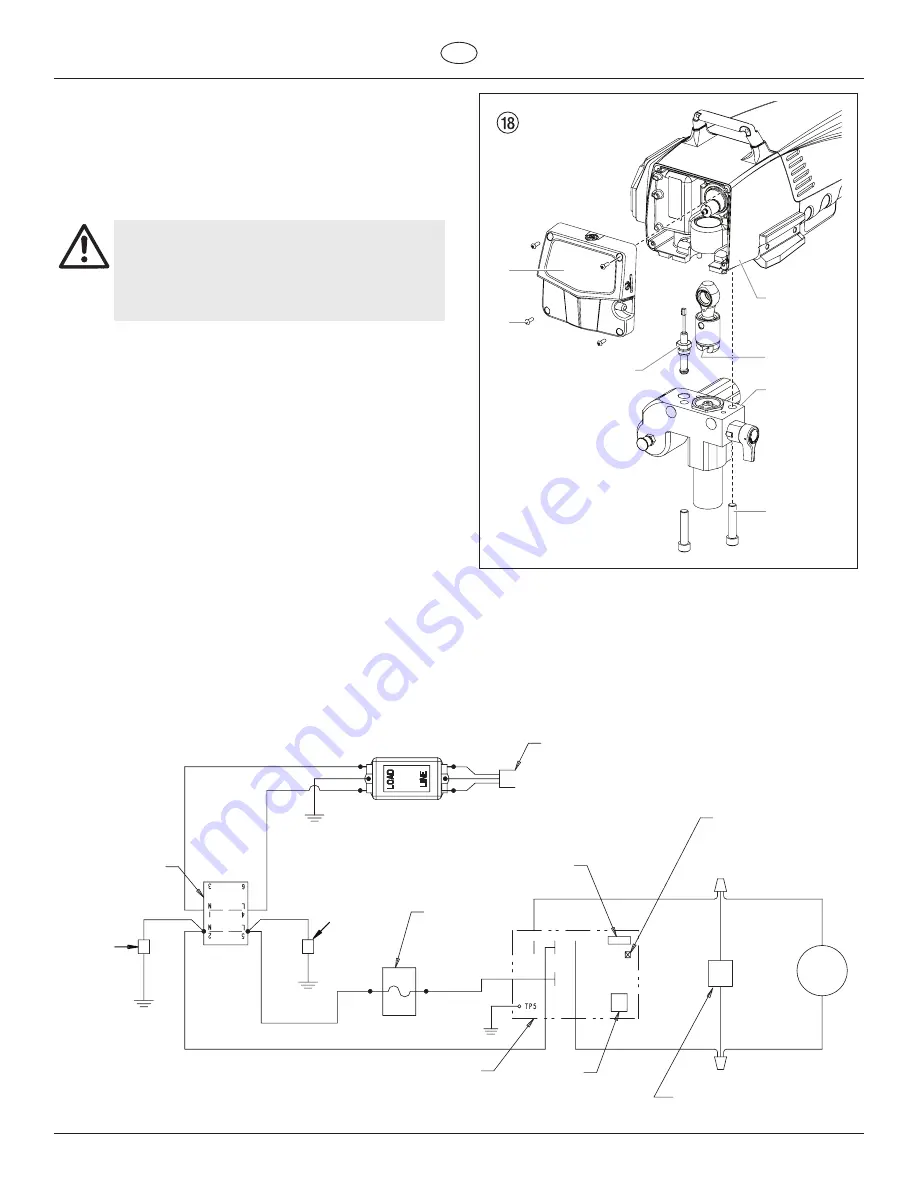
11.6 Replacing the Transducer
1. Loosen and remove the four front cover screws (1). Remove
the front cover (2).
2. Stop the sprayer at the bottom of its stroke so that the piston
is in its lowest position.
3. Open the relief valve, valve position PRIME (
k
circulation),
switch the unit OFF, and unplug the power cord.
Before proceeding, make sure all pressure has
been relieved from the system (see step 3, above).
Additionally, follow all other warnings to reduce the
risk of an injection injury, injury from moving parts
or electric shock. Always unplug the sprayer before
servicing!
4. Tilt the pump back for easy access to the fluid section.
5. Using a 3/8” hex wrench, loosen and remove the two pump
block mounting screws (3).
6. Pull the pump block down approximately 1/2” from the pump
housing (4) to clear the transducer (5).
7. Slide the pump block (6) and piston rod forward until the
piston rod is out of the T-slot (7) on the slider assembly.
8. Carefully pull the transducer wire out of the pump housing
until the connection to the transducer jumper is exposed.
Unplug the wire from the transducer jumper (refer to the
electrical schematic in the section 11.7).
9. Using a wrench, remove the transducer assembly (5) from the
pump block (6).
10. Thread the new transducer assembly into the pump block.
Tighten securely with a wrench.
11. Plug the new transducer wire into the transducer jumper
(refer to the electrical schematic in the section 11.7).
12. Reassemble the pump by reversing steps 1–7.
7
4
6
3
2
1
5
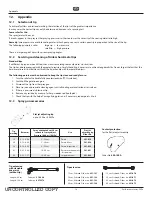
11.7 Performance Series 560e connection diagram
Capacitor Assembly
P/N 0522053
P/N 0522052
Brown
Brown
Blue
Brow
n
Blue
Blue
P/N 0516360
P/N 0516360
Motor
Red (+)
Black (-)
Red (+)
Black (-)
Potentiometer
Power Cord
EMI Filter
Ground
Ground
Ground
PC Board
Assembly
Transducer
jumper
Black
Red
White Gray
Circuit
Breaker
Switch
L.E.D.
Black
Uncontrolled Copy

