background image

1/2 SHEET SANDER 


SF290E

7. USING THE SANDER 

(See Fig13)

The workpiece to be sanded must be secured. If 

it is small or it may move during sanding, it must 

be held in a vice or suitably clamped.  

Be sure to hold the sander firmly whilst it is on 

and  apply  it  gently  to  the  work,  it  may  “kick” 

on first contact. Hold the sander so that it is flat 

on  the  work  and  move  slowly,  preferably  with 

a  smooth,  circular  motion.  Regularly  check  the 

condition of the sanding paper and replace when 

worn for best results.

WORKING HINTS FOR YOUR 

SANDER

1. Your  sander  is  useful  for  working  on  wood, 

metal,  painted  surface.  It  will  smooth  surfaces 

prior  to  painting,  even  where  fillers  have  been 

used and left proud.

2. Your sander is best suited to large flat areas such 

as doors but can also be used on skirting boards, 

windows, etc, provided they are accessible.

3.  Different  types  of  sanding  paper  will  allow 

the  sander  to  meet  various  needs.  Different 

grades of sanding paper are available, the higher 

grade number, the finer the grit. For rough work 

start with a low grade of grit (i.e. 60 grade) and 

change  to  a  higher,  finer  grade  (i.e.  100  or  120) 

for  finishing.  If  you  use  a  fine  grade  for  rough 

surfaces it will soon clog and need changing.

4. At all times, let the sander do the work-do not 

force it or apply excessive pressure to the sanding 

paper or it could wrinkle or tear. Preferably, use a 

light circular motion.

5. If the surface shows excessive making from the 

abrasive motion, you may be using a grit which is 

too coarse or applying too much pressure.

MAINTENANCE

1.  Your  power  tool  requires  no  additional 
lubrication  or  maintenance. There  are  no  user 
serviceable parts in your power tool.
2. Never use water or chemical cleaners to clean 
your power tool. Wipe clean with a dry cloth.
3. Always store your power tool in a dry place.
4. Keep the motor ventilation slots clean.

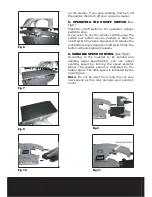
Fig 12

Fig 13

Summary of Contents for SF290E

Page 1: ...1 2 SHEET SANDER SF290E SAFETY AND OPERATING MANUAL...

Page 2: ...f routine maintenance Failure of consumable items such as batteries Accidental damage Cosmetic damage Failure to follow manufacturer s guidelines Loss of use of the goods Repairs attempted by anyone u...

Page 3: ...he cord Never use the cord for carrying pulling or unplugging the power tool Keep cord away from heat oil sharp edges or moving parts Damaged or entangled cords increase the risk of electric shock e W...

Page 4: ...reakage of parts and any other condition that may affect the power tools operation If damaged have the power tool repaired before use Many accidents are caused by poorly maintained power tools f Keep...

Page 5: ...hout wearing a dust mask 15 Where possible seal off the working area to contain the dust for later removal WARNING Some dust particles created by power sanding sawing grinding drilling and other const...

Page 6: ...SYMBOLS Read the manual Warning Wear gloves Wear dust mask eye ear protection Conforms to relevant safety standards...

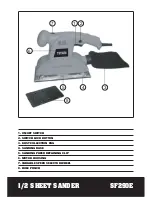
Page 7: ...SHEET SANDER SF290E 1 ON OFF SWITCH 2 SWITCH LOCK BUTTON 3 DUST COLLECTION BAG 4 SANDING BASE 5 SANDING PAPER RETAINING CLIP 6 MOTOR HOUSING 7 VARIABLE SPEED SELECTOR WHEEL 8 HOLE PUNCH 6 7 5 4 8 3 1...

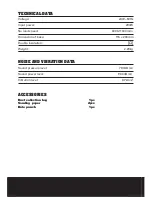
Page 8: ...peed 6000 11000min 1 Dimension of base 115 x 230mm Double insulation Weight 2 29kg ACCESSORIES Dust collection bag 1pc Sanding paper 2pcs Hole punch 1pc NOISE AND VIBRATION DATA Sound pressure level 7...

Page 9: ...ng the clip Switch on momentarily to check that the sander is functioning correctly If there is undue vibration repeat the paper positioning procedure 2 PUNCH THE HOLE After tting the sanding paper as...

Page 10: ...s been depressed To release the lock button simply depress on off switch fully the button will automatically release 6 VARIABLE SPEED CONTROL See Fig12 According to the material to be sanded and sandi...

Page 11: ...ble 3 Different types of sanding paper will allow the sander to meet various needs Different grades of sanding paper are available the higher grade number the ner the grit For rough work start with a...

Page 12: ...nd paper is worn replace with new paper The paper must be kept in a dry place if it is allowed to become damp the abrasive particles will lose their adhesion to the backing paper and will not abrade 3...

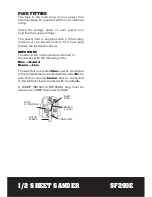
Page 13: ...new plug follows the instruction below IMPORTANT The wire in the mains lead are coloured in accordance with the following code Blue Neutral Brown Live The wire that is coloured blue must be connected...

Page 14: ...uirements of the following directives 89 336 EEC 93 68 EEC EMC Directive 73 23 EEC 93 68 EEC Low Voltage Directive 98 37 EC Machinery Directive Standards and technical speci cations referred to EN5501...

Page 15: ......

Reviews: