background image

3mm PLANER     


SF823N

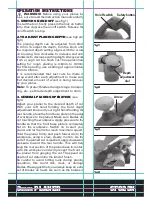
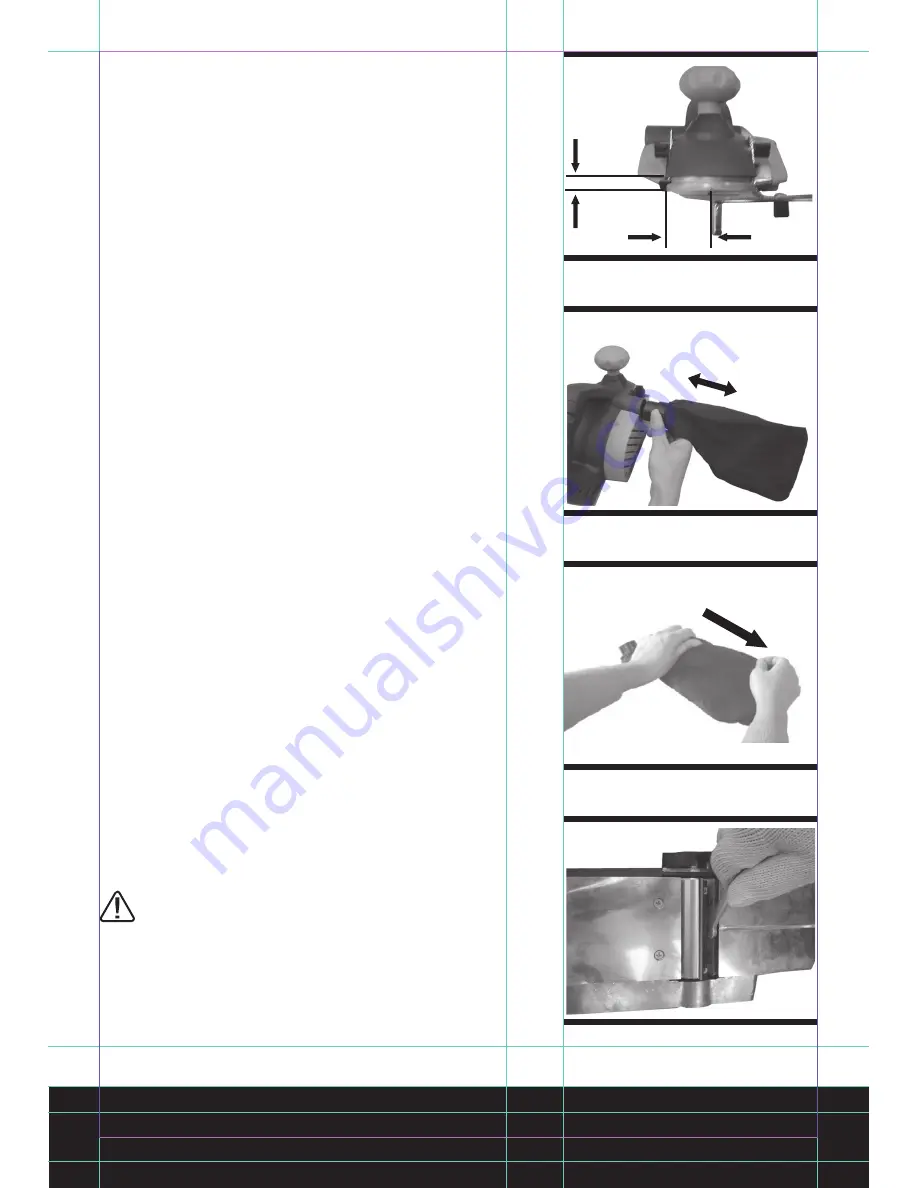
Depth of

rebate cut

Blade

edge

Width of

rebate cut

Fig 9

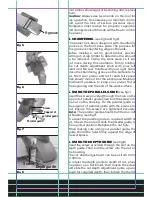
Insert

Remove

Fig 10

screw fully.

The width and depth of rebate cut 

(see fig9)

The width of rebate cut is adjustable by moving 

the  parallel  guide. The  depth  of  rebate  cut  is 

determined by the moving the depth guide, and 

the number of passes made along the workpiece.

7. USING THE DUST COLLECTION BAG 

(see 

fig10)

Your  planer  is  equipped  with  a  dust  bag  for 

collection of wood chips in the work area. 

Make sure the zipper on the bag is fully closed. To 

fit the dust bag, simply insert the tube end of the 

bag into the dust extraction outlet. Then switch on 

and start planing.

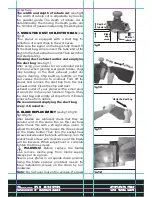
Cleaning dust exhaust outlet and emptying 

the dust bag 

(see fig11)

After  using  your  planer  for  an  extended  period 

of time or when planing wet green timber, chips 

may  build-up  in  the  dust  exhaust  outlet  and 

require  clearing.  Chip  build-up  restricts  air  flow 

and  causes  the  motor  to  overheat. Turn  off  the 

planer  and  remove  the  dust  bag  from  the  dust 

exhaust outlet. Clean the chip and dust 

exhaust outlet of your planer with a small piece 

of wood. Do not use your hands or fingers. Unzip 

the dust bag and empty all chips from it. Ensure 

collar is free from debris.

We recommend emptying the dust bag 

every 3-6 minutes.

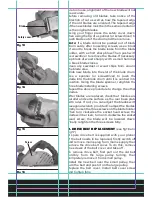
8. BLADE REPLACEMENT 

(seefig12,fig13, 

fig14,fig15)

After  blades  are  replaced,  check  that  they  are 

parallel  and  in  the  same  line  as  the  rear  base 

plate.  Check  this  with  a  straight  edge  (ruler). To 

adjust the blades firstly loosen the three screws 

on  the  blade  holder. Then  turn  the  socket  head 

screw clockwise and the blade will rise up.Turn the 

socket  head  screw  anti  clockwise  and  the  blade 

will  be  lowered. When  adjustment  is  complete 

tighten the three screws.

WARNING!

  Before  replace  the  blades 

remove  mains  plug  from  mains  supply. 

Always put on a glove.

Secure your planer in an upside down position. 

Using  the  blade  spanner  provided,  loosen  the 

three  installation  screws  on  the  drum  by  turn 

clockwise.

Note:

 Do not over loosen the screws. If screws 

Unzip the dust bag

Fig 11

Fig 12

Summary of Contents for SF823N

Page 1: ...3mm PLANER SF823N SAFETY AND OPERATING MANUAL ...

Page 2: ......

Page 3: ...buse Lack of routine maintenance Failure of consumable items such as batteries Accidental damage Cosmetic damage Failure to follow manufacturer s guidelines Loss of use of the goods Repairs attempted by anyone unless authorized by Screwfix Direct Ltd Thisguaranteedoesnotaffectyourstatutoryrights ThisguaranteeisonlyvalidintheUK For further technical advice spare parts or repair service outside of gu...

Page 4: ... or unplugging the power tool Keep cord away from heat oil sharp edges or moving parts Damaged or entangled cords increase the risk of electric shock e When operating a power tool outdoors use an extension cord suitable for outdoor use Use of a cord suitable for outdoor use reduces the risk of electric shock 3 Personal safety a Stay alert watch what you are doing and use common sense when operatin...

Page 5: ...her condition that may affect the power tools operation If damaged have the power tool repaired before use Many accidents are caused by poorly maintained power tools f Keep cutting tools sharp and clean Properly maintained cutting tools with sharp cutting edges are less likely to bind and are easier to control g Use the power tool accessories and tool bits etc in accordance with these instructions...

Page 6: ... to prevent movement 10 Where possible seal off the working area to contain the dust for later removal 11 Always use the appropriate safety equipment that is required for the product e g Goggles Safety Spectacles Ear defenders essential with tools with a noise rating of over 85dB A Gloves and face masks In all ensure that the safety equipment is in good condition Double insulation The tool is doub...

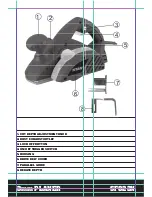
Page 7: ...3mm PLANER SF823N 1 CUT DEPTH ADJUSTMENT KNOB 2 DUST EXHAUST OUTLET 3 LOCK OFF BUTTON 4 ON OFF TRIGGER SWITCH 5 HOUSING 6 DRIVE BELT COVER 7 PARALLEL GUIDE 8 REBATE DEPTH 1 2 3 4 5 6 7 8 ...

Page 8: ...g width 82mm Cutting depth 0 3mm Rebate depth 0 18mm Double insulation Weight 4 1Kg ACCESSORIES Dust bag 1pc Rebate depth guide 1pc Parallel guide 1pc Spanner 1pc Allen key 1pc NOISE AND VIBRATION DATA Sound pressure level 90 0dB A Sound power level 103 0dB A Vibration level 4 8m s2 ...

Page 9: ...pth adjustment to 0mm 3 GENERAL PLANING OPERATION see fig4 Adjust your planer to the desired depth of cut With your left hand holding the front depth adjustment knob and your right hand holding the rear handle place the front base plate on the edge of workpiece to be planed Make sure blades are not touching the workpiece Apply pressure to the handle so that the front base plate is completely flat on...

Page 10: ... planer flat at the beginning and the end of the work surface 5 USING THE PARALLEL GUIDE see fig7 Insert the screw provided through the hole on the support of parallel guide Then turn the screw into the nut on the housing Fix the parallel guide on the support of parallel guide with the screw and nut Ensure the screws are tightened securely Note The parallel guide should be fitted on left of housing s...

Page 11: ...motor to overheat Turn off the planer and remove the dust bag from the dust exhaust outlet Clean the chip and dust exhaust outlet of your planer with a small piece of wood Do not use your hands or fingers Unzip the dust bag and empty all chips from it Ensure collar is free from debris We recommend emptying the dust bag every 3 6 minutes 8 BLADE REPLACEMENT seefig12 fig13 fig14 fig15 After blades are re...

Page 12: ...anner retighten the three blade installing screws Repeat the above procedure to change the other blades After blades are replaced check that blades are parallel and same surface as the rear base plate with ruler If not you can adjust the blades with hexagonal wrench provided To adjust the blades firstly loosen the three screws on the blade holder Then turn clockwise the socket head screw the blade ...

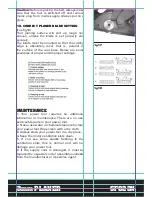
Page 13: ...w are some examples of proper and improper settings MAINTENANCE 1 Your power tool requires no additional lubrication or maintenance There are no user serviceable parts in your power tool 2 Never use water or chemical cleaners to clean your power tool Wipe clean with a dry cloth 3 Always store your power tool in a dry place 4 Keep the motor ventilation slots clean 5 If you see some sparks flashing i...

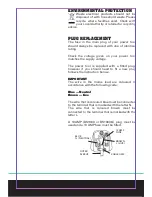
Page 14: ...ly voltage The power tool is supplied with a fitted plug however if you should need to fit a new plug follows the instruction below IMPORTANT The wire in the mains lead are coloured in accordance with the following code Blue Neutral Brown Live The wire that is coloured blue must be connected to the terminal that is marked with the letter N The wire that is coloured brown must be connected to the ter...

Page 15: ...ollowing directives 89 336 EEC 93 68 EEC EMC Directive 73 23 EEC 93 68 EEC Low Voltage Directive 98 37 EC Machinery Directive Standards and technical specifications referred to EN 60745 1 2003 A1 2003 EN 60745 2 14 2003 EN 55014 1 2000 A1 2001 A2 2002 EN 61000 3 2 2000 EN 61000 3 3 1995 Corr 1997 A1 2001 EN 50366 2003 Authorised Signatory Date 15 09 05 Signature Name Peter Harries Screwfix Direct Lt...

Page 16: ......

Reviews: