background image

13

  RL20-2 / 

Manual

Titgemeyer / 10342EN1121 / 1

English


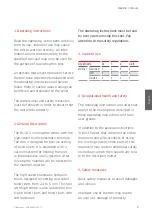
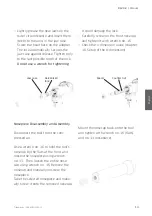
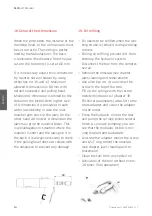
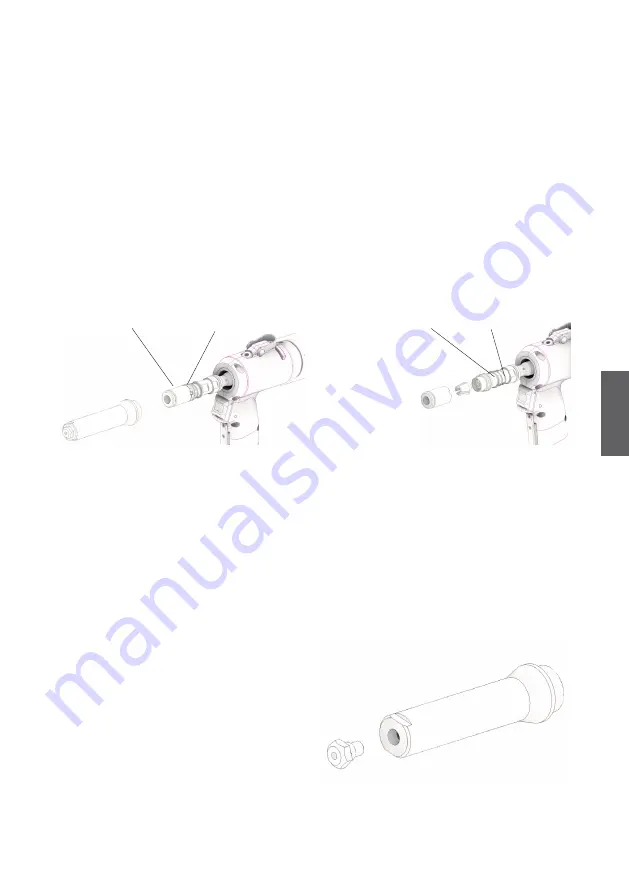
—  Lightly grease the new jaws on the 

outer circumference and insert them 
(teeth to the axis) in the jaw case. 
Screw the head back on the adapter. 
The lock automatically secures the 
jaw case against release. Tighten only 
to the last possible tooth of the lock. 

Do not use a wrench for tightening

!  

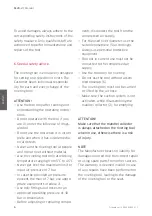
Jaw case

Spacer

Counter nut

Galvanized 
lock

It could damage the lock.


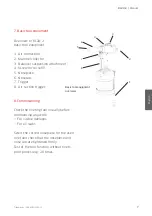
—  Carefully screw on the front nosecap 

and tighten it with wrench no. 16.


— Check the x-dimension value (chapter 

18. Setup of the X-dimension)

Nosepiece Disassembly and Assembly

Disconnect the tool from the com- 
pressed air

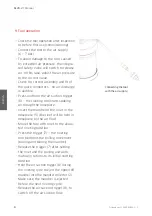
Use a wrench no. 16 to hold the tool’s 

nosecap by the flats at the front and 

loosen the nosepiece using wrench 
no. 11.  Then loosen the entire nose-
cap using wrench no. 16. Remove the 
nosecap and manually unscrew the 
nosepiece
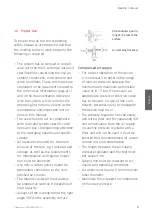
Take the selected nosepiece and manu-
ally screw it onto the removed nosecap.  

Mount the nosecap back onto the tool 

and tighten with wrench no. 16 (flats) 

and no. 11 (nosepiece)

Summary of Contents for RL20-2

Page 1: ...RL20 2 Riveting tool Operating manual Rivet tools tools for blind rivets ...

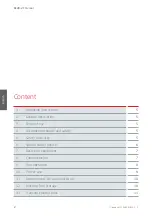
Page 2: ...neral description 5 3 Scope of use 5 4 Occupational health and safety 5 5 Safety measures 5 6 Special safety advice 6 7 Basic tool equipment 7 8 Commissioning 7 9 Tool operation 8 10 Proper Use 9 11 Requirements for compressed air 10 12 Riveting Tool Storage 10 13 Transport Instructions 11 ...

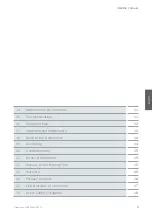
Page 3: ...ons 11 16 Inspection Plan 12 17 Inspection and Maintenance 12 18 Setup of the X dimension 14 19 Oil refilling 14 20 Troubleshooting 15 21 Technical parameters 15 22 Disposal of the Riveting Tool 15 23 Warranty 15 24 Package Contents 16 25 EC Declaration of conformity 17 26 List of Safety Pictograms 18 ...

Page 4: ...4 RL20 2 Manual Titgemeyer 10342EN1121 1 English ...

Page 5: ... riveting the mandrel will be collected in the mandrel collector The high speed pneumatic hydraulic tool is designed for setting one sided blind rivets from 2 4 to 5 mm This tool with high stroke is also suitable for mul ti grip blind rivets and blind rivets with soft materials The operating instructions must be read by every person using this tool Pay attention to the safety regulations 3 Scope o...

Page 6: ...ded air pressure exceeds the max of 7 bar use appro priate equipment to reduce it Use only fittings and hoses for an approved operating pressure of 10 bar in pneumatics Before adjusting or replacing compo nents disconnect the tool from the compressed air supply For the used rivet diameter use the suitable nosepiece 5 accordingly Always use personal protective equipment Tool not in current use must...

Page 7: ...nt 4 Screw for oil refill 5 Nosepiece 6 Nosecap 7 Trigger 8 Air suction trigger 8 Commissioning Check the riveting tool visually before commencing any work For visible damages For oil leaks Select the correct nosepiece for the used rivet and check that the nosepiece and nose cap are tightened firmly Test of the tool function without rivets prior processing 20 times Basic tool equipment overview ...

Page 8: ...uction trigger 8 the riveting tool starts soaking air though the nosepiece Insert the mandrel of the rivet in the nosepiece 5 the rivet will be held in nosepiece by the air flow Move the tool with rivet to the alloca ted riveting position Press the trigger 7 the riveting tool performs the pulling movement pulling and tearing the mandrel Release the trigger 7 after setting the rivet and the pulling...

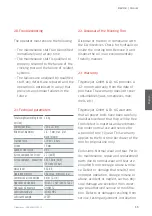
Page 9: ...afety quick coupler for permanent connection to the com pressed air sources The mandrel collector must always be emptied as soon as it exceeds half load capacity Always set the riveting tool at the right angle 90 to the assembly surface Compressed air supply For correct operation of the device it is necessary to observe the range of inlet air pressure between the minimum and maximum permissible va...

Page 10: ...d by a trained expert according to the operating Air quality classes under ISO 8573 1 Solid particles Water Oil Maximum size µm Maximum concentration mg m3 Maximum pressure dew point C Maximum concentration mg m3 2 1 1 40 0 1 11 Requirements for compressed air ISO 8573 1 Note The stated maximum concentrations relate to 1 bar abs 20 C and 60 relative humidity The individual concentrations are propo...

Page 11: ...roperties It is essential that such persons are capable of identifying and avoiding any potential risks in timely manner 15 Tool Modifications No structural modifications that could negatively affect the tooling safety may be performed on the tool without the manufacturer s consent Any unprofes sionally performed repairs and the use of incorrect spare parts are deemed to be interference in the des...

Page 12: ...active cleaning agents or flammable liquids when cleaning The riveting tool must be cleaned and checked in case of any mechanical defects as for the corresponding type of application After the riveting tool has been cleaned to be stored for a longer period of time all external metal parts need to be lightly greased with corro sion inhibitor 17 Inspection and Maintenance Jaws Cleaning or Replacemen...

Page 13: ...k Carefully screw on the front nosecap and tighten it with wrench no 16 Check the x dimension value chapter 18 Setup of the X dimension Nosepiece Disassembly and Assembly Disconnect the tool from the com pressed air Use a wrench no 16 to hold the tool s nosecap by the flats at the front and loosen the nosepiece using wrench no 11 Then loosen the entire nose cap using wrench no 16 Remove the noseca...

Page 14: ... short and the jaws grip it in the back It is always necessary to check if the pulling head does not collide with the nosepiece to prevent any damage 19 Oil refilling Oil needs to be refilled when the wor king stroke is reduced during working process During oil refilling prevent dirt from entering the hydraulic system Disconnect the tool from the compres sed air Remove the nosecap see chapter jaws...

Page 15: ...mple OH HM 32 Lubricant standard ISO XCCHB 2 Lubricant example LV2EP 22 Disposal of the Riveting Tool Disposal of the tool in compliance with the EU directives Check for hydraulic oil inside the riveting tool Remove it and dispose the oil in an environmentally friendly manner 23 Warranty Titgemeyer GmbH Co KG provides a 12 month warranty from the date of purchase The warranty does not cover consum...

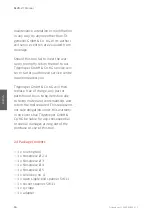
Page 16: ...ou Titgemeyer GmbH Co KG will then replace free of charge any part or parts found by us to be defective due to faulty material or workmanship and return the tool repaired This represents our sole obligation under this warranty In no event shall Titgemeyer GmbH Co KG be liable for any consequential or special damages arising out of the purchase or use of this tool 24 Package Contents 1 x riveting t...

Page 17: ...osepiece in any position After riveting the mandrel will be collected in the mandrel collector The high speed pneumatic hydraulic tool is designed for setting one sided blind rivets from 2 4 to 5 mm Manufacturer Titgemeyer Tools Automation spol s r o U Vodárny 1506 CZ 397 01 Písek IČ 60647761 Tel 420 382 206 711 info rivetec cz tta sales titgemeyer com We hereby declare that the products conform t...

Page 18: ...18 RL20 2 Manual Titgemeyer 10342EN1121 1 English 26 List of Safety Pictograms Use protective goggles Use protective gloves Use ear protection ...

Page 19: ...19 RL20 2 Manual Titgemeyer 10342EN1121 1 English ...

Page 20: ...Titgemeyer Tools Automation spol s r o U Vodárny 1506 39701 Pisek Tschechien T 420 382 206 711 E tta sales titgemeyer com W titgemeyer com ...

Reviews: