1. Disconnect electrical power before making wiring connections to prevent electrical shock and equipment damage.
2. When wiring is completed, check all components by running system through its entire heating cycle.
IN-FORCERS with date codes after “9704”
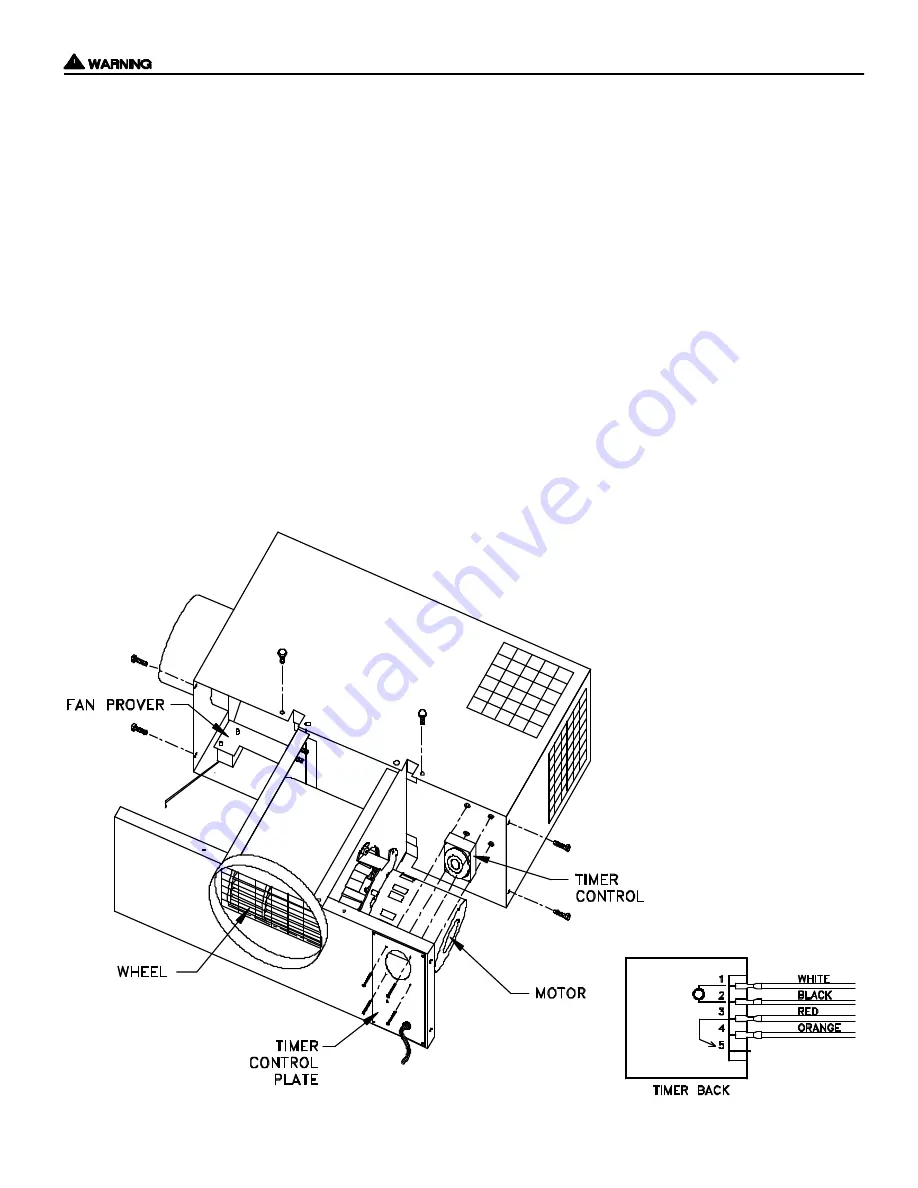
For the steps following below, refer to diagram B.
1. Remove (6) screws from bottom front and sides of IN-FORCER while holding blower assembly firmly.
2. Carefully slide blower assembly down until stops, hold it in place.
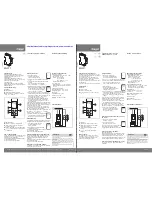
3. Carefully remove RED, ORANGE, BLACK and WHITE leads from Timer/Clock. Loosen and remove (2) nuts that
hold Timer/Clock bracket to blower housing and remove Timer/Clock.
4. Remove new Timer/Clock from box and reinstall Timer/Clock to fan housing using (2) nuts provided. Firmly tighten
Timer/Clock onto housing.
5. Push female leads on new Timer/Clock. The ORANGE wire from IN-FORCER should be connected to terminal 4 of
Timer/Clock, RED wire should be connected to terminal 3, BLACK wire to terminal 2, WHITE wire to terminal 1.
6. Follow reverse procedure in steps 1 & 2 to reassemble IN-FORCER. Verify proper heater and IN-FORCER operation.
P/N: 850-4045
©1997 TJERNLUND PRODUCTS, INC. ALL RIGHTS RESERVED
REV. 1 5/97
DIAGRAM B


