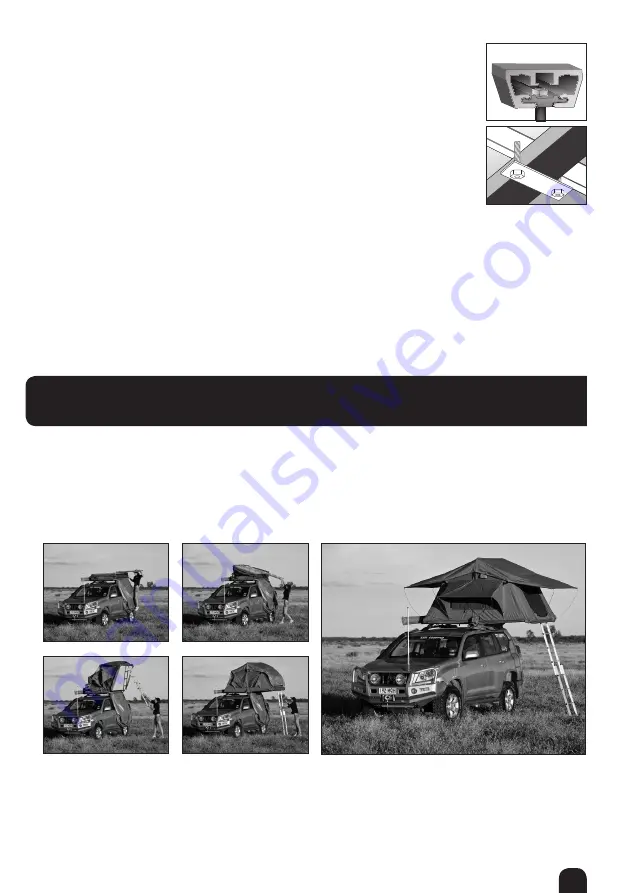
INSTRUCTIONS FOR TENT SETUP
Unpacking the tent
1. Ensure the tent is mounted to your vehicle before continuing.
2. Remove the cover from the tent by unzipping around the three edges.
3. Slide the remaining edge from the rope track. Stow the cover.
4. Release the hold down the Velcro straps on each side of the tent.
5. Slide the ladder out until the locking pins engage. The ladder can now be used as a lever to open the tent.
6. Rest the ladder on the ground and enter the tent.
7. Release the four bungee cords from one side of the tent.
8. Retrieve the Sprung Steed Rods (SSR).
9. The SSR’s are then to be positioned to tension the external and internal fly sheet window awnings.
10. Insert the other end of the SSR into the hole in the base of the roof tent, passing through the eyelet in the
roof tent skirt. This will require you to bend the SSR so that the angle of the SSR is equal to the angle of
the hole into which it should be inserted.
Fitting your TJM Roof Top Tent to your roof racks or bars
1. Lift the tent onto the vehicle
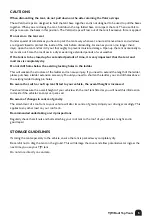
2. Place 8mm bolt into the slide plate.
3. Slide the plate and bolt into the mounting extrusion. Refer
Figure 4.
4. Attach the roof tent to your roof rack or roof bars in four places as
per
Figure 5.
5. Use two bolts and two slide plates with the base plate to hang the bar.
One set per corner.
6. Prior to tightening all the nuts, ensure that your roof tent is centred
(side to side) on the roof of your vehicle and that the mounting points
are symmetrically positioned near each corner of the tent.
If the angle of the ladder is too upright, you will require the optional ladder extension. Refer to
page 4 for more information.
NOTE
Figure
4.
Figure
5.
1.
3.
2.
5.
4.
Packing the tent
1. Simply repeat the above steps in the reverse order to pack away your TJM tent.
3
TJM Roof Top Tents
Summary of Contents for Roof Top Tents
Page 1: ...Roof Top Tents Boulia 620RCTRT01 Yulara 620RCTRT02...
Page 2: ......
Page 8: ...www tjm com au...


