9
3. Carefully remove accessory box, (rolling air/hydraulic jack
(s)
, and
turnplate boxes if applicable) from on top of runway assemblies.
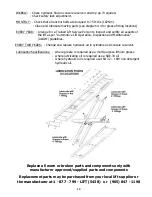
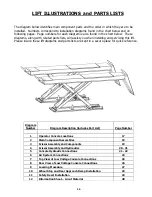
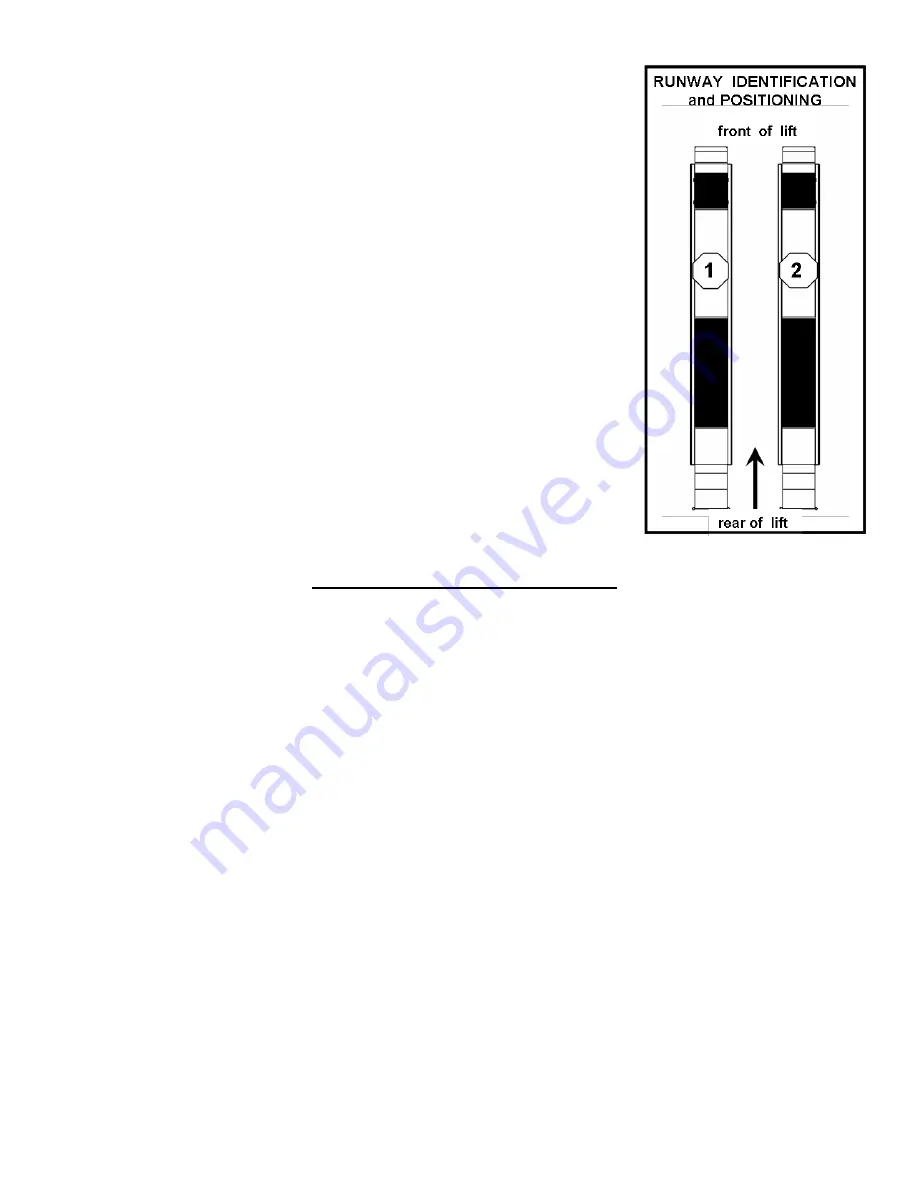
Identify top runway assembly
(see diagram to the right > >)
.
Move it to its proper position on the chalk lines you have marked.
Use extreme care not to damage preinstalled hydraulic, air and
electrical lines stored under the rear of each runway assembly.
Remove approach ramps from lower runway assembly and set
off to one side. Position second runway assembly on the chalk
lines you have marked. Confirm that turnplate pockets are at
the front of the bay and that all base frame edges are a minimum
6 inches from any floor seam. All anchor bolts must also be a
minimum of 6 inches away from any floor seam. Do not install if
floor has cracks or deterioration that could affect lift stability or
safety. The shop owner is responsible for confirming there are
no obstructions in the installation area like floor drains, under floor
piping or electrical conduit that could be damaged or would
prevent safe lift installation and secure lift anchoring. Check
ceiling for beams or heating ducts and walls for protruding
structures, etc.. Insure that the lift can be safely installed in the
position you have marked on the bay floor. Remove all packaging
material from installation area.
INSTALLATION PROCEDURE
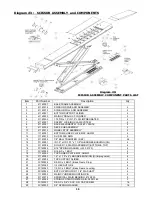
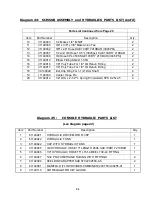
See the Installation and Parts Reference section of this manual for diagrams and parts lists
that will assist you during the installation process (pages 14 – 28). Use these diagrams and
parts lists together with the following written instructions. Insure the lift installation complies
with ANSI/ALI/ALIS, Safety Requirements for Installation and Service of Automotive Lifts.
1. Remove hydraulic, air and electrical lines from under the rear of each runway assembly.
Use extreme care not to damage any of these preinstalled items. Place on top of runway.
2. Unbolt steel shipping supports and remove from installation area.
3. Confirm that the front of both runways and inside base frame edges are on the chalk lines
you have marked. Also confirm that the runway assemblies are parallel to one another
(inside base frame distance front and rear must be equal - diagonal base frame distances front to
rear must also be equal)
. After confirming that the two runway assemblies are exactly
where they need to be, remove the shipping straps.
4. Unpack operator console and move to desired location
(reference diagram #1).
5. Carefully uncoil hydraulic, air and electrical lines and route them to the operator console
insuring there are no kinks.
6. Connect hydraulic, air and electrical lines as follows:
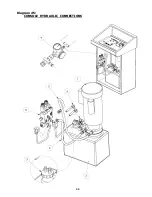
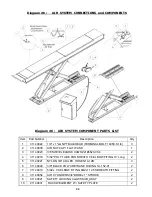
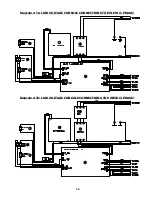
(reference diagrams #3 to #8)
(i) Connect hydraulic line from passenger side of lift to console manifold marked
“passenger side”. Connect hydraulic line from driver side of lift to console manifold
marked “driver side”.
(ii) Connect passenger side return oil line
(5/32” black tubing)
to “T” fitting from accessory box.
Connect driver side return oil line
(5/32” black tubing)
to “T” fitting. Connect “T” fitting to
oil reservoir cap in console using
5/32”
black tubing from accessory box.
Installation Procedure continued on page 10


