W W W . T M G I N D U S T R I A L . C O M P 8 / 1 7 To l l F r e e : 1 - 8 7 7 - 7 6 1 - 2 8 1 9
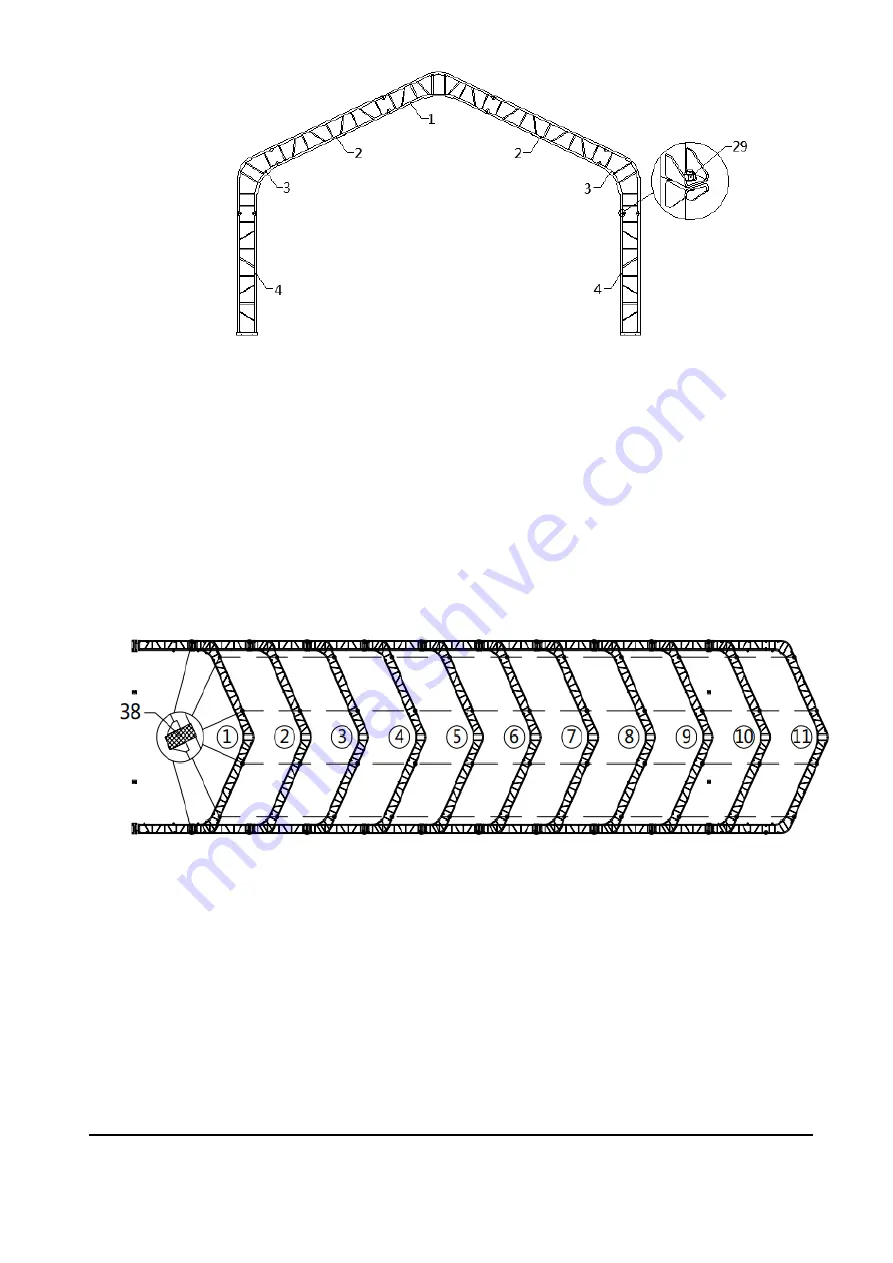
Figure 3
Lay down all (11) trusses on the ground when the assembly is all completed
and before moving to next step, and then wrap (#38) around the sharp points
of the joint to avoid friction between the fabric and the interface, resulting in
fabric damage. (refer to figure 4)
- (4) Scratch resistant tape (#38)
Figure 4
Step 3 : Put up the front truss
Put up the front truss: use a crane is the best and safest way, otherwise pull
with ropes is another option, but you have to make sure it is safe, and you have
enough manpower. We recommend 4 to 6 people to pull the truss up from
different directions. When the truss is up, tie the ropes to the heavy objects to
make sure the truss will stay upright steady, and use bolt (#29) to connect the
truss to the base plate. (refer to figure 5)
Parts used in this step : (8) Strengthened bolt (#29)


