


Version-01
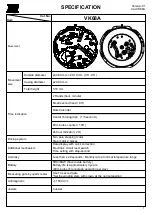
Cal.VK68A
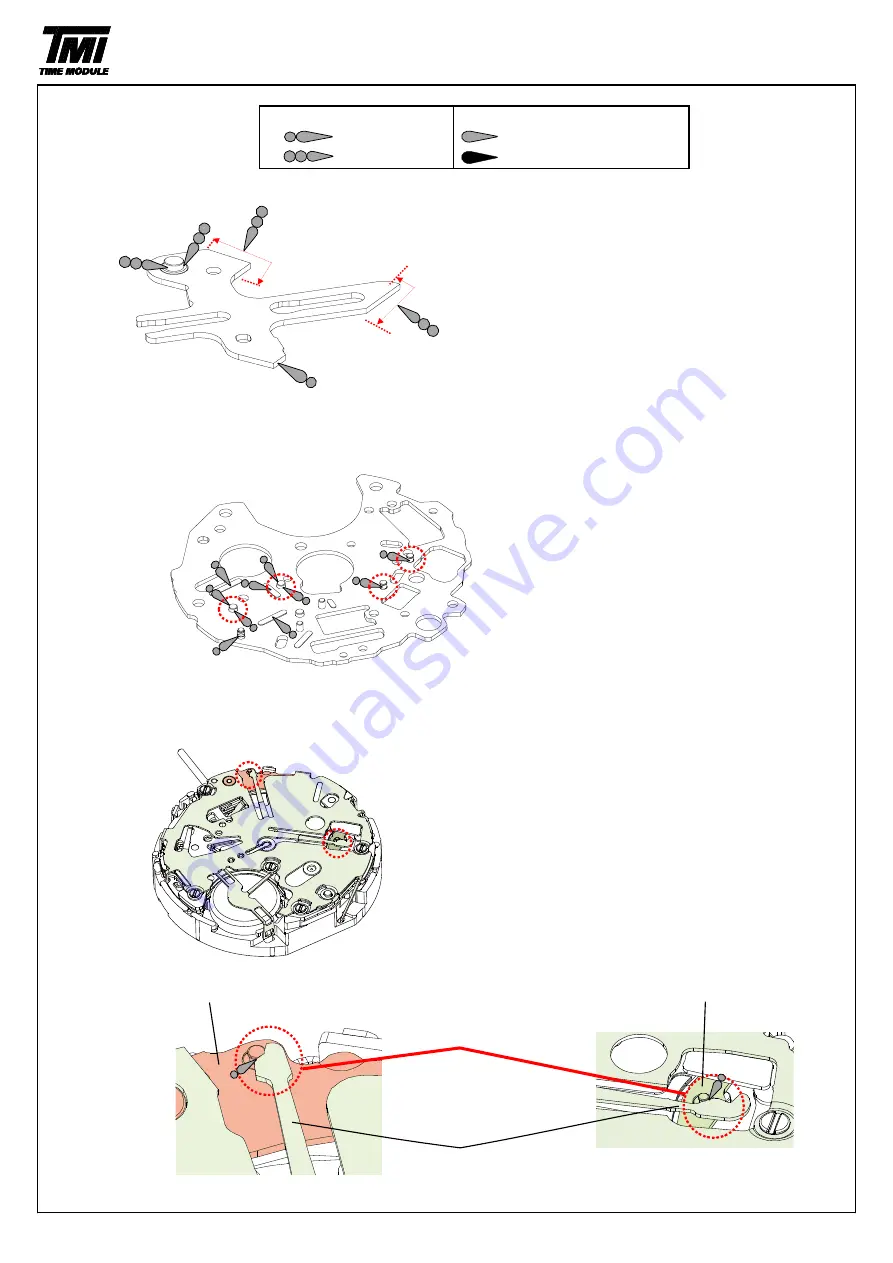
Lubricating : Types of oil
Oil quantity
Moebius 9010
NORMAL QUANTITY
S-6
SUFFICIENT QUANTITY
2.Oiling spot
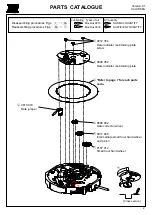
Hammer
There must be oil within the range of the arrow.
Lower plate for chronograph bridge
Note
Switch spring
*Oiling spot and spring setting position.
Chronograph coupling lever
Setting position
Switch spring
9
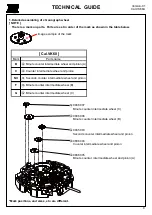
TECHNICAL GUIDE
*Oiling should be done on the contact spot of the spring and the pin.
*1
: Oiling should be done on the
pointed spot of marked place.
Hammer operating
lever (B)
*2
*3
*1
*1
*1
*1
*2
*3
○
19
○
21
○
20
○
16


