10
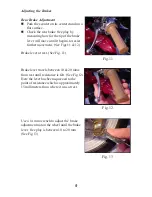
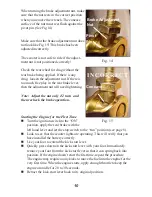
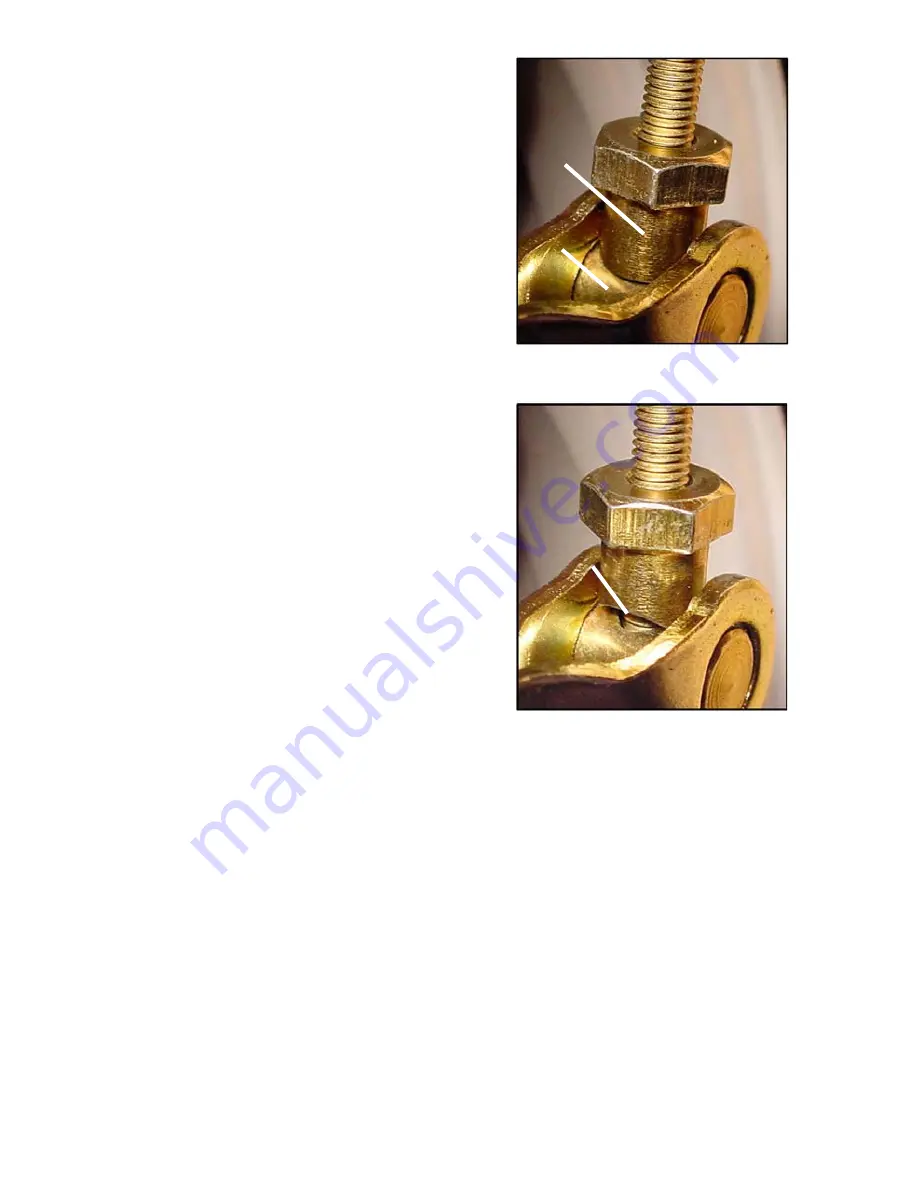
When turning the brake adjustment nut, make
sure that the nut rests in the correct position
when you remove the wrench. The concave
surface of the nut must rest flush against the
pivot pin. (See Fig 14)
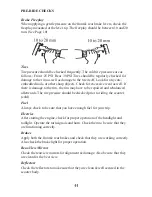
Make sure that the brake adjustment nut does
not look like Fig 15! This brake has been
adjusted incorrectly.
The scooter is not safe to ride if the adjust-
ment nut is not positioned correctly!
Check the rear wheel for drag without the
rear brake being applied. If there is any
drag, loosen the adjustment nut. If there is
too much free play in the rear brake lever,
then the adjustment nut will need tightening.
Note: Adjust the nut only 1/2 turn and
then recheck the brake operation.
Starting the Engine for the First Time
Turn the ignition switch to the “ON”
position, apply the rear brake with the
left hand lever and set the stop switch to the “run” position (see page 8).
Look to see that the scooter lights are operating. This will verify that you
have installed the battery correctly.
Use your foot to extend the kick start lever.
Quickly press down on the kick start lever with your foot. Immediately
remove your foot from the kick start lever so that it can spring back into
position. If the engine doesn’t start the first time, repeat the procedure.
The engine may require many kicks to move the fuel into the engine for the
very first time. When the engine starts, apply enough throttle to keep the
engine at an idle for 20 to 30 seconds.
Retract the kick start lever back to its original position.
Fig. 14
Brake Adjustment
Nut
Pivot
Pin
Fig. 15
I N C O R R E C T
Concave


