12
S E Q U E N C E
S W I T C H E R
1
D W E L L
T I M E
3 S E C
2
S E Q U E N C E
S K I P
C H 1
O F F
C H 2
O F F
C H 3
O F F
C H 4
O F F
Q U A D
O N
.
.
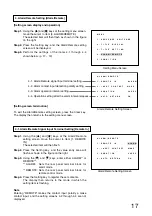
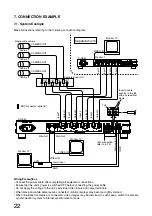
Sequential Switching Setting Screen
1-1. Automatic Sequential Switching Time Interval Setting [Dwell Time]
Step 1.
Using the [ ] and [ ] keys at the sequential switching
setting screen, move the cursor to Item [1. DWELL
TIME].
The selected item will then flash.
Step 2.
Press the Setting key, and the value entry area will
flash as shown in the figure on the right.
Step 3.
Using the [
] and [
] keys, set a variable switching
interval of 1 – 60 seconds (in 1 second units).
Step 4.
Press the Setting key to register the set value.
The display then returns to the mode in which the
setting item is highlighted.
S E Q U E N C E
S W I T C H E R
1
D W E L L
T I M E
3 S E C
2
S E Q U E N C E
S K I P
C H 1
O F F
C H 2
O F F
C H 3
O F F
C H 4
O F F
Q U A D
O N
.
.
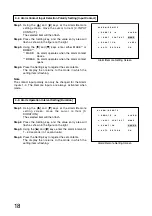
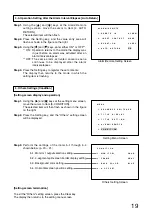
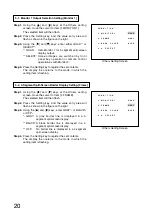
Sequential Switching Setting Screen
1-2. Sequential Switching Skip Channel Setting [Sequence Skip]
Step 1.
Using the [ ] and [ ] keys at the sequential switching
setting screen, move the cursor to the camera to skip.
The selected camera number will then flash.
Step 2.
Press the Setting key, and the setting entry area will
flash as shown in the figure on the right.
Step 3.
Using the [
] and [
] keys, select either ON*
1
or
OFF*
2
.
*
1
ON: The camera image is not displayed when in
automatic sequential switching mode.
*
2
OFF: The camera image is displayed when in
automatic sequential switching mode.
Step 4.
Press the Setting key to register the set contents.
The display then returns to the mode in which the
setting item is flashing.
Step 5.
Repeat Steps 1 – 4.
Step 6.
Pressing the Clear key returns the display to the setting
menu screen.
Notes
• It is impossible to simultaneously set all individual cameras
[CH1] – [CH4] and [QUAD] to ON.
• Channels having no connected camera are skipped
regardless of the skip channel setting.


