14
2-2. 4-Segment Split-Screen Title Display Setting [Quad Screen]
Step 1.
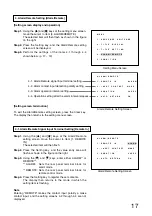
Using the [ ] and [ ] keys at the Title Display setting
screen, move the cursor to Item [2. QUAD SCREEN].
The selected item will then flash.
Step 2.
Press the Setting key, and the setting entry area will
flash as shown in the figure on the right.
Step 3.
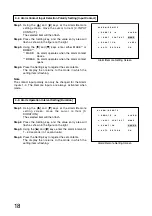
Using the [
] and [
] keys, select either ON*
1
or
OFF*
2
.
*
1
ON: Displays the title on the 4-segment split-screen.
*
2
OFF: Displays no title on the 4-segment split-screen.
Step 4.
Press the Setting key to register the set contents.
The display then returns to the mode in which the
setting item is flashing.
T I T L E
D I S P L A Y
1
F U L L
S C R E E N
O N
2
Q U A D
S C R E E N
O N
3
P O S I T I O N
C H 1
C H 2
C H 3
C H 4
Q U A D
.
.
.
Title Display Setting Screen
2-3. Title Display Position Setting [Position]
[Setting for cameras 1 – 4]
Step 1.
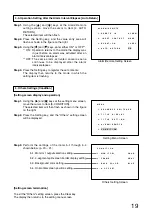
Using the [ ] and [ ] keys at the Title Display setting
screen, move the cursor to the camera (1 – 4) for which
the title display position must be changed.
The selected camera number will then flash as shown
in the figure on the right.
Step 2.
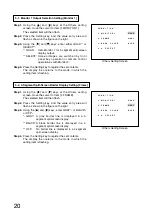
Pressing the Setting key displays the title display
position setting screen of the selected camera, and the
[
] indication will flash at the title display
position.
Step 3.
Select the display position (upper left, upper center,
upper right, lower left, lower center, or lower right)
using the [ ] and [ ] keys.
Step 4.
Press the Setting key to register the selected position.
The display then returns to the Title display setting
screen.
Step 5.
Pressing the Clear key returns the display to the setting
menu screen.
Note
When the title is displayed in any position in the upper row, the
alarm indication is displayed at the lower right, and at the upper
right when the title is displayed in the lower row.
T I T L E
D I S P L A Y
1
F U L L
S C R E E N
O N
2
Q U A D
S C R E E N
O N
3
P O S I T I O N
C H 1
C H 2
C H 3
C H 4
Q U A D
.
.
.
Title Display Setting Screen
Title Display Position Setting Screen


