19
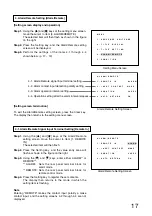
4-4. Operation Setting after the Alarm Interval Elapses [Auto Return]
Step 1.
Using the [
] and [
] keys at the Alarm/Remote
setting screen, move the cursor to Item [4. AUTO
RETURN].
The selected item will then flash.
Step 2.
Press the Setting key, and the value entry area will
flash as shown in the figure on the right.
Step 3.
Using the [ ] and [ ] keys, enter either ON*
1
or OFF*
2
.
*
1
ON: Operation returns to the mode the display was
in just before an alarm was activated after an
alarm interval elapses.
*
2
OFF: The same alarm-activated camera scene
continues to be displayed after the alarm
interval elapses.
Step 4.
Press the Setting key to register the set contents.
The display then returns to the mode in which the
setting item is flashing.
A L A R M / R E M O T E
1
R E M O T E
I N
A L A R M
2
I N P U T
C O N T A C T
M A K E
3
D U R A T I O N
2 0 S E C
4
A U T O
R E T U R N
O N
.
.
.
.
Alarm/Remote Setting Screen
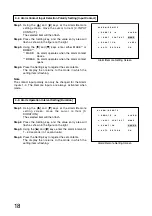
5. Others Settings [Condition]
[Setting screen display and operation]
Step 1.
Using the [ ] and [ ] keys at the setting menu screen,
move the cursor to Item [5. CONDITION].
The selected item will then flash as shown in the figure
on the right.
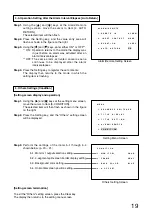
Step 2.
Press the Setting key, and the "Others" setting screen
will be displayed.
Step 3.
Perform the settings of the items 5-1 through 5-4
shown below. (p. 20 – 21.)
[Setting screen termination]
To exit the "Others" setting screen, press the Clear key.
The display then returns to the setting menu screen.
M E N U
1
S E Q U E N C E
S W I T C H E R
2
T I T L E
D I S P L A Y
3
T I T L E
S E T T I N G
4
A L A R M / R E M O T E
5
C O N D I T I O N
.
.
.
.
.
Setting Menu Screen
C O N D I T I O N
1
M O N I T O R 1
Q U A D
2
F R A M E G R A Y
3
B A C K
C O L O R
B L U E
4
H
O F F S E T
.
.
.
.
Others Setting Screen
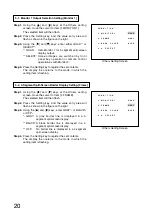
5-1. Monitor 1 output selection setting
5-2. 4-segment split-screen border display setting
5-3. Background color setting
5-4. Horizontal screen position setting


