3-11
Chapter 3: SYSTEM SETTINGS (NX-100 SETUP PROGRAM)
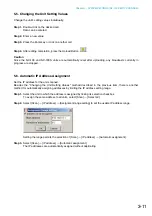
5.5. Changing the Unit Setting Values
Change the unit's setting values individually.
Step 1.
Double-click on the desired cell.
Data can be entered.
Step 2.
Enter a new value.
Step 3.
Press the Enter key or click on another cell.
Step 4.
After editing completion, press the Upload Button
.
Caution
Since the NX-100 and NX-100S units are automatically reset after uploading, any broadcasts currently in
progress are stopped.
5.6. Automatic IP Address Assignment
Set the IP address for the unit scanned.
Besides the "Changing the Unit Setting Values" method described in the previous item, there is another
method for automatically assigning addresses by limiting the IP address setting range.
Step 1.
Select the unit to which the address is assigned by ticking its selection checkbox.
To assign the same address to all units, select [Scan]
→
[Select all].
Step 2.
Select [Scan]
→
[IP address]
→
[Assignment range setting] to set the usable IP address range.
Setting the range permits the selection of [Scan]
→
[IP address]
→
[Automatic assignment].
Step 3.
Select [Scan]
→
[IP address]
→
[Automatic assignment].
The IP addresses are automatically assigned without duplicating.
Summary of Contents for NX-100
Page 6: ...Chapter 1 BEFORE INSTALLATIONS AND SETTINGS ...
Page 12: ...Chapter 2 UNIT AND SOFTWARE INSTALLATIONS ...
Page 27: ...Chapter 3 SYSTEM SETTINGS NX 100 SETUP PROGRAM ...
Page 58: ...Chapter 4 SYSTEM SETTINGS SETTING USING BROWSER ...
Page 89: ...Chapter 5 OPERATION SETTINGS NX 100 OPERATION PROGRAM ...
Page 104: ...Chapter 6 APPENDIX ...
Page 114: ...200708 URL http www toa jp ...

