21
7.4. Recording to a USB Memory Device
A commercially available USB memory device (flash drive/thumb drive) is required to make USB memory
recordings using the Master control unit. Prepare a USB memory device that meets all the conditions shown in
the section, "Usable USB memory devices" on p. 19
7.4.1. Procedure for recording to a USB memory device
1
1
2
1
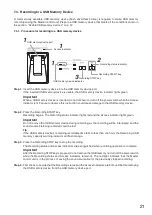
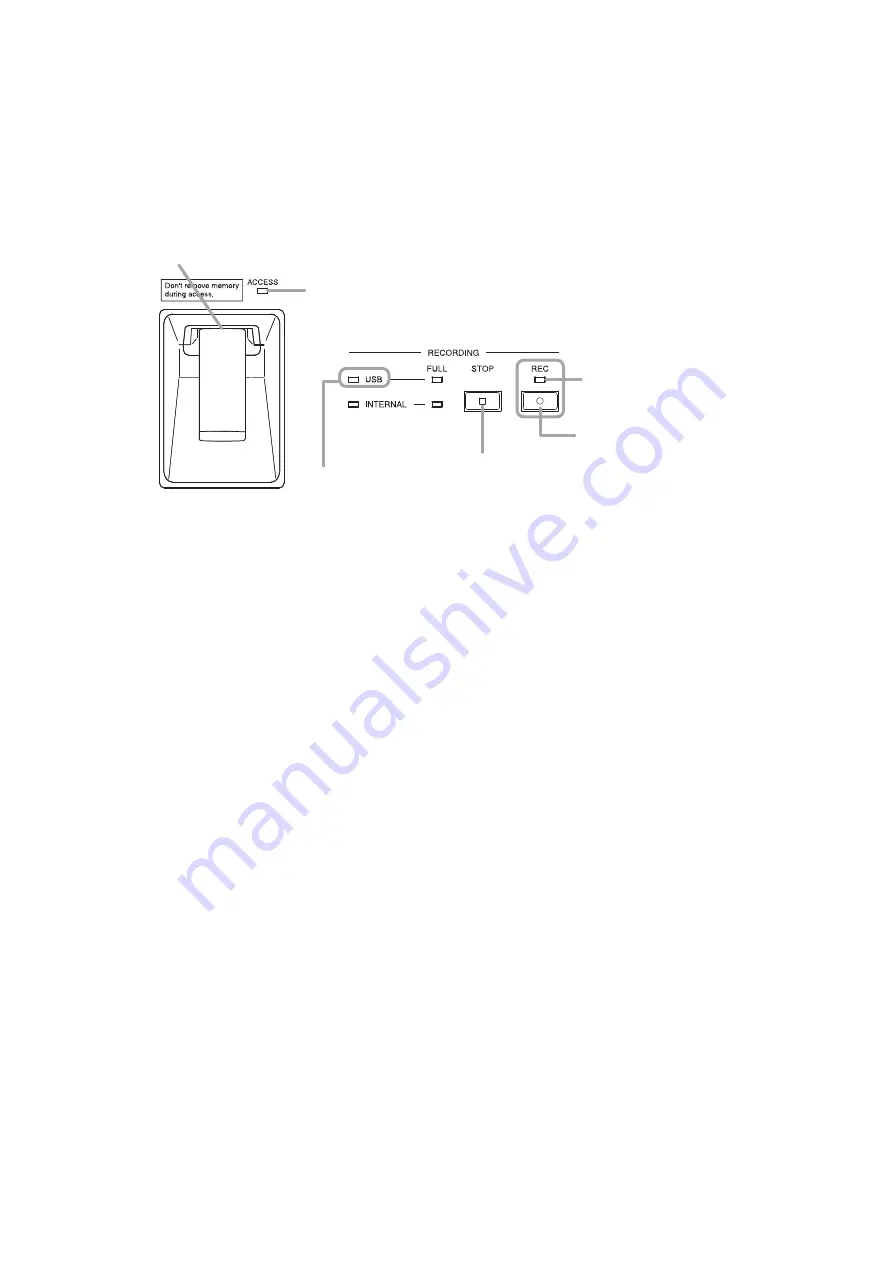
USB memory device port
3
Recording STOP key
Recording START key
Recording status indicator
Access indicator
USB memory device indicator
Step 1. Insert the USB memory device into the USB memory device port.
If the inserted USB memory device is usable, the USB memory device indicator lights green.
Important
When a USB memory device is inserted, do not remove it or turn off the power switch while the Access
indicator is lit. Failure to observe this instruction could cause damage to the USB memory device.
Step 2. Press the Recording START key.
Recording begins. The Recording status indicator lights red and the Access indicator lights green.
Important
Do not remove the USB memory device during recording, as the recording will be interrupted and the
sound source file being recorded could be lost.
Tip
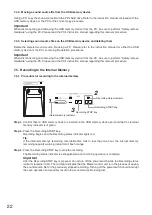
If the USB memory device’s remaining recordable time falls to less than one hour, the Remaining USB
memory capacity warning indicator will flash orange.
Step 3. Press the Recording STOP key to stop the recording.
The Recording status and Access indicators are extinguished when recording operation is complete.
Important
After the Recording STOP key is pressed, do not remove the USB memory nor turn off the power switch
while the Recording status and Access indicators remain lit. The red light indicates that the Master
control unit is in the process of saving the sound source file for the previously stopped recording.
Step 4. First check to be sure that the Recording status and the Access Indicators are both unlit before removing
the USB memory device from the USB memory device port.


