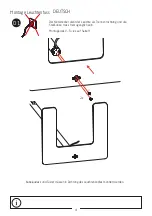
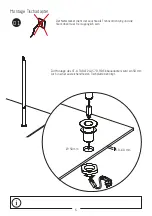
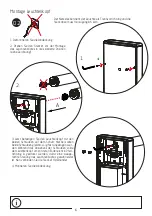
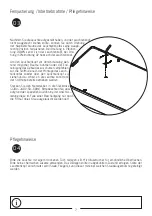
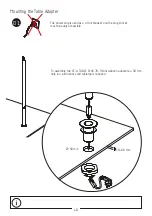
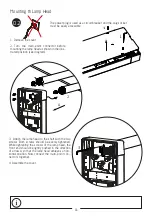
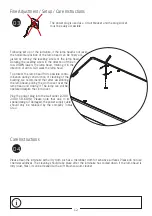
TOBIAS GRAU XA40-0, Mounting Instructions
Discover the versatile TOBIAS GRAU XA40-0 lighting fixture and enhance your space with its sleek design and impeccable functionality. For easy installation, conveniently download the free Mounting Instructions manual from 88.208.23.73:8080. Illuminate your surroundings effortlessly with this cutting-edge product.
Share
Download


Reviews:
No comments
Related manuals for XA40-0

6221000 Series
Brand: Ecco Pages: 5

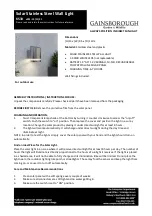
K223
Brand: Gainsborough Pages: 2

H590
Brand: Gainsborough Pages: 2
K530
Brand: Gainsborough Pages: 2

Magic Series
Brand: U Technology Pages: 6

16-2043
Brand: Ibiza Pages: 20

BELLEZA
Brand: Nave Pages: 30

Ilumipanel 180
Brand: Iluminarc Pages: 12

AQUALUC C:URVE WIDE
Brand: Barthelme Pages: 16

CS9100 Professional Series
Brand: P. M. Lighting Pages: 2

AVENUE VIRTUAL
Brand: Thorn Pages: 2

PRO-500G MH
Brand: Laserworld Pages: 14

VSSI-2005-50-BK
Brand: Volt Pages: 12

39.9PF13061N
Brand: Life Pages: 2

SCREENLITE 104105
Brand: Sun-Flex Pages: 2

1237000145
Brand: Elation Pages: 32

OE 0144
Brand: CLAS Pages: 4

HOLJES
Brand: IKEA Pages: 12


