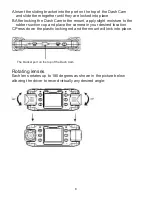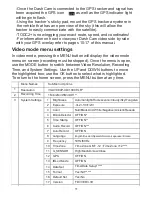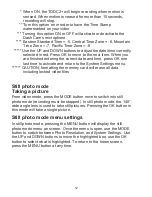
Menu Names
Sub-Menu Options
1
Resolution
VGA/1080P-UD/1080P-LR*
2
Recording Time
1 Min/2Min/5Min/Off **
3
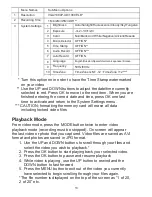
System Settings
1
Brightness
Auto/Sunlight/Fluorescence/Cloudy/Sky/Tungsten
2
Exposure
-3/-2/-1/0/1/2/3
3
Color
Null/Black And White/Negative/Ancient/Reseda
4
Motion Detector
OFF/ON*
5
Time Stamp
OFF/ON**
6
Audio Record
OFF/ON***
7
Auto Record
OFF/ON
8
Language
English/Russian/Spanish/German/Japanese/ Korean
9
Frequency
50Hz/60Hz
10 TimeZone
Time Zone GMT -12 ~Time Zone +12****
11 G_SENSOR
High/Medium/Low/Close
12 GPS
OFF/ON
13 IRLed Mode
OFF/ON
14 Date Set
Time/Date Setup*****
15 Format
Yes/No******
16 Default Set
Yes/No
17 Version
FDV VER3.3H
Menu Names
Sub-Menu Options
1
Resolution
VGA/1080P-UD/1080P-LR*
2
Recording Time
1 Min/2Min/5Min/Off **
-Once the Dash Cam is connected to the GPS tracker and signal has
been acquired the GPS icon
as well as the GPS indicator light
will begin to flash.
-
Using the tracker ’s sticky pad, mount the GPS
tracker anywhere in
the vehicle that has an open view of the sky (this will allow the
tracker to easily communicate with the satellite).
-TODC2+ is now logging your exact route, speed, and coordinates!
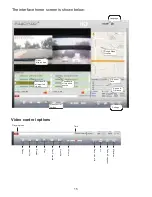
-For information on how to view your Dash Cam video side by side
with your GPS overlay refer to pages 10-17 of this manual.
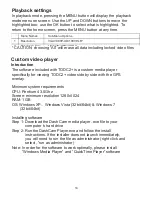
Video mode menu settings
In video mode, pressing the MENU button will display the video mode
menu on screen (recording must be stopped). Once the menu is open,
use the MODE button to switch between Video Resolution, Recording
Time, and System Settings. Use the UP and DOWN buttons to move
the highlighted box; use the OK button to select what is highlighted.
To return to the home screen, press the MENU button at any time.
11


