5
INSTRUCTIONS FOR USE
1. Remove all packaging materials, sticker, and labels.
2. Clean the basket and pan with hot water, soap and a non-abrasive sponge. These parts
are dishwasher safe.
3. Wipe the inside and outside of the appliance with a clean cloth.
4. Place the Air Fryer on a flat and even surface.
5. Place the cooking basket into the heating chamber, then place into the Air Fryer.
6. Plug unit in to a 3-prong grounded wall socket. The On/Off icon will be illuminated.
7. To start the Air Fryer in manual mode, press On/Off. The factory default setting is 15
minutes at 370° F.
• Time can be adjusted in 1-minute increments by pr or − on the left side of the
control panel.
• Temperature setting can be adjusted in 10° increments by pr or − on the right
side of the control panel.
8. To cook using one of the seven cooking presets, press M until the desired icon is illumi-
nated. Then press On/Off to start the Air Fryer.
9. You can override the current cooking cycle at any time. To do so:
• Adjust the time by pr or − on the left side of the control panel.
• Adjust the temperature by pr or − on the right side of the control panel.
• Select a different cooking preset by pressing M until the new preset is illuminated.
10. The fan/heating icon will illuminate red while the Air Fryer is heating, and will turn off once
the selected temperature has been reached. During the cooking cycle, while hot air is
circulating through the Air Fryer, the icon will illuminate blue. It will stay blue during the
cooling period.
11. In order to shake or add ingredients during the cooking cycle:
• Remove the cooking basket by the handle. The Air Fryer will automatically shut down.
• Add ingredients or gently shake basket.
• Place basket back into the machine. The cooking cycle will resume.
• See the Cooking Guide for recommended times to add or shake ingredients.
12. Once the cooking cycle is complete, remove the heating chamber with the cooking
basket from the Air Fryer and place it on a pot holder. The heating chamber and cooking
basket are VERY HOT—do not place on any surface that can burn.
NOTE:
Liquids will accumulate in the cooking chamber. Use caution when removing from the
Air Fryer.
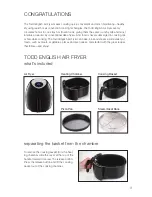
13. To separate the cooking basket from the heating chamber, slide the cover at the top
of the handle forward to access the release button. Press the release button and lift the
cooking basket out of the cooking chamber.
The Pizza Pan is included for cooking pizza, and can also be used as a baking tin. Place the
pan into the cooking basket, and then put the basket with the pan into the heating chamber.
The Steam/Meat rack is included for steaming or keeping meats off the bottom of the basket.
Place the rack into the cooking basket, and then put the basket with the rack into the heating
chamber. The rack can also be used with the Pizza Pan, with both placed in the basket.
NOTE: In order for the Air Fryer to operate, the heating chamber—with the cooking
basket in it—must be secured in the Air Fryer.
Summary of Contents for TEAFXL55
Page 1: ...5 8 QT AIR FRYER with CONVECTION OVEN model number TEAFXL55 ...
Page 10: ...10 ...
Page 28: ...28 ...
Page 59: ...59 ...

