1
2
3
Troubleshooting
Other
If you have any questions, please consult the following troubleshooting guide
THERE IS NO IMAGE AND NO SOUND
●
Check the ON button is connected
●
Check the socket works
●
●
Check the power supply cable is not
damaged
Check the plug is firmly inserted into the
wall socket
THERE IS IMAGE BUT NO SOUND
●
Check the audio connecti
●
Check the audio key is not damaged
●
●
Check you have setup the DVD pl
●
●
ons are properly
connected
Check the volume is activated in the VOL /
CH setup
ayer’s
AUDIO settings correctly
Check you have used the correct AV IN
on your television
THERE IS SOUND BUT NO IMAGE
●
Check the video connecti
●
●
Check the video key is not broken
●
Check you have setup the DVD play
ons are properly
connected
Check you have used the correct AV IN on
your TV
er’s
VIDEO settings correctly
DISTORTED IMAGE OR SOUND
●
Check you have setup the DVD pl
●
Check the disc in not scratched or stained
●
ayer’s
AUDIO settings correctly
damaged
Check the AV key or the OUT terminal
are not
THE MESSAGE “BAD DISC” APPEARS
●
Check the disc is not bent, broken or deformed
●
Check the disc is not too stained or damaged
●
●
Please check if you have attempted to play
Check the disc format is compatible with the
DVD player
a
software CD. If so, turn the DVD player
THE REMOTE CONTROL DOES
NOT WORK
●
●
●
Point the remote control directly
●
Check the main unit POWER button is
connected
Check the remote control batteries are
working
towards
the unit’s infrared sensor
Remove any obstacles between the remote
control and the sensor
Check the audio is not in silent mode
(MUTE)
THE UNIT DOES NOT WORK
●
Disconnect the power supply and reconnect
THE MESSAGE “NO DISC” APPEARS
●
●
Check that the disc is the right way up.
●
Check that the disc is not deformed, stained
or scratched.
Check that you have placed the disc in the
tray.
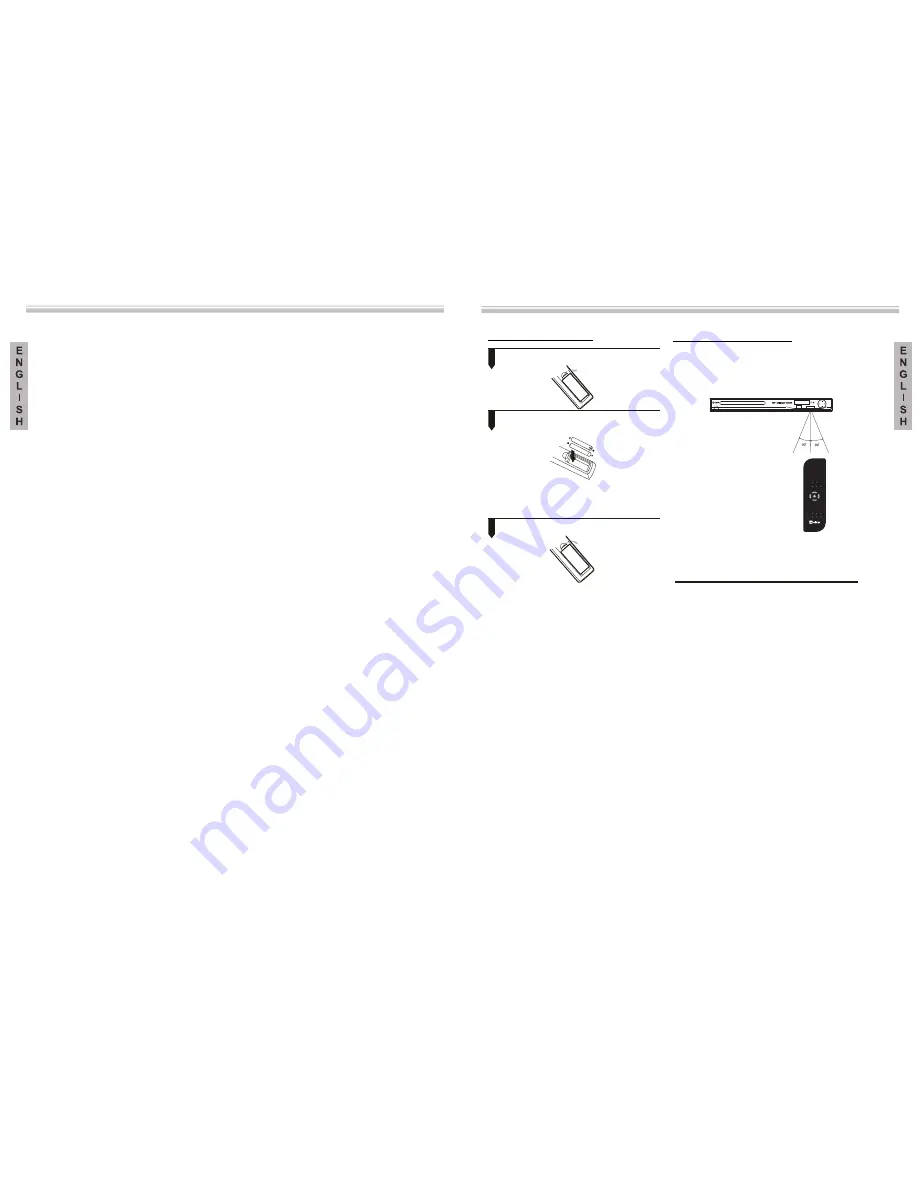
Preparing the remote control
Other
Inserting the batteries
1. Open the cover
2. Insert the batteries(2XAAA size
of the battery compartment.
Make sure that the + and – poles of the
batt eries coincide with the marks on the
inside
3. Close the cover
Notes:
The incorrect use of batterie
handle the remote control safel
s can produce
leakage of the inner liquid and corrosion.
To
y,
follow these instructions:
●
Do not put the batteries in the wrong way.
●
Do not recharge, heat, open or
●
Do not throw the batteries in the fire.
●
Do not leave empty batteries
●
old ones.
●
rol for a long period of time, remove the
batteries to avoid potential corrosion damage.
●
ance is very short,
replace with new batteries.
?
If liquid leakage occurs in
clean the battery compartment
and then put new ones in.
short-
circuit the batteries.
inside the
remote control.
Do not use different types of battery at
the same time. Do not mix new batteries
with
If you are not going to use the remote
cont
If the remote control does not work
correctly,
or the
working dist
side the batteries,
carefully
Using the remote control
Point the remote control towards the DVD
player’s sensor. (The images below are only
for reference).
sunlight.
e DVD player to strong li
Note: Do not expose the remote control or
th
ght such as
direct
Notes:
●
●
Do not leave the remote control in
●
●
Battery life is of approximately
Point the remote control directly towards the
DVD player.
an excessively
hot or damp place.
Do not spill water or place anything wet on
the remote control.
one year in
normal use conditions.
70
7
0
71
DISPL AY
OPEN/CLOSE
PROGRAM CL EA R SUBTITLE
TIME
TITL E
HDMI
VOL+
VOL-
SL OW
DVD/DVB
RADIO/TV
ZOOM
MUTE
POWER
+
REPEAT
V-MODE
RETURN
A -B
SETUP
MENU/PBC
ENTER
PLAY/PAUSE
LANGUAGE
L/R
STOP
REV
NEXT
PREV
FWD
USB /CA RD
REC
S D /M M C /M S
U S B
LDT-1200
1.5V)


