background image

Keyless Electronic Lock

INSTALLATION INSTRUCTIONS

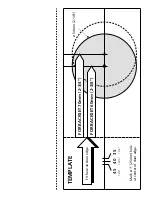
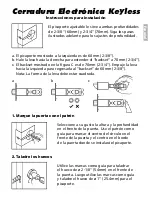
1. MARK THE DOOR WITH TEMPLATE

2. DRILL HOLES

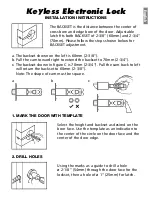
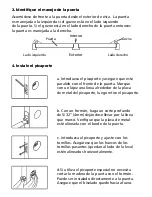
The BACKSET is the distance between the center of 

cross bore and edge bore of the door. Adjustable 

latch 

fi

 ts both BACKSET of 2-3/8” (60mm) and 2-3/4” 

(70mm). Please follow the steps shown below for 

BACKSET adjustment.

a. The backset shown on the left is 60mm (2-3/8”).

b. Pull the cam toward right to extend the backset to 70mm (2-3/4”).

c. The backset shown in 

fi

 gure C is 70mm (2-3/4”). Pull the cam back to left     

    will return the backset to 60mm (2-3/8”).

    Note: The shape of cam must be square.
a

b

c

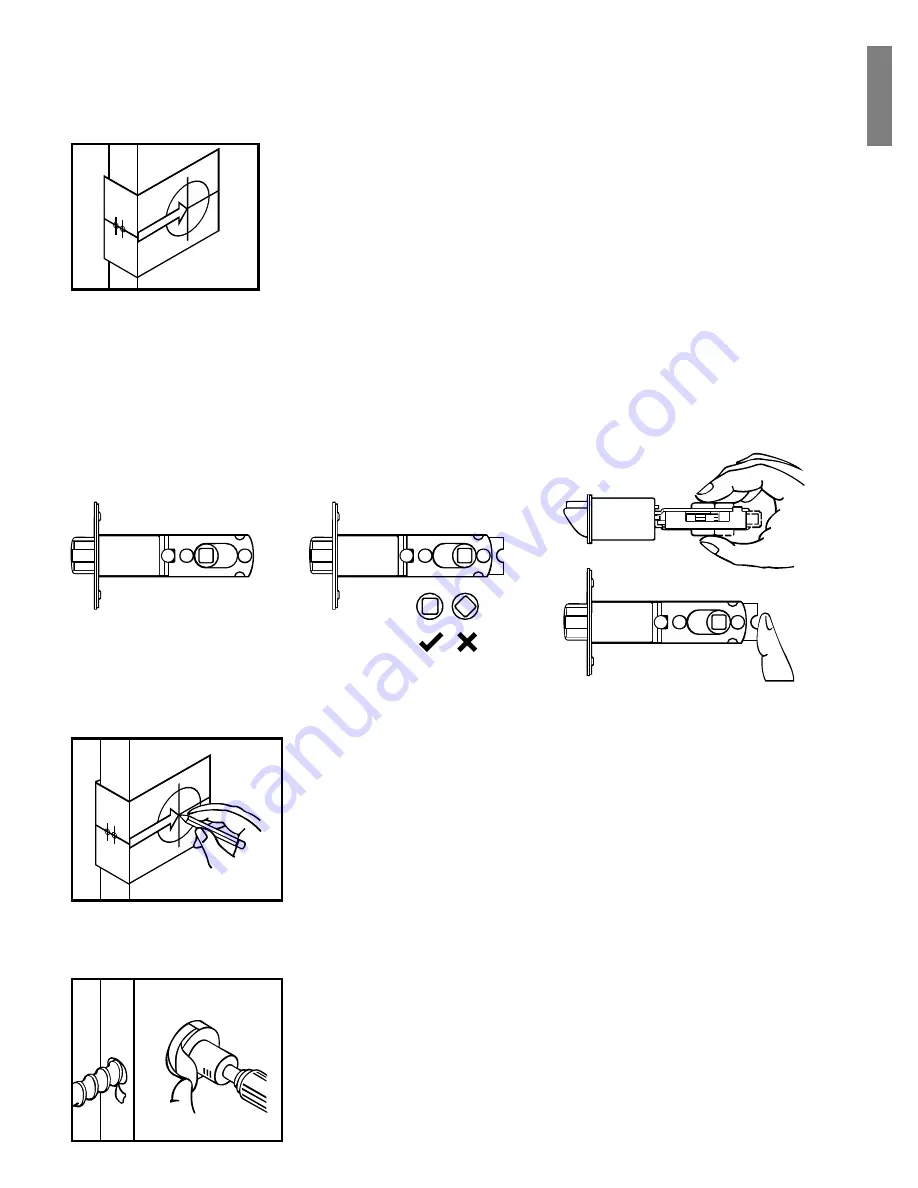
Select the height and backset as desired on the 

boor face. Use the template as an indication to 

the center of the circle on the door face and the 

center of the door edge.

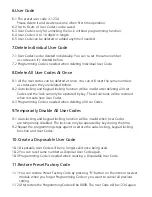
Using the marks as a guide to drill a hole 

ø 2-1/8” (54mm) through the door face for the 

lockset, then a hole of ø 1” (25mm) for latch.

English

Summary of Contents for V180E-US15

Page 1: ...USER MANUAL Electronic Lever Knob Manual del usuario Mango Pomo Electr nico...

Page 2: ...White Page...

Page 3: ...t is 60mm 2 3 8 b Pull the cam toward right to extend the backset to 70mm 2 3 4 c The backset shown in figure C is 70mm 2 3 4 Pull the cam back to left will return the backset to 60mm 2 3 8 Note The s...

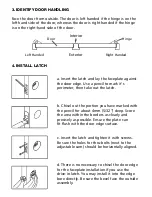
Page 4: ...hten it with screws Be sure the holes for thru bolts next to the adjustable cam should be horizontally aligned d There is no necessary to chisel the door edge for the faceplate installation if you use...

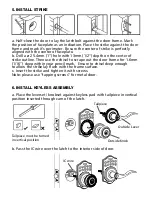
Page 5: ...mm 1 16 deep within your pencil mark Ensure to chisel deep enough to allow the strike lay flush with the frame surface c Insert the strike and tighten it with screws Note please use tapping screws for...

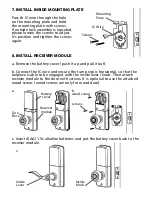
Page 6: ...lopsided please loosen the screws to adjust it s position and tighten the screws again a Remove the battery cover push it up and pull it out b Connect the IC wire and ensure the turn piece is horizon...

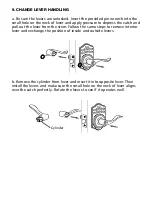
Page 7: ...w the same steps to remove interior lever and exchange the position of inside and outside levers b Remove the cylinder from lever and insert it into opposite lever Then install the levers and make sur...

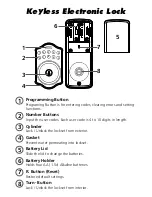
Page 8: ...length Cylinder Lock Unlock the lockset from exterior Gasket Prevent water permeating into lockset Battery Lid Slide the lid to change the batteries Battery Holder Holds four AA 1 5v Alkaline batteri...

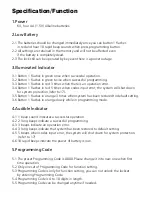
Page 9: ...er to17 3 5 Button 1 flashes in orange 3 times when system has been restored to default setting 3 6 Button 1 flashes in orange slowly while in programming mode 4 Audible lndicator 4 1 1 beep sound ind...

Page 10: ...d the lock can only be operated by key These functions will be restored when recreate new User Codes 8 3 Programming Code is needed when deleting all User Codes 9 Temporarily Disable All User Codes 9...

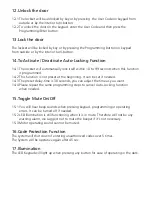
Page 11: ...nning It can be set if needed 14 3 The preset delay time is 30 seconds you can adjust the time as you want 14 4 Please repeat the same programming steps to cancel Auto Locking function when needed 15...

Page 12: ...ut then the system will be operative again 4 Each programming step should be done within 6 seconds 5 You can lock and unlock this product by either key or keypad Please refer to the following programm...

Page 13: ...by key during the time Remark The preset delay time is 30 seconds you can change the time by following instruction Repeat the steps to cancel the Auto locking function Enter New UC Enter New PC Enter...

Page 14: ...by key during the time Repeat the steps to enable the User Codes again Remark Disposable code will be no longer walid once being used Remark Press R button for over 5 seconds The programming will comp...

Page 15: ...54mm 2 1 8 Mark 1 25mm hole at center of door edge Fit here on door edge FOR BACKSET 70mm 2 3 4 45 1 3 4 1 9 16 1 3 8 40 TEMPLATE 35 FOR BACKSET 60mm 2 3 8...

Page 16: ...White Page...

Page 17: ...El backset mostrado en la figura C es de 70mm 2 3 4 Empuje la leva hacia la izquierda para regresarla al backset de 60mm 2 3 8 Nota La forma de la leva debe estar cuadrada a b c Seleccione a su gusto...

Page 18: ...seg rese que los huecos de los tornillos pasantes quedan al lado de la leva est n alineados horizontalmente d Si utiliza el picaporte especial no necesita cortar la madera de la puerta con el form n P...

Page 19: ...lrededor del pasador que permita que el pasador y el marco de la puerta est n alineados c Introduzca el pasador y ajuste con los tornillos Nota Para puertas de metal use tornillos auto roscable a Colo...

Page 20: ...ntaje de afuera de la cerradura est virado suelte los tornillos para arreglar la posici n y vuelva a ajustar los tornillos a Remueva la tapa de la bater a empuje hacia arriba y hale hacia fuera b Cone...

Page 21: ...Repita las mismas indicaciones para remover el mango interior Intercambie de posici n los mangos b Remueva el cilindro del mango e inserte en el mango opuesto Luego instale los mangos y asegure que e...

Page 22: ...Cilindro Cierra o abre el seguro desde el exterior Junta Previene la entrada del agua en la cerradura Tapa de la bater a Deslice la tapa para cambiar las bater as o para restaurar el ajuste Caja de b...

Page 23: ...l sistema ha sido restaurado a su estado original 3 6 El bot n 1 parpadea en anaranjado lentamente cuando est en modo de programaci n 4 Audible lndicator 4 1 1 sonido beep indica operaci n exitosa del...

Page 24: ...rogramar los mismos n meros como c digos aunque los haya borrado anteriormente 8 2 Auto locking and Keypad locking function will be invalid after deleting all User Codes and the lock can only be opera...

Page 25: ...ros en la parte exterior Tambi n cierra desde el interior girando el mango o el pomo 14 Activar o desactivar la funci n de auto cerrado 14 1 Cuando la funci n de auto cerrado se programa la puerta cer...

Page 26: ...adea tres veces junto a 3 beeps cuando el c digo entrado es incorrecto Necesita esperar por 6 segundos u oprimir el bot n de programado para que el sistema opere nuevamente 4 Cada paso de programaci n...

Page 27: ...establecido previamente es de 30 segundos Puede cambiar esto siguiendo las instrucciones Repita los pasos para cancelar la funci n de auto cerrado Entre Nuevo CU Entre nuevo CP Entre el CU que desea...

Page 28: ...ser inv lida La cerradura se podr utilizar s lo con la llave Repita los pasos para habilitar los c digos de usuario nuevamente Nota El c digo de usuario disponible no ser v lido una vez haya sido usad...

Page 29: ...2 1 8 Marque el hueco de 1 25mm en el centro del borde de la puerta Acomodar esta parte al borde de la puerta Para profundidad de 70mm 2 3 4 45 1 3 4 1 9 16 1 3 8 40 Patr n 35 Para profundidad de 60mm...

Page 30: ...White Page...
Page 31: ...ccurred by act of God and damages caused by misuse abuse and unauthorized modification Toledo will not be held liable for incidental or consequential losses or damages to any act of God Service requir...

Page 32: ...Toledo Co PO Box 915 Dorado PR 00646 0915 Tel 1 787 807 3738 Fax 1 787 807 3767 Toll free 1 866 714 6073 www toledofinelocks com info toledofinelocks com...

Reviews: