TonerRefillKits.com
RechargX™ RX180 v2
Mon - Fri 8am - 5pm ET
© 1995-2012 ReChargX™, EmptyX, TonerRefillKits and TonerRefillKits.com, the TonerRefillKits logo, the
2012.02.21
800.527.3712 or 352.343.7533 ReChargX™ and EmptyX logos are trademarks owned by TonerRefillkits, LLC. All rights reserved.
Page 2 of 10
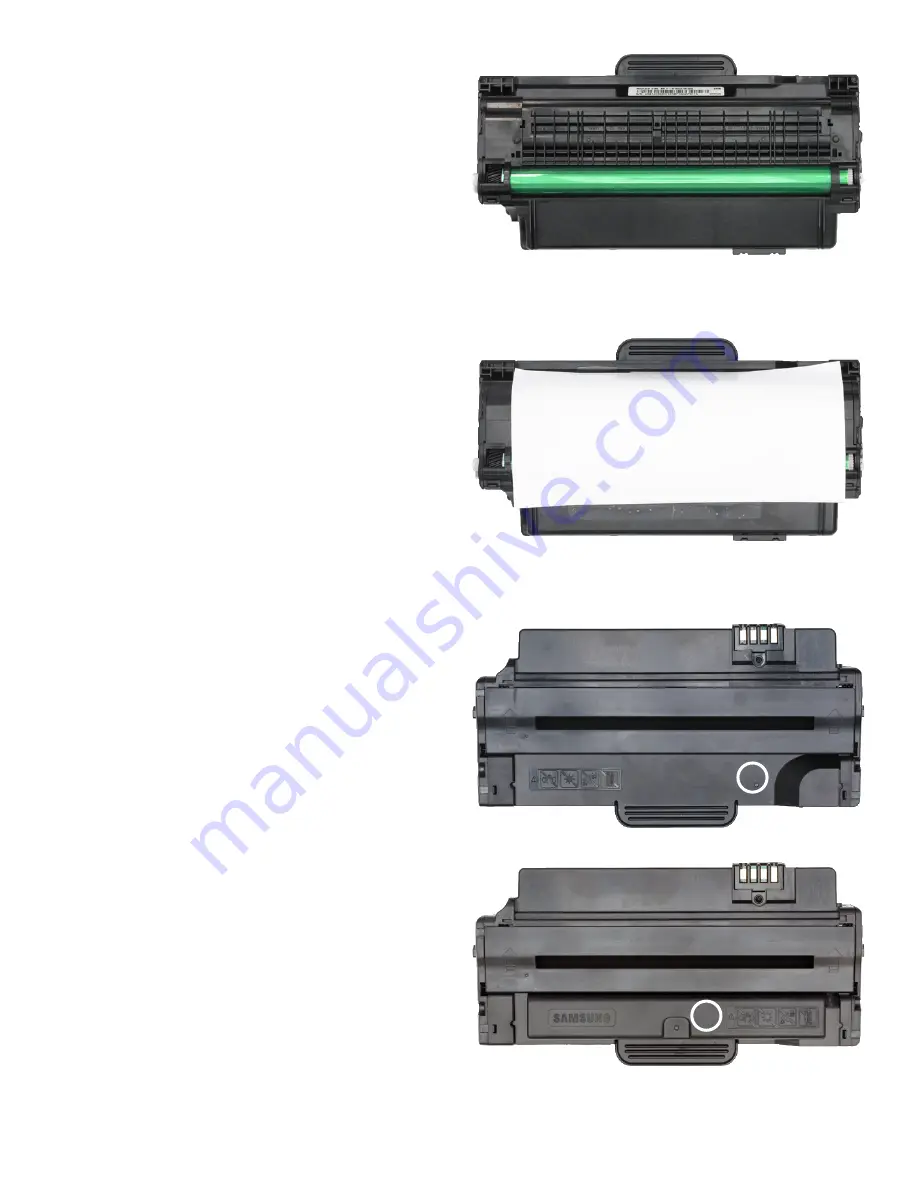
Step 2: Rotate the Toner Cartridge
Turn the cartridge over so the handle is now away
from your chest and the green imaging drum is
closest (figure 3).
Step 3: Cover the Toner Roller
With the cartridge in the same orientation as
previously shown in figure 3 (with the toner
cartridge handle away from your chest), we will
tape a piece of paper over the cartridge imaging
drum by placing tape on both sides of the paper
to secure it to the cartridge (figure 4).
Step 4: Locate the Toner Hopper
Rotate the cartridge back so the toner cartridge
handle is now facing your chest and the reset
chip is opposite.
You will be placing the toner hopper hole within the
area shown by the white circles for either version
of the cartridges, shown in figures 5a & 5b.
MLT-D105S: Please refer to figure 5a.
MLT-D105L: Please refer to figure 5b.
Figure 3
: Cartridge rotated to back side
Figure 4
: Covering the imaging drum with paper
Figure 5a
: Locating the MLT-D105S toner hopper area
Figure 5b
: Locating the MLT-D105L toner hopper area


