This is a publication by Conrad Electronic SE, Klaus-Conrad-Str. 1, D-92240 Hirschau (www.conrad.com). All rights
including translation reserved. Reproduction by any method, e.g. photocopy, microfilming, or the capture in electronic data
processing systems require the prior written approval by the editor. Reprinting, also in part, is prohibited. This publication
represents the technical status at the time of printing.
Copyright 2018 by Conrad Electronic SE.
*1712599_v2_1018_02_dh_m_en
Installation
Do not touch the lens with your fingers (especially finger nails) or sharp/pointed
objects.
The rubber pads located on the end of the mounting clip
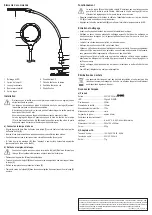
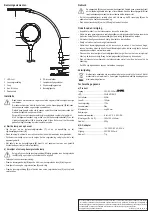
(9)
may leave marks on
sensitive surfaces.
Do not use force to open the clip as this may cause damage. The maximum clip
range is approximately 60 mm.
Always make sure the device is securely clipped on before letting go.
When adjusting the device, make sure the lamp attachment plug
(7)
and clip
attachment socket
(8)
remain in the locked position or the top section may fall down
and cause damage.
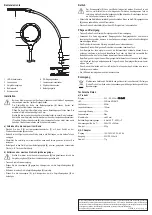
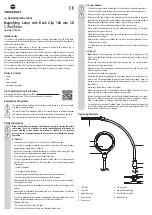
a) Connect the Lamp to the Base
• Line the pin on the lamp attachment plug
(7)
up with the slot on the clip attachment socket
(8)
.
• Insert all the way then rotate either direction to lock the two parts.
• Gently check to make sure the lock is secured before letting go.
• Using the mounting clip
(9)
, attach the device to a suitable horizontal surface (e.g. table or
work bench).
b) Remove or Replace the Magnifying Lens.
Always make sure the lens lock
(2)
is firmly closed and the magnifying lens
(3)
is
securely held in place before letting go.
• Disconnect from the power supply.
• Turn the lens lock
(2)
counterclockwise to release the magnifying lens
(3)
.
• Carefully remove or / replace the magnifying lens
(3)
.
• Turn the lens lock
(2)
clockwise to fix the magnifying lens
(3)
in place.
Operation
The gooseneck
(5)
can be adjusted as required. Do not use excessive force to
over bend or twist the flexible section. Hold the mounting clip
(9)
while making
adjustments to prevent the lamp from falling over.
• Completely unwind and connect the power adaptor cable to the DC input jack
(6)
and the
other end to a mains power supply.
• Press the power button
(4)
to turn the LED ring light on/off.
Care and Cleaning
• Disconnect the product from the power supply before cleaning.
• Under no circumstances use aggressive cleanings agents, cleaning alcohol or other chemical
solutions since these can penetrate the housing or impair functionality.
• The product does not require any maintenance, do not disassemble it.
•
Clean the product with a dry, fibre-free cloth.
• Use a lens cleaning cloth for cleaning the lens. Alternatively, use a dry, clean, soft and lint-
free cloth or a dust brush. If necessary, you can moisten the cloth with a small amount of
lukewarm water.
• When cleaning the lens with a cleaning agent, make sure not to directly apply the cleaner on
the lens. Always apply the cleaning agent to the cloth first.
• When cleaning, do not apply too much force on the lens or housing in order to avoid
scratching.
• The LEDs are built-in and cannot be replaced.
Disposal
Electronic devices are recyclable waste and must not be disposed of in the
household waste. At the end of its service life, dispose of the product in accordance
with applicable regulatory guidelines.
Technical Data
a) Product
Input.............................................. 20 V/DC, 300 mA
LED ............................................... 30 pcs 6 W SMD
Luminous flux
............................... 500 lm
Lens Ø .......................................... 100 mm
Lens magnification
........................ 1.75x
Lens material ................................ Glass
Clamp width .................................. Approx. 60 mm
Operating / storage conditions ......
-5 to +40 °C, ≤ 95 % RH
Dimensions (W x H x D) ............... 360 x 125 x 360mm
Weight .......................................... 520 g
b) AC Adapter
Input.............................................. 100 - 240 V/AC 50 - 60 Hz
Output ........................................... 20 V/DC, 300 mA
Weight .......................................... 71 g


