Filling
The gas-fired soldering/brazing torch is not filled when delivered, due to safety reasons. When
using for the first time, you must first fill the gas-fired soldering/brazing torch’s tank before using
the product.
Warning!
Only use commercial lighter gas (ISO butane gas) to fill the tank. Suitable refill car-
tridges are available for purchase (e.g. 250ml cartridges) for this purpose. In case of
doubt, consult a specialist.
NEVER fill the product with other gases/fluids. Never use unsuitable cartridges or
hose connections when filling! There is a great risk of fire or explosion!
Only fill the gas tank of the product in a well ventilated environment and avoid
naked flames. (Risk of explosion!)
Only fill the product after it has cooled down completely.
To fill, proceed as follows:
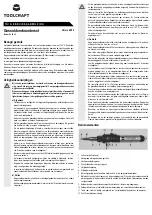
• Turn the gas-fired soldering/brazing torch so the filling valve (1) points vertically upwards.
• Attach the filling tip of the lighter gas cartridge vertically to the filling valve (1). If necessary, use
a suitable adapter (usually supplied with the lighter gas cartridge).
• Press the lighter gas cartridge down, on to the filling valve. The gas flows into the gas tank of
the gas-fired soldering/brazing torch. End the procedure after 2 to 3 seconds.
Stop the filling process immediately, if gas escapes. A gas-air mixture could arise
that could explode. Make sure that the room is well ventilated before you ignite the
gas-fired soldering/brazing torch or other sources of ignition.
Wait for a few minutes after filling, before using the product, so the gas refill can sta-
bilise.
Use with soldering bit (catalyst burning)
The soldering bit (10) with attached soldering tip (9) is included in the delivery. The soldering tip
(9) can be replaced with differently shaped soldering tips (e.g. spatula shape).
☞
When removing the soldering bit, the fixing ring (7) has to be unscrewed. Then, the
soldering bit (10) can be removed from the metal sleeve (8) (if the spatula shaped
soldering tip is attached to the soldering bit, it must be unscrewed first).
The gas burns without a flame due to the catalyst located in the soldering bit (10). For this rea-
son, the flame must be extinguished after ignition.
Proceed as follows:
• Turn the gas-fired soldering/brazing torch so the soldering tip points upwards.
• Adjust the amount of gas to medium, with the regulator for the gas flow (3).
• Slide the slider switch (4) towards the tip, so the catch (5) engages. Gas is released, with can
be heard as a clear hissing.
The gas must be ignited immediately, with the slider for the piezo ignition (12). The slider can
be pressed twice or three times, to ensure safe ignition.
• Now, extinguish the flame, by pressing the button (11) firmly, for about one second.
Gas continues to escape. The gas burns without a flame, due to the catalyst located inside the
soldering bit (10). The heat generated heats up the soldering tip after approx. 20-30 seconds
(depending on the size of the soldering tip), and it can now be used for soldering.
There is an opening in the side of the soldering bit (10). An orange glow must be visi-
ble here, indicating that, at the catalyst, the gas is now „burning“ without a flame.
When using the soldering bit(10) with soldering tip attached, there must not be a
naked flame, as this will damage the soldering bit.
Adjusting the gas flow
• The amount of gas released can be adjusted with the regulator (3).
• If the regulator is moved to the left (imprint „-“) (soldering tip pointing upwards or away from
you), the amount of gas, and hence the temperature of the soldering tip, is decreased.
• If the regulator is moved to the right (imprint „+“) (soldering tip pointing upwards or away from
you), the amount of gas, and hence the temperature of the soldering tip, is increased.
Switching off
• Press the catch (5) and move the sliding switch (4) all the way back, towards the grip.
• The gas valve closes, the gas is no longer released. A hissing noise should not be heard.
Use with naked flame
The gas-fired soldering/brazing torch can also be used without a soldering tip , for example,
when it is to be used for hard-soldering or other work that requires a hot flame (up to 1300 °C).
Note:
If the soldering bit (10) is inserted in the metal sleeve (8), it must be removed first.
The soldering bit (10) with inserted soldering tip, as well as the gas-fired solde-
ring/brazing torch, must have cooled down completely! Risk of burns!
Unscrew the fixing ring (7), remove the soldering bit (10) with the soldering tip attached.
Reattach the fixing ring (7) to the thread on the gas-fired soldering/brazing torch and
screw it tight (do not catch an edge).
Proceed as follows:
• Turn the gas-fired soldering/brazing torch, so the metal sleeve (8) points upwards.
• Adjust the amount of gas to medium, with the regulator for the gas flow (3).
• Slide the slider switch (4) towards the metal sleeve, so the catch (5) engages. Gas is released,
with can be heard as a clear hissing.
The gas must be ignited immediately, with the slider for the piezo ignition (12). The slider can
be pressed twice or three times, to ensure safe ignition.
Adjusting the gas flow
• The amount of gas released can be adjusted with the regulator (3).
• If the regulator is moved to the left (imprint „-“) (soldering tip pointing upwards or away from
you), the amount of gas is decreased and the flame becomes weaker.
• If the regulator is moved to the right (imprint „-“) (soldering tip points upwards or away from
you), the amount of gas is increased and the flame becomes stronger.
• Press the catch (5) and move the sliding switch (4) all the way back, towards the grip.
• The gas valve closes, the gas is no longer released. A hissing noise should not be heard.
Tips and Notes
• The foot (6) can be folded out during breaks. Place the gas-fired soldering/brazing torch on an
even, stable surface! Use a suitable heat and fire resistant underlay (e.g. a ceramic tile).
• A small bowl and a sponge are supplied for cleaning the soldering tip. Moisten the sponge well!
Flux residues can now be easily removed by wiping the soldering tip on the wet sponge.
Disposal
Please dispose of the device when it is no longer of use, according to the current
statutory requirements.
Technical Data
Flame temperature: ..............................max. ca. 1300 °C; with soldering tip ca. 400 °C
Gas tank: ..............................................22 ml
Operating time with 22 ml:....................Ca. 50 min
Operating temperature: ........................0 °C to +40 °C
Dimensions (L x W x H): ......................197 x 30 x 37mm
These operating instructions are a publication by Conrad Electronic SE, Klaus-Conrad-Str. 1, D-92240 Hirschau (www.conrad.com).
All rights including translation reserved. Reproduction by any method, e.g. photocopy, microfilming, or the capture in electronic data pro-
cessing systems require the prior written approval by the editor. Reprinting, also in part, is prohibited.
These operating instructions represent the technical status at the time of printing. Changes in technology and equipment reserved.
© Copyright 2010 by Conrad Electronic SE.


