background image

23

22

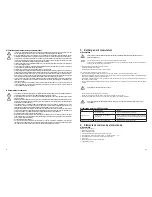
b)  Removing and inserting the rechargeable battery

For removing the rechargeable battery, press (A) the two lateral push-buttons for 

unlocking it (7).

Then, the rechargeable battery can be pulled out downwards (B). 

For inserting the rechargeable battery it is to position with its correct orientation at 

the bottom of the cordless screwdriver up to the point at which it engages.


Figure 1

c)  Inserting/removing the tool into/out of the drill chuck


For safety reasons, first the turn-over switch (5) is to be set to its central position to block the on/off switch (8).

Open the drill chuck by holding the internal ring (F) with one of your hands and turning the 

outer ring (E) with your other hand anticlockwise (C, seen from front to the drill chuck).

Insert the desired tool (a drill in the figure) into the drill chuck.

Screw on the drill chuck by holding the internal ring (F) with one of your hands and turning 

the outer ring (E) with your other hand clockwise (D, seen from front to the drill chuck).


To ensure that the tool (e.g. a bore bit or a drill) is fixed in the drill 
chuck, it should be positioned at least 1 cm deep in the drill chuck 
(bore bits or small drills). Large drills are to be inserted completely.

Proceed as described above to remove the tool. 

Open the drill chuck by holding the internal ring (F) with one of your hands and turning the 

outer ring (E) with your other hand anticlockwise.

Figure 2

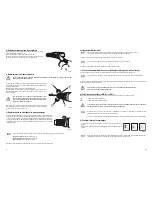
d)  Setting the torque or selecting the drill mode

By turning the torque-setting ring (2) the desired torque can be set at which the sliding clutch is 

activated. Thus, the screw cannot be overtightened, e.g. when screwing it in; the screw flushes with 

the material surface if the torque setting has been selected properly.

For drilling the setting ring can be set to a special position (marked by a drill symbol). In this position 

the sliding clutch is deactivated, the torque is not limited.

Figure 3

The higher the setting value (see imprint at the cordless screwdriver), the higher the torque available:

Low setting value:

 soft materials, small screws

High setting value:

 hard materials, large screws

Drill symbol:

 no torque limitation

For screwing out screws select a higher value or the “Drill” setting (drill symbol).

e)  On/off switch

To be able to operate the on/off switch (8), the turn-over switch (5) must not be at its central position (in this position the on/off 

switch is blocked).

The number of revolutions of the drive depends on the degree to which the on/off switch (8) is pressed.

In this way, the speed can be adjusted continuously from standstill up to maximum number of revolutions.

If the on/off switch is released, the drive will be slowed down (“Rotation stop”).

f)  Function of the change-over switch (with turn-on lock)

Via the turn-over switch (5) you can switch between left and right senses of rotation.

The correct sense of rotation is to be selected according to the kind of work, whether holes are to be bored or a screw is to be 

screwed in or out.

In its central position the turn-over switch blocks the on/off switch (8) and consequently the motor in the cordless screwdriver. Thus, you are able 

to change the tools safely.


Change only the sense of rotation of the drive, if the cordless screwdriver has stopped completely. Otherwise, the drive 
might be damaged.

g)  Selecting the gear speeds (“HIGH”/ “LOW”)

A switch (4) is provided on the top of the cordless screwdriver. By means of this switch the two speeds can be selected.

LOW 

1. speed, low number of revolutions, high torque

HIGH 

2. speed, high number of revolutions, low torque


The switch for selecting the two speeds may only be activated, if the drive of the cordless screwdriver has stopped 
completely. Otherwise, the drive might be damaged.

If one of the two speeds cannot be set by activating the switch, the driving toothed wheels are probably in an unfavourable 

position.

In this case, activate the on/off switch (8) slightly so that the toothed wheels move a little bit.

h)  Checking the rechargeable battery state

On top of the cordless screwdriver a small display and a check key are provided.

If the check key is activated, the current charge state is indicated. See figures on the right.

Figure 4

Only activate the check key, if the drive of the cordless screwdriver has stopped completely. Otherwise, the indication is not 

correct because the high power consumption of the motor falsifies the measured value.

Summary of Contents for 82 09 21

Page 1: ...c SE Imprint These operating instructions are published by Conrad Electronic SE Klaus Conrad Straße 1 92240 Hirschau Germany No reproduction including translation is permitted in whole or part e g photocopy microfil ming or storage in electronic data processing equipment without the express written consent of the publisher The operating instructions reflect the current technical specifications at ...

Page 2: ...2 8 Wartung und Reinigung 12 9 Entsorgung 13 10 Behebung von Störungen 13 11 Technische Daten 14 12 EG Konformitätserklärung 15 Diese Bedienungsanleitung gehört zu diesem Produkt Sie enthält wichtige Hinweise zur Inbetriebnahme und Handhabung Achten Sie hierauf auch wenn Sie dieses Produkt an Dritte weitergeben Haben Sie deshalb diese Bedienungsanleitung zum Nachlesen auf 1 2 3 4 5 8 7 6 ...

Page 3: ... erhalten und einen gefahrlosen Betrieb sicherzustellen müssen Sie als Anwender diese Bedienungsanleitung beachten Alle enthaltenen Firmennamen und Produktbezeichnungen sind Warenzeichen der jeweiligen Inhaber Alle Rechte vorbehalten Bei Fragen wenden Sie sich an unsere Technische Beratung Tel Nr 0180 5 31 21 11 Fax Nr 09604 40 88 48 e mail tkb conrad de Mo Fr 8 00 bis 18 00 Uhr Internet www conra...

Page 4: ...durch könnte das Produkt beschädigt werden Bei der Ladestation besteht zusätzlich Lebensgefahr durch elektrischen Schlag Lassen Sie deshalb das Produkt zuerst auf Zimmertemperatur kommen bevor Sie es verwenden bzw die Ladestation mit der Netzspannung verbinden Dies kann u U mehrere Stunden dauern Stellen Sie keine Gefäße mit Flüssigkeiten z B Eimer Vasen oder Pflanzen in die unmittelbare Nähe des ...

Page 5: ...ekter Sonneneinstrahlung Durch widrige Umgebungsbedingungen verringert sich nicht nur die Lebensdauer des Akkus sondern es besteht in Extremfällen Explosionsgefahr bzw die Gefahr der Zerstörung des Akkus Werfen Sie den den Akkuschrauber mit eingebautem Akku nicht ins Feuer Explosionsgefahr durch den Akku Gehen Sie vorsichtig mit dem Produkt um lassen Sie Akkuschrauber und Ladestation nicht fallen ...

Page 6: ...e Schrauben Bohrer Symbol Keine Drehmoment Begrenzung Beim Herausdrehen von Schrauben sollte eine höhere Einstellung gewählt werden bzw die Einstellung für Bohren Bohrer Symbol e Ein Ausschalter Damit sich der Ein Ausschalter 8 betätigen lässt darf der Drehrichtungsumschalter 5 nicht in Mittelstellung stehen in dieser Stellung ist der Ein Ausschalter blockiert Die Drehzahl des Antriebs ist davon a...

Page 7: ...r und ein damit verbundenes Öffnen des Produkts darf nur von einem Fachmann bzw einer dazu geeigneten Fachwerkstatt durchgeführt werden Vor einer Wartung oder Reinigung ist zuerst der Akku aus dem Akkuschrauber zu entfernen Das Ladegerät ist von der Netzspannung zu trennen ziehen Sie den Netzstecker Es sind keine für Sie zu wartenden Teile in dem Produkt enthalten öffnen Sie es deshalb niemals Für...

Page 8: ...umschalter Mittelstellung für Einschaltsperre Schnellspann Bohrfutter Aufnahme von 1 5 mm bis 13 mm LC Anzeige für Akkuzustand mit Prüftaste Drehmomenteinstellung in verschiedenen Stufen spezielle Einstellung für Bohren A bewerteter Schalldruckpegel 89 dB A Geräuschpegel beim Arbeiten 100 dB A Gehörschutz tragen Hand Arm Vibration 8 28 m s2 Gewicht 2 3 kg Abmessungen B x H x T 250 x 80 x 260mm 12 ...

Page 9: ... instruction for future reference Introduction Dear Customer Thank you for purchasing this product This product is EMC tested and meets the requirements of the applicable European and national guidelines Proof of CE conformity has been established and the corresponding declarations are obtainable from the manufacturer To maintain the specifications and to ensure risk free operation the user should...

Page 10: ...port reasons it is possible that condensation water develops This water could damage the product Additionally the charging set can cause a fatal electric shock Therefore allow the complete product to reach room temperature before using it or before connecting the charging set to the mains voltage This may take several hours Never position vessels or containers containing liquids such as buckets va...

Page 11: ...ng life of the rechargeable battery but also cause risk of explosion or of destruction of the rechargeable battery in extreme cases Do not throw the rechargeable battery into fire risk of explosion Handle the rechargeable battery carefully ensure that it and the cordless screwdriver does not fall down Due to the heavy weight there is not only the risk of destroying the rechargeable battery and the...

Page 12: ...ls large screws Drill symbol no torque limitation For screwing out screws select a higher value or the Drill setting drill symbol e On off switch To be able to operate the on off switch 8 the turn over switch 5 must not be at its central position in this position the on off switch is blocked The number of revolutions of the drive depends on the degree to which the on off switch 8 is pressed In thi...

Page 13: ... be serviced by the user Therefore never open it Servicing or repair and any associated opening of the product may only be carried out by a specialist or a specialist workshop A thorough cleaning maintains the operability of the product so that you can enjoy it for a long period of time A good craftsman is careful with his tools Remove dust by means of a clean long hair brush and a vacuum cleaner ...

Page 14: ...turn over switch central position for turn on lock Quick action chuck retaining workpieces ranging from 1 5 mm up to 13 mm LC display for accumulator state with check key Torque setting in different stages special setting for drilling operations Sound pressure level evaluated as A 89d B A Noise level during operation 100 dB A Put on ear protection Hand arm vibration 8 28 m s2 Weight 2 3 kg Dimensi...

Page 15: ... ce produit Ce produit a été testé pour sa compatibilité électromagnétique et satisfait ainsi aux exigences des directives européennes et nationales en vigueur La conformité à ces directives est prouvée les documents et déclarations correspondants sont déposés chez le constructeur Afin de maintenir le produit dans son état actuel et pour un fonctionnement sans risques les utilisateurs sont tenus d...

Page 16: ...ocal froid à un local chaud p ex lors du transport il peut se former de l eau de condensation Cela pourrait endommager le produit Pour le chargeur il y a en plus un danger de mort par électrocution Attendez que le produit ait atteint la température ambiante avant de l utiliser ou de brancher le chargeur sur le secteur Selon les cas cela peut durer plusieurs heures Ne mettez pas de récipients avec ...

Page 17: ...ects du soleil Des conditions ambiantes défavorables ne diminuent pas seulement la durée de vie de l accumulateur mais dans les cas extrêmes il y a danger d explosion ou danger de destruction de l accumulateur Ne pas jeter l accumulateur au feu danger d explosion Soyez prudent avec l accumulateur avec le tournevis sur accumulateur aussi ne le laissez pas tomber Du fait du poids important il n y a ...

Page 18: ... foret Pas de limitation du couple Pour dévisser il faut sélectionner un réglage plus élevé ou le réglage pour percer symbole du foret e Interrupteur Marche Arrêt Pour pouvoir actionner l interrupteur Marche Arrêt 8 il faut que le commutateur de sens de rotation 5 ne soit pas en position du milieu sinon dans cette position l interrupteur Marche Arrêt est bloqué La vitesse de l entraînement dépend ...

Page 19: ...ur ou de l accumulateur est normal pendant l utilisation La même chose est valable pour le chargeur et l accumulateur lors du chargement Gardez les appareils électriques propres et nettoyez les régulièrement Ainsi vous jouirez longtemps de votre outil en parfait état de fonctionnement Rangez ensuite l appareil électrique dans un endroit sec et propre pas dans une cave humide etc Le lieu de rangeme...

Page 20: ...sses HIGH ou LOW sur le dessus du tournevis sur accumulateur Le mandrin tourne mais le foret ou l embout ne tourne outil patine Contrôlez si le mandrin est serré Tournez les deux bagues du mandrin de manière à ce que l outil foret ou embout soit bien serré La plage de serrage du mandrin n est pas suffi sante Enfoncez plus l outil dans le mandrin Le tournevis sur accumulateur est uniquement appropr...

Page 21: ...wijdering als afval 50 10 Verhelpen van storingen 50 11 Technische gegevens 51 12 EC Conformiteitsverklaring 52 Deze handleiding heeft betrekking alleen op dit product Het bevat belangrijke informatie over de operatie en het gebruik van dit product Leest u voorzichtig deze handleiding en geeft u hem samen aan de derde partij indien u dit product niet meer wilt Bewaart u deze handleiding voor toeko...

Page 22: ...t kunststoffen metalen en keramiek Daarvoor moeten telkens geschikte schroefhulpstukken of boren worden gebruikt Het totale product mag niet worden veranderd of verbouwd daarbij vervalt niet alleen de garantie vrijwaring maar ook de registratie CE De behuizing mag niet worden geopend De stickers op het product mogen niet worden beschadigd of verwijderd Een andere toepassing dan hierboven beschreve...

Page 23: ...t elektrische installaties en bedrijfsmiddelen in acht te worden genomen In scholen opleidingscentra hobbyruimten en werkplaatsen moet door geschoold personeel voldoende toezicht worden gehouden op de beduidingen van het product b Werking van de accuschroevendraaier Door roterende delen kunnen haren of kleding naar binnen worden getrokken er bestaat gevaar voor letsel Gebruik daarom bij lang haar ...

Page 24: ...Accu eruit halen en erin zetten Om de accu eruit te halen moet op de druktoetsen aan beide zijden voor het ontgrendelen van de accu 7 worden gedrukt A Daarna kan de accu er naar onderen uit worden getrokken B Om de accu te plaatsen moet deze op de geode manier onder in de accuschroevendraaier worden geplaatst tot hij vastklikt Afbeelding 1 c Gereedschap in de boorhouder plaatsen eruit halen Vanweg...

Page 25: ...iet laat genoeg afstand aan de buitenkant m b t andere voorwerpen enz Haal de accu na het beëindigen van het laadproces er zo snel mogelijk uit en haal daarna de laadapparaat van de netspanning trek de netstekker eruit Steek nooit puntige voorwerpen balpen naald breipen paperclips enz door de ventilatiesleuven of openingen in de behuizing van het apparaat Daarbij bestaat niet alleen het gevaar dat...

Page 26: ...r vindt u enkele manieren beschreven hoe u eventuele storingen kunt verhelpen Volg alle veiligheidsinstructies in deze gebruiksaanwijzing op Probleem Oplossing Geen functie Is de accu leeg Is de accu erin gezet en vastgeklikt Aan Uit schakelaar laat niet drukken positie Breng de draairichtingsomschakelaar in de Positie links of rechts In de middenpositie blokkeert hij de Aan Uit schakelaar Bij het...

Page 27: ...52 12 Conformiteitsverklaring De ondertekenaar verklaart in naam van de fi rma dat het product overeenstemt met de volgende richtlijnen en normen ...

Reviews: