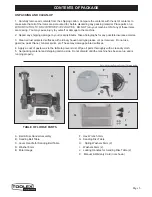
Page 7
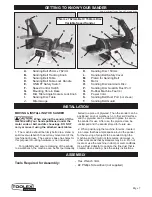
GETTING TO KNOW YOUR SANDER
A
B
C
D
E
F
G
H
I
J
K
7
ASSEMBLY
Tools Required for Assembly:
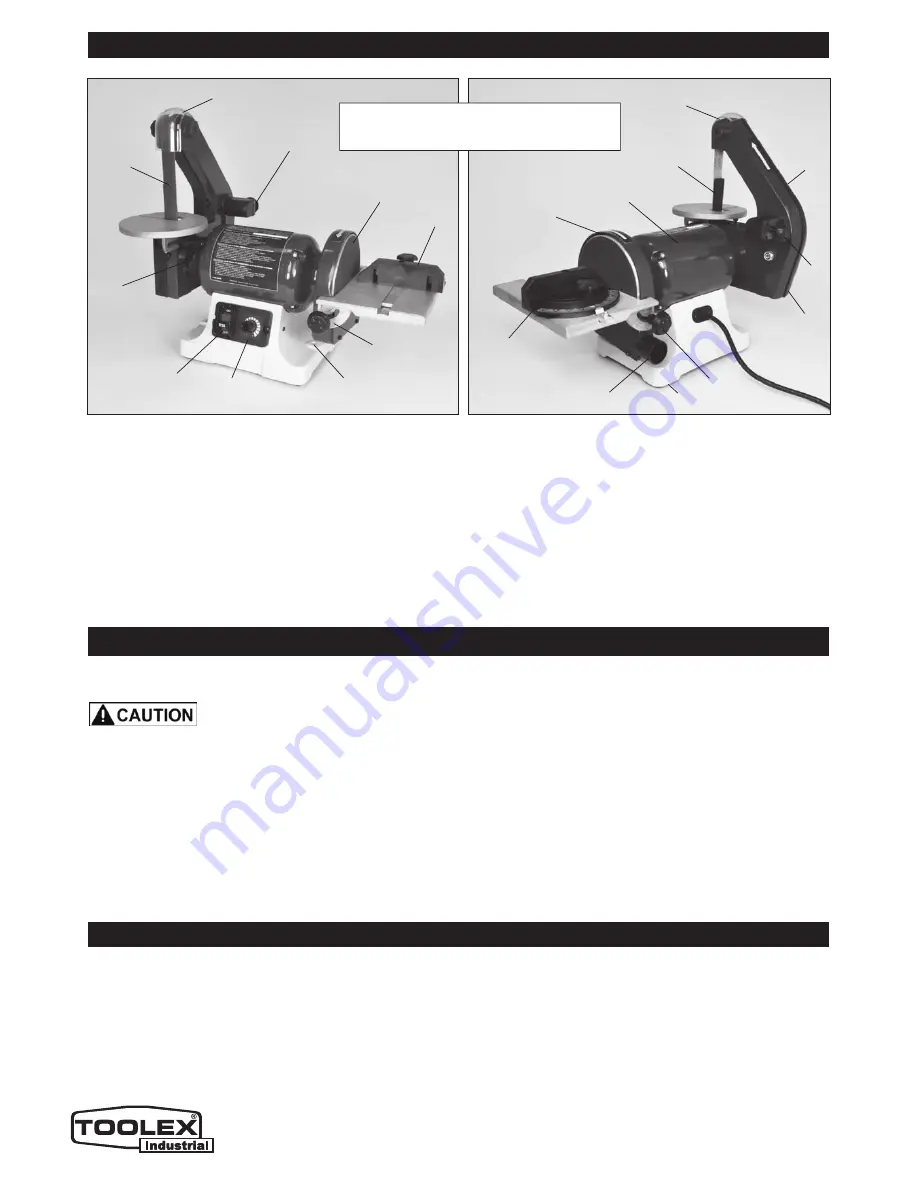
A.
Sanding Belt 25mm x 762mm
B.
Sanding Belt Tracking Knob
C.
Sanding Belt Table
D.
Sanding Belt Table Lock Handle
E.
ON/OFF Safety Switch
F.
Speed Control Switch
G.
Mounting Hole in Base
H.
Disc Table Angle Scale & Lock Knob
I.
Sanding Disc Table
J.
Miter Gauge
K.
Sanding Disc 150mm
L.
Sanding Belt Safety Cover
M.
Platen for Sanding Belt
N.
Motor
O.
Sanding Disc Aluminum Disc
P.
Sanding Disc Guard & Dust Port
Q.
Rubber Machine Feet (4)
R.
Power Cord
S.
Sanding Belt Dust Port (
not shown)
T.
Sanding Belt Guard
INSTALLATION
MOVING & INSTALLING THE SANDER
When moving the sander, lift the
machine with your hands positioned under the
motor ends or belt and disc housings. DO NOT
carry or move it using the attached work tables.
1. The machine should be firmly bolted to a stand or
solid, level workbench to avoid any movement of the
machine during use. The sander’s base has holes for
this purpose (mounting hardware is not included).
For portability and secure clamping of the sander
to a workbench, the machine can be first permanently
bolted to a piece of plywood. Then the sander can be
positioned on your workbench, or other solid surface,
and the plywood can be clamped in place to secure
the sander for use. After use, the plywood can be
unclamped and the sander stored for future use.
2. When positioning the machine for work, locate it
in an area that has ample space around the sander
for the moving of projects to be sanded. Align the
machine so that it will not face aisles, doorways, or
other work areas that bystanders may be in. Do not
locate or use the machine in damp or wet conditions.
Use a Dust Collector to capture the fine dust that is
created when sanding. See the safety instructions.
J
B
L
L
M
R
N
Q
O
P
S
T
H
25mm x 762mm Belt / 150mm Disc
Variable Speed Sander
- Hex Wrench 3mm
- #2 Phillips Screwdriver (not supplied)
Note: Not Actual Toolex Product Pictured below
Summary of Contents for 598557
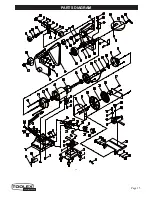
Page 15: ...Page 15 PARTS DIAGRAM 15 ...


