background image

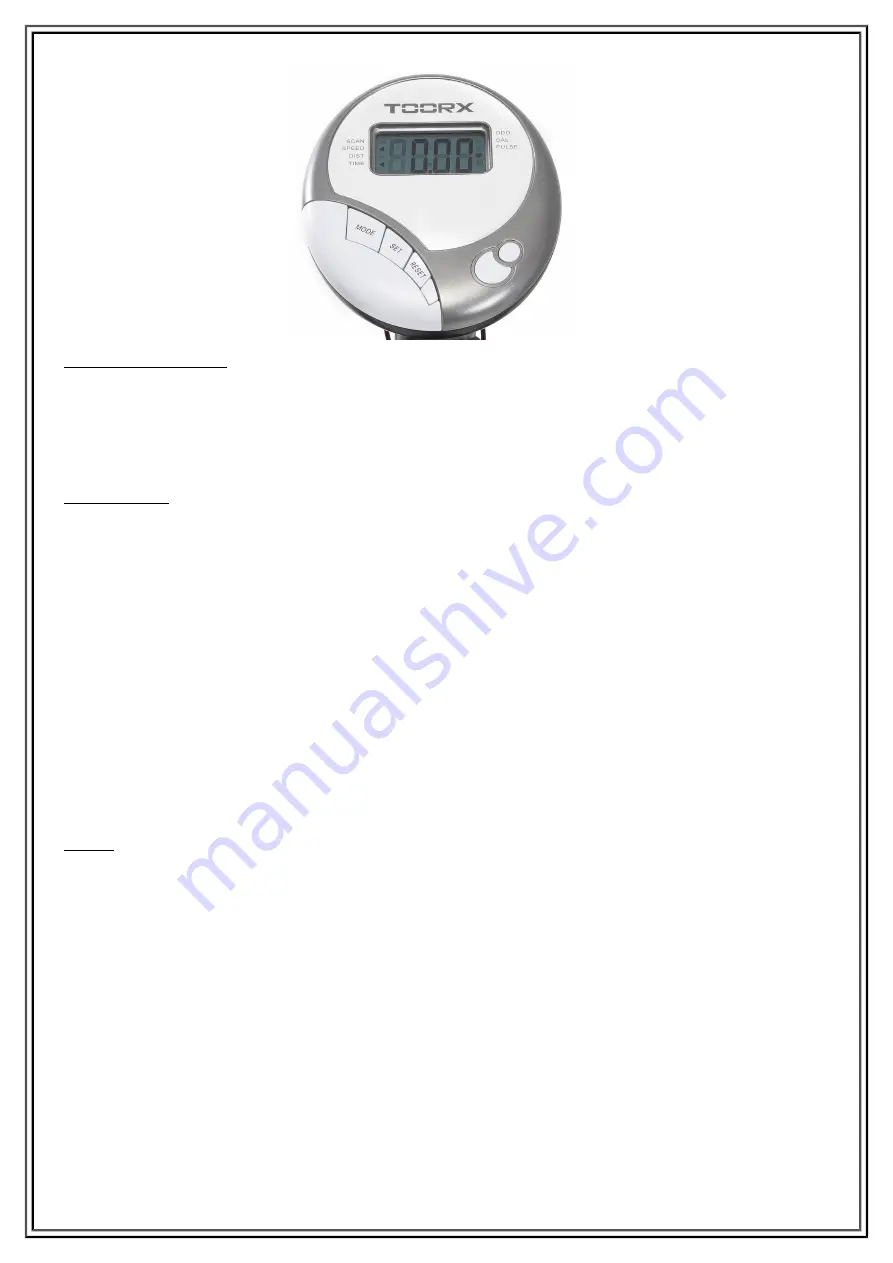
FUNCTION BUTTON

MODE

SET

RESET

FUNCTIONS

SCAN

SPEED

TIME

DISTANCE

CALORIES

PULSE

Press "MODE" to select each function display on the main screen. 

Can to proceed the data establish for “TIME””DISTANCE””CALORIES”

Hold two seconds to reset all of the values to zero.

Automatically scan through each mode in sequence every 6 seconds. The display loop is TIME-

SCAN-DISTANCE-CALORIE-SPEED on the main screen.

Displays current training SPEED, the maximum is 99.9km/ml,it always displays.

Accumulates total working time from 00:00 up to 99:59. 

Accumulates  training  distance  from  0.00  to  the  maximum  99.99km/ml  with  each  increment

0.01km/ml. 

Accumulates calories consumption during training from 0 to the maximum 9999 cal with each

increment 1 cal.

Press  the  MODE  key  until  the  pointer  advance  to  PULSE.  User’s  current  heart  rate  will  be

displayed in beats per minute. Place the palms of your hands on both of the contact pads (or
put ear-clip to ear),and wait for 30 seconds for most accurate reading.

ODO

Press the MODE key until the pointer advance to ODOMETER.The total accumulated distance

will be shown.

NOTE

1. Without any signal been transmitted into the monitor for 4 minutes, the LCD display will shut off automatically,

and all function values will be kept. You may press mode or start pedaling to have the monitor power on again.

2. If improper display on monitor, please re-install batteries to have a good result.

3. Battery spec: 1.5v um-3 or AA(2pcs).

12

Summary of Contents for BRX50

Page 1: ...Ed 02 17 Rev 00 INSTRUCTION...

Page 2: ...4...

Page 3: ...ASSEMBLY INSTRUCTIONS Step 1 Assembly the rear and front stabilizer F E with 4 bolts E 1 4 nuts E 4 and 4 washers E 3 5...

Page 4: ...eat post D into the support tube tighten the knob Step 3 Assemble the saddle D 3 onto the slider set D 5 with three nuts and washers fix the saddle Assemble the slider set with the seat post with Knob...

Page 5: ...3 Insert handle bar post C onto the support tube tighten with four screws and washers Step 5 Put the handle bar B into the metal bracket make the hand pulse cable through the hole on handle bar post c...

Page 6: ...e hand pulse cable between computer and handle bar A 2 B 3 connect the sensor cables A 1 C 1 fix the computer onto the metal plate with two screws A 3 Step 7 Assemble the left hand pedal M L and the r...

Page 7: ...Handle bar cover 1PC B 9 T knob 1PC C Handlebar post set 1SET C 1 Sensor cable upper 1PC C 2 Tension controller Upper 1PC D Seat post 1PC D 1 Knob for seat 1PC D 2 Flat washer 1PC D 3 Saddle 1PC D 4...

Page 8: ...H 7 Have tooth washer 1PC H 8 Hex nut 1PC I Flywheel 1PC I 1 Flywheel bearing 1PC I 2 6900 bearing 1PC I 3 Bushing 1PC I 4 Nut 5PCS I 5 6000 bearing 1PC J Idle set 1SET J 1 Idle wheel 1PC J 2 Bushing...

Page 9: ...COMPLETE BIKE ASSEMBLY EXERCISE COMPUTER Monitor Display 11...

Page 10: ...m ml Accumulates calories consumption during training from 0 to the maximum 9999 cal with each increment 1 cal Press the MODE key until the pointer advance to PULSE User s current heart rate will be d...

Page 11: ...GARLANDO SPA Via Regione Piemonte 32 Zona Industriale D1 15068 Pozzolo Formigaro AL Italy www toorx it info toorx it...

Reviews: