background image

Adjustment instruction 

Treadmill adjustment 

1.Before  connect  power,  service  or  professional  inspect  if  voltage  is  suitable,  and  if
three-core plug grounded wire is connected. Using hand to pull the belt, inspect if rotation
is flexible and no noise.
2.Connect power, press Start key, treadmill will run slowly, inspect if belt and computer are
normal.
3.Press i/- key, inspect treadmill rotation and display. If the belt is deviation, you
must stop it to adjust belt according daily maintenance.
4.Pressing  emergency  stop  key  or  pull  out  safety  key  on  running  treadmill,  it  will  stop
immediately.  Rotating  the  emergency  stop  key  to  reset  or  insert  safety  key,  can  restart
treadmill.
5.Press Stop key, the treadmill stop to running, waiting incline back to zero class, turn off
the power.

Treadmill can use after all the install adjustment is finished. 

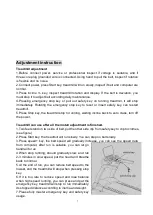
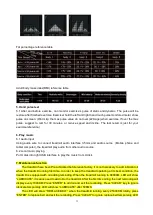
1.Two feet stand on two side of belt, put the other side clip from safety key to clip to clothes.
(see figure)
2.Press Start key, the treadmill will run slowly. You can step on belt slowly.
3.Press speed+ key, the belt speed will gradually increase, you can see the speed data
from  computer,  after  run  is  suitable,  you  can  let  go
handrail to run.
4.When stop running, should gradually slow, and run
2-3 minutes in slow speed, put the heart and breathe
back to normal.
5.At the end of run, you can reduce belt speed to the
lowest, and the treadmill will stop when pressing stop
key.
6.If  it  is  too  late  to  reduce  speed  and  lose  balance
when high speed running, you can press and pat the
emergency key, treadmill will stop to run immediately.
Its stopped distance according to inertia and weight.
7.Please fully master emergency key and safety key
usage.

Summary of Contents for TRX 9000

Page 1: ...Ed 10 18 Rev 00 Cod TOXPRFTRX9000 INSTRUCTION...

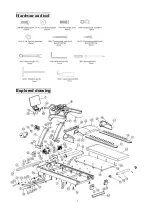
Page 2: ...3 Hardware and tool Explored drawing...

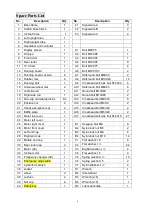
Page 3: ...und bolt M10X90 2 19 Non slip colloidal particles 84 A13 Crosshead bolt M8X70 8 20 Position nut 6 A14 Crosshead bolt M3X8 2 21 Shock absorption mat 4 A15 Crosshead bolt M5X40 2 22 Baffle plate 1 A16 C...

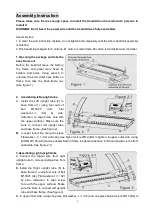
Page 4: ...upright tube 4 to base frame 1 using four sets of bolt M10X25 A4 Flat washers 10 C2 by side Attention to align screw hole with the upper surface Make sure the bolts to connect left upright tube and ba...

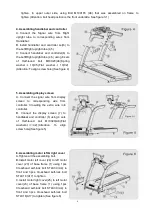
Page 5: ...ssembling display screen A Connect the signal wire from display screen to corresponding wire from controller Crowding the extra wire into controller B Connect the display screen 7 to handlebar and con...

Page 6: ...ne back to zero class turn off the power Treadmill can use after all the install adjustment is finished 1 Two feet stand on two side of belt put the other side clip from safety key to clip to clothes...

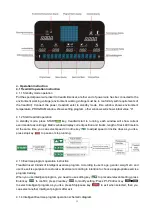
Page 7: ...able Button Icon Button Name Button Instruction Treadmill operation key instruction START Key Connect the power press START key the treadmill start running STOP PAUSE Key When treadmill running press...

Page 8: ...ram Incline direct key Build in 4 8 12 three incline direct shortcut keys Audio play key instruction Previous song volume down Press one time to back previous song long press to volume down Pause Stop...

Page 9: ...nutes of the countdown training RPE 2 30 minutes of the countdown training RPE 3 10 minutes of the countdown training P8 Strength Exercise Program Five level of strength exercise program LEVEL 1 Easy...

Page 10: ...3 4 1 88 4 05 9 1 7 F 4 F 4 265 8 3 1 6 2 1 4 1 8 2D 53 01 1 8 G 313 29 M1 1 3 2 3 1 3D 8 235381 26334 85 3 3 1 4R 21 26334 85 3 85 22 2 5 3D 6 322 21 6 3 1 6 23 21 6 09 G9 9B Q73 8 23 6 0 63 1 21 81...

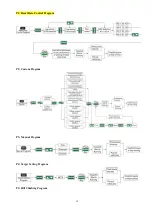
Page 11: ...12 P1 Heart Rate Control Program P2 Custom Program P3 Manual Program P4 Target Setting Program P5 Hill Climbing Program...

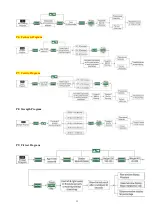
Page 12: ...13 P6 Fat burn Program P7 Cardio Program P8 Strength Program P9 Fit test Program...

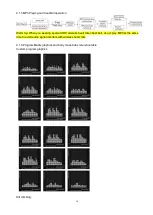
Page 13: ...When you wearing special HRC wireless heart rate chest belt do not play MP3 at the same time to avoid audio signal interfere with wireless heart rate 4 1 6 Program Matrix graphics and body mass index...

Page 14: ...m other audio source 6 2 Local music playing Put U disk into right USB interface to play the music from U disk 7 Maintenance function The treadmill have been Pre lubricated before leave factory it is...

Page 15: ...left and right bolts in rear roller with hex spanner If the belt is deviation to left clockwise rotate the left bolt If the belt is deviation to right counterclockwise rotate the right bolt It is bet...

Page 16: ...GARLANDO SPA Via Regione Piemonte 32 Zona Industriale D1 15068 Pozzolo Formigaro AL Italy contact toorxprofessional it www toorxprofessional it...

Reviews: