background image


This product must be grounded. If it should malfunction or breakdown, grounding provides a 

path of least resistance for electric current to reduce the risk of electric shock. This product is 

equipped with a cord having an equipment-grounding conductor and a grounding plug. The 

plug  must  be  plugged  into  an  appropriate  outlet  that  is  properly  installed  and  grounded  in 

accordance with all local codes and ordinances. 


  DANGER – Improper connection of the equipment-grounding conductor can result in a risk 

of electric shock. Check with a qualified electrician or serviceman if you are in doubt as to 

whether the product is properly grounded. Do not modify the plug provided with the product – 

if it will not fit the outlet, Please find a proper outlet installed by a qualified electrician. 


This product is for use on a nominal 220V circuit and has a grounding plug . Make that the 

product  is  connected  to  an  outlet  having  the  same  configuration  as  the  plug.  No  adapter 

should be used with this product. 


Grounding Methods 


Summary of Contents for TRX Endurance

Page 1: ...APP READY Ed 03 17 Rev 00 INSTRUCTION...

Page 2: ...UCTIONS 4 6 FOLDING UNFOLDING INSTRUCTIONS 7 GROUNDING METHODS 8 OPERATION GUIDE 9 14 GETTING STARTED GUIDE 15 SAFETY EXERCISES 16 WARM UP EXERCISES 17 MAINTENANCE INSTRUCTIONS 18 BELT ADJUSTMENT 19 E...

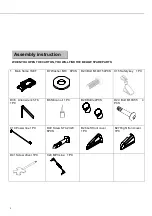
Page 3: ...her M10 8PCS D23 Bolt M10X15 4PCS C15 Safety key 1PC D36 Allen wrench T6 1PC B6 Silicon oil 1 PC B28 Bottle 2PCS D24 Bolt M10X55 4 PCS C19 Power line 1PC D40 Screw ST4 2X20 6PCS B26 Left front cover 1...

Page 4: ...er bracket Be careful not press the line when folding STEP 2 Lock the treadmill with Bolt M10 15 D23 M10 55 D24 and Washer M10 D7 Step 3 Insert the Left front cover B26 and Right front cover B27 on th...

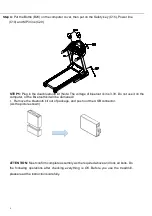
Page 5: ...it is 3 3V Do not use it on the computer or the Bluetooth kit will be damaged 1 Remove the bluetooth kit out of package and push out the USB connector As the picture shown ATTENTION Must confirm compl...

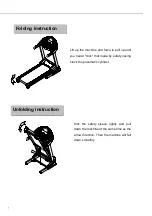
Page 6: ...ou heard click that made by safety casing stuck the pneumatic cylinder Kick the safety sleeve lightly and pull down the machine at the same time as the arrow direction Then the machine will fall down...

Page 7: ...ordinances DANGER Improper connection of the equipment grounding conductor can result in a risk of electric shock Check with a qualified electrician or serviceman if you are in doubt as to whether th...

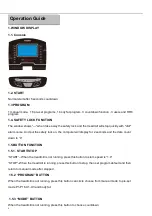
Page 8: ...will display for 2 seconds and the date count down to 0 1 5 BUTTON FUNCTION 1 5 1 START STOP START When the treadmill is not running press this button to start speed is 1 0 STOP When the treadmill is...

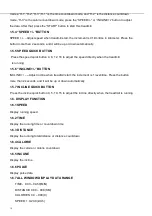
Page 9: ...running 1 5 6 INCLINE BUTTON INCLINE Adjust incline when treadmill start the increment is 1 level time Press the button more than 2 seconds and it will be up or down automatically 1 5 7 INCLINE QUICK...

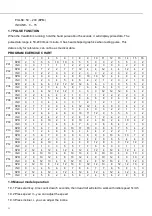
Page 10: ...2 7 7 9 9 4 4 12 12 4 4 8 8 4 4 2 INC 0 1 1 2 2 3 3 4 4 3 3 2 2 1 1 0 P08 SPD 2 2 6 6 6 8 9 10 11 12 9 5 5 5 3 2 INC 0 1 2 4 2 1 2 4 2 1 2 4 2 1 2 0 P09 SPD 2 4 8 10 2 4 8 10 2 4 10 2 4 10 4 2 INC 0 1...

Page 11: ...l display F5 and grasp the hand pulse the window will display your body quality index The body quality index is to test the relation between height and weight not the body scale The body FAT suits for...

Page 12: ...bluetooth kit with smartphone or tablet If it s connected successfully treadmill screen will show up BTH 1 14 3 When the connecting is completed user can use smartphone or tablet through the app to c...

Page 13: ...nter into power saving mode automatically if there is no any action within 10 minutes under IDLE MODE and there is no display and backlit on the computer Press any key to resume the system 1 15 2Count...

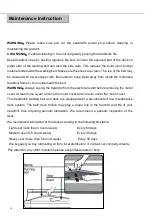
Page 14: ...g the treadmill from the electrical outlet before removing the motor cover At least once a year remove the motor cover and vacuum under the motor cover This treadmill s walking belt and deck are equip...

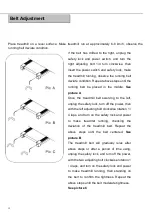
Page 15: ...g to the left unplug the safety lock turn off the power then with the left adjusting bolt clockwise rotation 1 4 laps and turn on the safety lock and power to make treadmill running checking the devia...

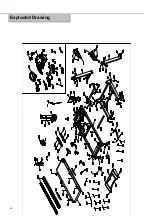
Page 16: ...20 Exploded Drawing...

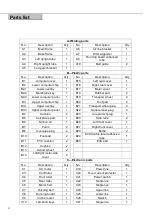
Page 17: ...rt wheel plug 2 B3 3 Upper computer panel 1 B22 Square inner plug 4 B4 Cushion 4 B23 Line protect plug 1 B5 Cell phone pad 1 B25 Side rails 2 B6 Silicon oil 1 B26 Left front cover 1 B7 Foam 2 B27 Righ...

Page 18: ...Washer M10 17 D32 Bolt M5X15 5 D8 Nylon nut M10 3 D33 Bolt M8X40 2 D9 Bolt M6X40 2 D34 Bolt M8X30 1 D10 Bolt M6X60 2 D35 Screw ST4 2X19 10 D11 Bolt M6X25 2 D36 Allen wrench T6 1 D12 Screw ST4 2X16 26...

Page 19: ...GARLANDO SPA Via Regione Piemonte 32 Zona Industriale D1 15068 Pozzolo Formigaro AL Italy www toorx it info toorx it...

Reviews: