8
c
3
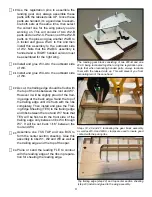
Temporarily secure the aileron assembly
to the wing with pins carefully centering it
in the trailing edge. Use a soft lead pen-
cil to mark the aileron assembly at the root
end and along the leading edge, top and
bottom. Use these lines to guide you when
you shape the ailerons. Plane and sand the
ailerons to shape.
c
5
c
4
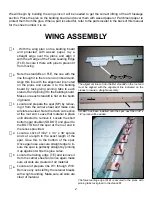
Marking the aileron for shaping to the contour of the wing.
Mark the leading edge top and bottom as well as both ends.
The tip can be marked by laying a straight edge on the tip and
projecting a line over the end of the aileron.
Plane a chamfer on both sides of the lead-
ing edge of about 20 degrees but leave
about a 1/16” flat at the center for hinging.
Use a sharp X-Acto knife to open up the
slots in the trailing edge for the aileron hing-
es. The slots should be open all the way
through FLE.
c
6
Test fit the ailerons to the wing with the CA
Hinges. The aileron control horns will be in-
stalled after covering.
c
2
c
1
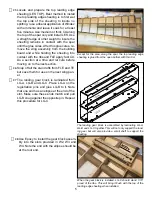
Locate all the belly pan components, BP-
1, BP-3, BP-5, BP-7, BP-9, BP-10 and BP-
11. Also the formed belly pan plastic parts.
Note that BP-11 terminates in an angle at
one end, this is the AFT end. Starting at the
front or opposite end install and glue BP-1
to BP-11. Install BP-3, BP-5, BP-7 and BP-9
from the front to the back. Install and glue
BP-10 at the angles end.
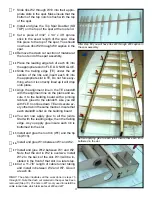
Belly pan formers attached to the belly pan keel. Use only
Pacer 560 canopy glue to attach this structure to the plastic
belly pan.
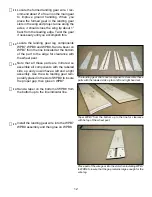
Locate the plastic formed belly pan. Note at
the sides where it changes from a curved
surface to a straight side. Use the side of
a pencil lead along this edge to define it.
Trim off the excess plastic from the sides.
Leave a little excess for final fitting. Leave
both ends for now.
c
3
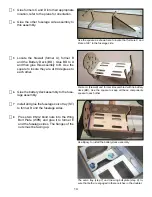
Test fit the balsa frame work into the plas
-
tic pan. You will need to sand a bevel in
the edge of BP-10 so all the formers will fit
snugly to the plastic belly pan. To glue any-
thing to a flexible plastic part such as his you
need a glue that will remain flex able or it
will break away from the part. Two adhesive
that are excellent for this purpose are Pace
Formula 560 (Also called canopy glue) and
a glue called Grafter’s Pick which is a fabric
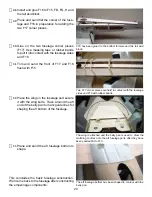
Rough trim the sides of the belly pan form using the line cre
-
ated by rubbing the side of a soft lead pencil against ridge on
the sides.
ASSEMBLING THE BELLY PAN

