16
c
25
c
24
c
23
c
22
c
26
c
21
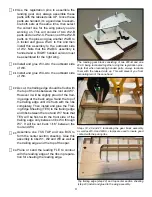
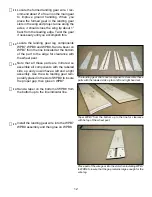
Locate the two For Deck Sheets (FDS) and
test fit them to formers C and D. Wet the
outside of these sheets and then install
them between formers C and D. Glue them
first to the fuselage sides and force them
over and into contact with the formers and
BCK and glue them. When cured, sand
them flush with formers C and D.
Install cockpit bulkhead CBH to E1
Install and glue the Cockpit Bulkhead
(CBH) to E1.
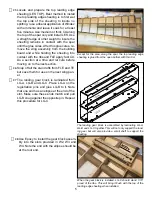
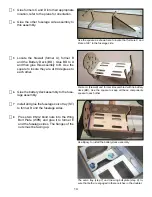
Locate and prepare the hatch components
HA-A, HA-B, HA-C, A1, B1 and C1. Lightly
sand the outer edges of HA-B to remove
any nubs and smooth the sides. When the
hatch is completed, HA-B will slide down
between the fuselage sides. Use the 1/8”
dowel pins and assemble HA-A and HA-B.
This is the forward hatch base.
HA-B
HA-A
1/8” DOWEL
The hatch base stack is laminated upside down using 1/8”
dowels for registration.
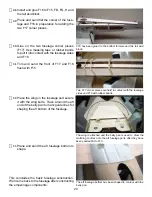
Install and glue HA-C to HA-A.
Install and glue formers A1, B1 and C1.
Use thick canopy glue or thick CA and in-
stall and glue a 1/8” x 1/4” magnet in the
hole provided in A1.
Glue FDS flush to the top of the fuselage and then shape and
glue it to the formers and BCK.
Glue a 1/8” x 1/4” magnet into A1. No need to worry about
polarity at this point.

