21
£
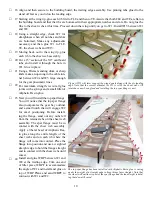
32 Use a short straight edge to force the
sheeting into contact with the top string-
er between F7 and F6 and then glue
with thin CA and accelerator. Move up
to the section between F6 and F5 and
repeat these processes till complete. Do
not attempt to force the ply sheeting to
adhere to the stringers as it may cause
deformities in the sheeting.
£
33 Repeat this procedure for the remaining
side.
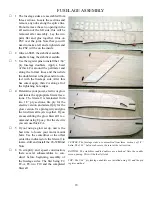
Fuselage forward bottom sheeting has been wet formed around the firewall
and F2. The area between the sheets on F2 and the firewall are filled with
1/8” scrap.
A piece of 1/2” scrap balsa is used to space the instrument panel 1/2”
away from F2.
£
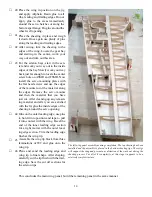
34 Flip the fuselage over and apply a lib-
eral bead of glue to both sides along the
top stringer.
£
35
Install a piece of 1/8” scrap fill along
the ¼” side stringers in the cockpit
area to bring this area out flush with
the sides.
£
36 Install and glue F4-B.
£
37 If you haven’t already done so, sand the
sheeting you applied to the tail section
when you pinched it together flush with
the bottom of the fuselage sides. You
will install the bottom sheeting next and
it should lay flush on top of this sheet
-
ing.
£
38 Install the fuselage aft bottom sheeting
(FAB). It should start flush with F4-B
and be centered.
£
39 Plane and sand the aft fuselage bot-
tom corners to a 45° angle. Install one
aft bottom corner (ABC) to each side.
Secure with masking tape until cured.
After curing, plane and sand the aft fu-
selage section to shape.
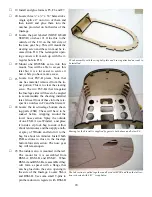
The forward top sheet has been formed over the firewall at the front and
F2 and the instrument panel in trhe cockpit area.
£
40 Place the wing onto the fuselage and
check for fit. Trim the saddle area for
a good fit. The ABC sections will have
to be planed to contour with the wing
saddle. There will be a small gap at the
trailing edge of the wing. This can be
filled with a piece of ½” wide scrap.
Miter the ends for a good fit with the
ABC and the plane to contour with the
fuselage sides.


