7. APPLICATION FUNCTIONS
7-5
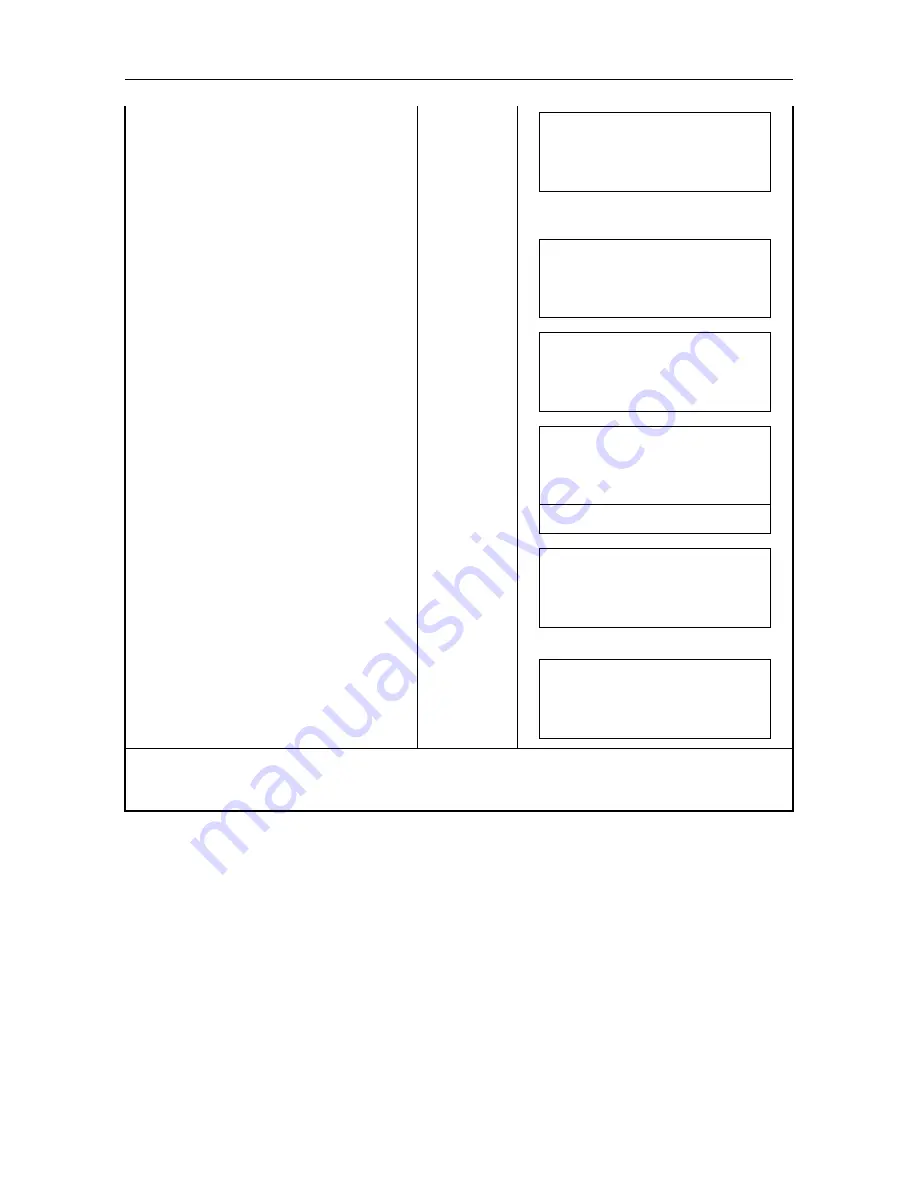
Select a setting area Number.
Press
[F2](
) or [F3](
), and select
the number of right upper corner in the
screen display and press [F4](ENT)
key.
[F2]
or
[F3]
[ENT]
AREA
SET
N :
***.*** m
E :
***.*** m
EXIT
CLR
A
[ 2]
Input coordinate value of point A, and
press [ENT] key.
N Coord.
[ENT]
E Coord.
[ENT]
Z Coord.
AREA
SET
Z :
3.4567 m
EXIT
CLR
A
[ 2]
The displays changes to input point B.
[ENT]
AREA
SET
N :
***.*** m
E :
***.*** m
EXIT
CLR
B
[ 2]
Input coordinate value of point B, and
press [ENT] key.
N Coord.
[ENT]
E Coord.
[ENT]
Z Coord.
[ENT]
AREA
SET
Z :
4.5678 m
EXIT
CLR
SET
OK
[YES]
[NO]
B
[ 2]
Press [F3](YES) key.
The area range to be set is diagonal
area range between Points A and B
(area No.2). To set another area,
repeat from the step of
.
[F3]
AREA
SET
N :
1234.5678 m
E :
6543.4321 m
EXIT
ENT
A
[ 2]
Press [F1](EXIT) key.
The menu returns to AREA SET.
1)
[F1]
AREA
SET 1/1
F1 : INPUT NEZ
F2 : MOVED SET
F3 : SETTING AREA
1) Pressing [ESC] key from the AREA SET menu returns you to PROGRAMS menu, and to return
to normal mode, press [MENU] key.
Summary of Contents for AP-L1A
Page 1: ...INSTRUCTION MANUAL AUTOMATIC TRACKING TOTAL STATION AP L1A AP L1AN...
Page 14: ...1 NOMENCLATURE AND FUNCTIONS 1 3 2 The details of label will be differed by the market...
Page 82: ...11 SETTING ATMOSPHERIC CORRECTION 11 4 Temprerature C Temprerature F...
Page 83: ...11 SETTING ATMOSPHERIC CORRECTION 11 5 Temprerature F...


