2-10
2 PREPARATION FOR MEASUREMENT
2.5.2 L
evelling
PROCEDURE
1
Perform the centering procedure.
See Section 2.5.1 “Centering”.
2
Center the bubble in the circular level by either
shortening the tripod leg closest to the offcenter
direction of the bubble or by lengthening the tripod leg
farthest from the offcenter direction of the bubble. Adjust
one more tripod leg to center the bubble.
Turn the levelling foot screws while checking the circular
level until the bubble is centered in the center circle.
3
Press
{ON}
to power on.
See Section 2.1 “Power Switch Key ON”.
•
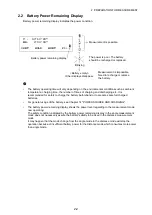
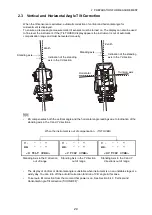
The circular level is displayed on the screen.
•
“
” indicates bubble in circular level. The range of the
inside circle is ±4' and the range of the outside circle is
±6'.
Tilt angle values X and Y are also displayed on the
screen.
•
“
” is not displayed when the tilt of the instrument
exceeds the detection range of the tilt sensor. Level the
instrument while checking the air bubbles in the circular
level until “
” is displayed on the screen.
•
When executing the measurement program, if
measurement starts with the instrument tilted, the
circular level is displayed on the screen.
4
Center “
” in the circular level
steps 1 to 2
•
If the bubble is centered, move to step 9.
5
Turn the instrument until the telescope is parallel to a
line between levelling foot screws A and B, then tighten
the horizontal clamp.
6
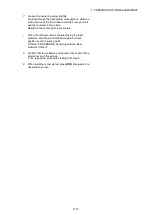
Set the tilt angle to 0° using foot screws A and B for the
X direction and levelling screw C for the Y direction.
Tripod legs
adjustment
X ****
Y ****
X
Y
EXIT
X -3'20"
Y 3'40"
X
Y
EXIT


